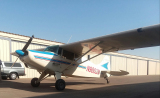
1999 ACA 7ECA Citabria Aurora
Fri Jun 07, 2019 5:58 pm
Re: 1999 ACA 7ECA Citabria Aurora
I really enjoy watching others work! Its great. I learn a lot from threads like this. Thanks for taking the time to document.
- daedaluscan offline


- Posts: 1269
- Joined: Sat Jan 12, 2013 1:06 pm
- Location: Texada BC
Sat Jun 08, 2019 4:51 pm
Re: 1999 ACA 7ECA Citabria Aurora
I recently went through a similar prices with a Citabria for somebody. All the plywood fuselage formers were bent into S-shapes. I replaced them with a set from Rainbow Flying Services (I think in Oregon). Great deal at around $300; perfect fit,5 ply Birch I believe.
Same hasslr with removing tailplanes, bad floorboards, rusted rear window ledges etc.
Same hasslr with removing tailplanes, bad floorboards, rusted rear window ledges etc.
Sat Jun 08, 2019 5:21 pm
Re: 1999 ACA 7ECA Citabria Aurora
daedaluscan wrote:I really enjoy watching others work! Its great. I learn a lot from threads like this. Thanks for taking the time to document.
Great! Thanks for following along.
Aerco wrote:I recently went through a similar prices with a Citabria for somebody. All the plywood fuselage formers were bent into S-shapes. I replaced them with a set from Rainbow Flying Services (I think in Oregon). Great deal at around $300; perfect fit,5 ply Birch I believe.
Same hasslr with removing tailplanes, bad floorboards, rusted rear window ledges etc.
Nice, we’re using Rainbow to source our stuff too.

Sat Jun 08, 2019 10:33 pm
Re: 1999 ACA 7ECA Citabria Aurora
Finished painting the rest of the engine baffles

Fuselage has another nice coat of white epoxy on all the tubes.

Control linkages and pulleys etch primed and installed.


Fuselage has another nice coat of white epoxy on all the tubes.
Control linkages and pulleys etch primed and installed.
Sun Jun 09, 2019 6:02 am
Re: 1999 ACA 7ECA Citabria Aurora
Great work! That’s going to be a beautiful airplane!
I’ve just used pull rivets on my baffle-work. I enjoyed watching you do it this way though. I’ve never worked with solid rivets and learned something new there!
I’ve just used pull rivets on my baffle-work. I enjoyed watching you do it this way though. I’ve never worked with solid rivets and learned something new there!
- CamTom12 offline

- Posts: 3705
- Joined: Sun Jul 08, 2012 1:08 pm
- Location: Huntsville
- FindMeSpot URL: https://share.delorme.com/camtom12
- Aircraft: Ruppe Racer
Experimental Pacer
home hand jam "wizard"
Sun Jun 09, 2019 8:35 am
Re: 1999 ACA 7ECA Citabria Aurora
When I was working on my RV, I learned early on that that squeezed rivets come out much nicer looking, especially the universal heads. It looks like the rivets in that baffle patch could've all been squeezed? Either way, functional beats beauty everytime!
Thanks for the progress updates! I'm waiting on my welder to finish brekkie I can start reassembly. Sucks being at the mercy of other people....
Thanks for the progress updates! I'm waiting on my welder to finish brekkie I can start reassembly. Sucks being at the mercy of other people....
- 1:1 Scale offline
- Posts: 235
- Joined: Fri Jul 20, 2012 11:38 pm
- Location: Redmond
- Aircraft: Maule M4-220C
Kelly
Maule M4-220C
Maule M4-220C
Sun Jun 09, 2019 8:40 am
Re: 1999 ACA 7ECA Citabria Aurora
Looks good. But I do agree that for those little jobs I much prefer to squeeze them.

Sun Jun 09, 2019 10:11 am
1999 ACA 7ECA Citabria Aurora
Yep, I agree with you guys, squeeze them when you can for a consistent and nice looking result.
Unfortunately my absolutely wonderful Main Squeeze from Cleavelend Tool was borrowed by a “friend” who hasn’t bothered to return it so I had no choice.
With my A&P practical exam coming up next month I was more than happy to buck some rivets to get back in the groove. In contrast, you set up the squeezer once and it just effortlessly cranks them out with zero skill (which is nice!).
Tue Jun 11, 2019 7:42 am
Re: 1999 ACA 7ECA Citabria Aurora
A few more bits installed yesterday.

Got a bunch of stuff ready for my paint shop to strip and paint.

Got a bunch of stuff ready for my paint shop to strip and paint.
Tue Jun 18, 2019 6:30 pm
1999 ACA 7ECA Citabria Aurora
Gear legs are stripped and etch primed.
A razor blade worked well to get them down to bare metal.


The first piece of wood goes on.

Trial fitting some more wood


This is when it's nice to have the old stuff to reference so you're sure what goes where.

This Port A Cool is AMAZING in this dry heat with summer only days away.


A razor blade worked well to get them down to bare metal.
The first piece of wood goes on.
Trial fitting some more wood
This is when it's nice to have the old stuff to reference so you're sure what goes where.
This Port A Cool is AMAZING in this dry heat with summer only days away.
Wed Jun 19, 2019 9:03 am
Re: 1999 ACA 7ECA Citabria Aurora
I made the mistake of not keeping track of where the many small pieces of aluminium go on a Tri-Pacer rebuild.
- contactflying offline
- Posts: 4972
- Joined: Wed Apr 03, 2013 7:36 pm
- Location: Aurora, Missouri 2H2
Download my free "https://tinyurl.com/Safe-Maneuvering" e-book.
Wed Jun 19, 2019 9:04 am
Re: 1999 ACA 7ECA Citabria Aurora
The only thing worse than that is when someone else takes it apart and you have to piece everything together.
Wed Jun 19, 2019 11:03 pm
Re: 1999 ACA 7ECA Citabria Aurora
The wood from Rainbow was cheaper than ACA, but it isn't as nice. It doesn't have the reinforcements on each bulkhead like the factory stuff, and you have to build the stringers instead of having each part ready to go.
I'll show more later about the difference in bulkhead reinforcement.


Got some goodies back from powdercoat. The pedals came out particularly nice. It's a black satin finish with an industrial grade matte clear for maximum resistance to damage.


I also managed to pop rivet on new baffle seals.


An awl transfers over the rivet positions well.


Lead shot bags help during the tracing

And all done, ready to go back on the engine.

I'll show more later about the difference in bulkhead reinforcement.
Got some goodies back from powdercoat. The pedals came out particularly nice. It's a black satin finish with an industrial grade matte clear for maximum resistance to damage.
I also managed to pop rivet on new baffle seals.
An awl transfers over the rivet positions well.
Lead shot bags help during the tracing
And all done, ready to go back on the engine.
Thu Jun 20, 2019 4:15 am
Re: 1999 ACA 7ECA Citabria Aurora
It's looking fantastic! I'm glued.
- IncipientSpin offline
- Posts: 120
- Joined: Mon Feb 23, 2015 5:47 pm
- Location: Boise, ID
Thu Jun 20, 2019 4:40 am
Re: 1999 ACA 7ECA Citabria Aurora
I love this thread! Thank you Aryana!

Thu Jun 20, 2019 7:23 am
1999 ACA 7ECA Citabria Aurora
Glad to hear that!
It's a lot of work to constantly stop progress and take photos while thinking about what to share, but it's a great record of the rebuild for the aircraft and especially fun if others enjoy watching the process. [emoji1360]
I forgot to post a pic of some of the powercoated controls fitted on the fuselage with new hardware.


Also here is the pile of stringer material that came from Rainbow.

And new wood for the roof.

It's a lot of work to constantly stop progress and take photos while thinking about what to share, but it's a great record of the rebuild for the aircraft and especially fun if others enjoy watching the process. [emoji1360]
I forgot to post a pic of some of the powercoated controls fitted on the fuselage with new hardware.
Also here is the pile of stringer material that came from Rainbow.
And new wood for the roof.
Thu Jun 20, 2019 11:47 am
Re: 1999 ACA 7ECA Citabria Aurora
Aryana wrote:Glad to hear that!
It's a lot of work to constantly stop progress and take photos while thinking about what to share, but it's a great record of the rebuild for the aircraft and especially fun if others enjoy watching the process.
Loving this thread! Thanks for taking time to take the photos!
- Papa Foxtrot offline
- Posts: 62
- Joined: Thu Jun 28, 2012 1:40 pm
- Location: Atlanta
Thu Jun 20, 2019 10:13 pm
Re: 1999 ACA 7ECA Citabria Aurora
[emoji1360] Thanks Papa Foxtrot
Took the blankets off the engine and pulled it out to install the rehabbed baffles.
Repairing and refurbishing the existing baffles was a lot of work, but new baffles aren't exactly plug and play either. I have never had a new set fit without some work, so fixing the old stuff was not too bad a deal for me.


I still have to order some new AN3-41A bolts for the oil cooler and a couple AN4-12A bolts for the rear baffle mounts. I had new hardware on hand for everything else.


Took the blankets off the engine and pulled it out to install the rehabbed baffles.
Repairing and refurbishing the existing baffles was a lot of work, but new baffles aren't exactly plug and play either. I have never had a new set fit without some work, so fixing the old stuff was not too bad a deal for me.
I still have to order some new AN3-41A bolts for the oil cooler and a couple AN4-12A bolts for the rear baffle mounts. I had new hardware on hand for everything else.
Sun Jun 23, 2019 4:41 pm
Re: 1999 ACA 7ECA Citabria Aurora
Almost 100F in the hangar today. Didn't get much done besides mocking up some stringers in place on the bulkhead formers.


This clothing steamer works wonders to bend wood without breaking it.

Here's a ridiculously expensive and time consuming scratch build of a 1/4 scale 170B that I used it on to seamlessly bend balsa sheeting on the fuselage.

This clothing steamer works wonders to bend wood without breaking it.
Here's a ridiculously expensive and time consuming scratch build of a 1/4 scale 170B that I used it on to seamlessly bend balsa sheeting on the fuselage.
Sun Jun 23, 2019 7:01 pm
Re: 1999 ACA 7ECA Citabria Aurora
Here's a ridiculously expensive and time consuming scratch build of a 1/4 scale 170B that I used it on to seamlessly bend balsa sheeting on the fuselage.
Which I am dying to see flying:)
Which I am dying to see flying:)
- daedaluscan offline
- Posts: 1269
- Joined: Sat Jan 12, 2013 1:06 pm
- Location: Texada BC
DISPLAY OPTIONS
Who is online
Users browsing this forum: No registered users and 0 guests
Latest Features
-
Live to Tell
A Minnesota pilot is surprised to learn that the sudden asymmetric drag of an out-of-rig ski can…Read More -
Creators
Working in some of the Yukon's most beautiful and remote environments, photographer Simon Blakesley captures aircraft in…Read More -
Aircraft Ownership and Maintenance
Upgrading to big tires can make a huge difference in backcountry performance, but with those gains come…Read More -
Tales from Yesteryear
In this tale from bush flying yesteryear, Don Cogger signs up to help Atlee Dodge Jr recovery…Read More


Latest Knowledge Base
-
Destinations
A regional guide with ideas for winter camping destinations in California, Nevada, New Mexico, and Arizona.Read More -
Aircraft
Finding an affordable aircraft that can handle the backcountry for $80K or less? A challenge for sure, but with the…Read More -
Aircraft
01.29.2018 - Zane - Updated tire diameter graphic to add 8.50x10 Guide to tires for use in the backcountry and off-airport landing…Read More -
Pilots
12.22.2013 - Initial article format Operating aircraft on skis and negotiating a snow-covered landscape is an entirely unique skillset and environment.…Read More


