Looking for feedback on an EGT question...if there’s a better forum, let me know.
So on this “old” 182 I have an unusual EGT gauge...it’s made by Swearingen and is 3 1/4 in gauge. It has an arc across the face of which the left half says “Rich” and the right half says “Cruise”. The jury is still out as to how accurate it is. It has only one exhaust probe which is in the #2 exhaust stack. (Left rear). So on climb out the the gauge climbs into the lean or “cruise” range when the mixture knob is full rich, once I get to altitude (9500’ today) the gauge drops back into the “Rich” range and then I can go through a normal leaning process.
What’s with the automatic leaning of the mixture on climb-out? I don’t like climbing out with a lean mixture. Maybe the gauge is faulty? CHT’s are running around 300-325 on the climb which seems good.
Any ideas?
Inactive engine Cessna 182
Sat Aug 18, 2018 7:14 pm
- BirdyinBOI offline

- Posts: 166
- Joined: Tue Dec 25, 2012 10:53 pm
- Location: Boise
Sat Aug 18, 2018 7:33 pm
Re: Inactive engine Cessna 182
I bet it's just measuring temperature and not actually how lean or rich your mixture is. It's going to be hot on climb out and therefore mimic "lean" on your gauge.
Just a guess.
CW
Just a guess.
CW
- clippwagon offline
- Posts: 737
- Joined: Sun Nov 13, 2011 9:49 pm
- Location: Oregon
Wed Dec 19, 2018 7:29 pm
Re: Inactive engine Cessna 182
This is kind of a late add in to this thread but thought I would give it a try.
You mentioned possibly updating your panel and I am in the midst of doing that on my 57 182. The old plastic overlay was really cracked up and pretty much unusable. Then I got into the wiring behind the panel and that settled it. I ripped out all the avionics related wiring and have installed all new breakers and switches etc.
To replace the old plastic overlay has been a real challenge for me. I will finally pick up the new .040 thick panel overlay tomorrow from the water jet cutter and see how it fits. If it fits well, the file I have made for the water jet cutter could be very useful for anyone else doing this.
Getting it programmed right is especially challenging since all of the holes need to line up with existing holes in the main panel underneath. Some folks doing this have had them cut a lexan piece first too mark up and make corrections with. I am going for it with the first cut being aluminum and hoping all that crazy layout work I did works out OK..
I got a decent deal on mine with low time airframe, (2200) and fairly high time engine at 1300 SMOH. I plane to upgrade to a PPonk this spring.
I will have 8:50s on mains and 8:00 on the nose, double piston breaks and airglass nose fork when done.
Tearing out all that old wiring and switches and breakers has been a real setback in the project. It got me caught up in the "while your at it clause" that can be a real trap..
Let me know if you are interested in the autocad file and perhaps we can work something out.
Thu Dec 20, 2018 3:21 pm
Re: Inactive engine Cessna 182
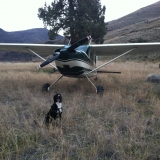
C 182 guy....I’m very interested in what you’re doing. I’ll PM you and can hopefully go more in- depth...maybe even a phone calll and some pics. I’m 1 or 2 days away from jacking up the plane up and removing the main gear for refurbishing. I made 3 cradles with straps and ratchets to set it in for the month the gear will be gone. I hope they work. Attached is the pic...the webbing straps will go around the 4x4’s and form an adjustable cradle between the tops of each pair of 4x4’s. I can adjust the tension with ratchets positioned along the outside of each 4x4.
The panel will get started after Christmas. New wiring and circuit breakers is definitely on the menu.
The panel will get started after Christmas. New wiring and circuit breakers is definitely on the menu.
- BirdyinBOI offline
- Posts: 166
- Joined: Tue Dec 25, 2012 10:53 pm
- Location: Boise
Tue Feb 12, 2019 8:44 am
Re: Inactive engine Cessna 182
All went well with the gear removal and refurbish. Jim Hayton at North Sound Aviation did a great job and is a really fine person. He was very reasonable and prompt. The gear came back like brand new. He’s also a wealth of information. I even though I got the gear back to new condition I still had to add two .063 shims on the pilot side. All is level now. Not sure why the shims were still necessary but Cessna allows up to 3 of them. I made the shims out of 2024-T3 sheet. Just copied the inside tip shape, where the bolt goes thru, for about 1 1/2”. No torquing in that tight space, just got it as tight as I could with a little prying with a wooden hammer handle.
Now into my 3rd month of panel refurbishing. Also new rubber motor mount to firewall bushings went in yesterday. Not a simple job! Just make sure your hang point at the top of the case is slightly forward of the center. Mine was too far back and it got a little interesting. We had to add a rachet strap around the crankshaft and over the top of the hoist arm to get the front back up. Too much grunting and groaning.
Now into my 3rd month of panel refurbishing. Also new rubber motor mount to firewall bushings went in yesterday. Not a simple job! Just make sure your hang point at the top of the case is slightly forward of the center. Mine was too far back and it got a little interesting. We had to add a rachet strap around the crankshaft and over the top of the hoist arm to get the front back up. Too much grunting and groaning.
- BirdyinBOI offline
- Posts: 166
- Joined: Tue Dec 25, 2012 10:53 pm
- Location: Boise
DISPLAY OPTIONS
Who is online
Users browsing this forum: No registered users and 1 guest
Latest Features
-
Live to Tell
A Minnesota pilot is surprised to learn that the sudden asymmetric drag of an out-of-rig ski can…Read More -
Creators
Working in some of the Yukon's most beautiful and remote environments, photographer Simon Blakesley captures aircraft in…Read More -
Aircraft Ownership and Maintenance
Upgrading to big tires can make a huge difference in backcountry performance, but with those gains come…Read More -
Tales from Yesteryear
In this tale from bush flying yesteryear, Don Cogger signs up to help Atlee Dodge Jr recovery…Read More


Latest Knowledge Base
-
Destinations
A regional guide with ideas for winter camping destinations in California, Nevada, New Mexico, and Arizona.Read More -
Aircraft
Finding an affordable aircraft that can handle the backcountry for $80K or less? A challenge for sure, but with the…Read More -
Aircraft
01.29.2018 - Zane - Updated tire diameter graphic to add 8.50x10 Guide to tires for use in the backcountry and off-airport landing…Read More -
Pilots
12.22.2013 - Initial article format Operating aircraft on skis and negotiating a snow-covered landscape is an entirely unique skillset and environment.…Read More


