Paint touch up
Sat Jan 06, 2018 11:03 pm
Paint touch up
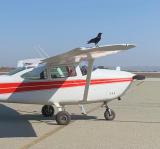
Just bought a 1968 Cessna 182 and i have a spot, around the size of a quarter, that needs to be touched up on one of the wings where all the paint has come off and it's bare aluminum. What's the best way to touch this up? 
Sun Jan 07, 2018 7:15 am
Re: Paint touch up
Sand it with 800. Tape it off. Use a self etch primer. Shoot it with an airbrush. After you pull the tape, wet-sand the edge of the new paint with 2000. Let the paint cure for a couple weeks and polish with Maguires, 3m or something similar and then seal with the same.
Fixing the red:

The red after:

Fixing the red:
The red after:
Sun Jan 07, 2018 7:59 am
Re: Paint touch up
Looks good.
What type of paint are you using?
Is a two part from an auto paint store?
How about the color. I need to touch up a white spot on my wing. How did you match your color?
I don't have a sprayer setup, so I'm going to be using one of the preval sprayer setups.
thanks for you comments
Dale
What type of paint are you using?
Is a two part from an auto paint store?
How about the color. I need to touch up a white spot on my wing. How did you match your color?
I don't have a sprayer setup, so I'm going to be using one of the preval sprayer setups.
thanks for you comments
Dale
Sun Jan 07, 2018 6:31 pm
Re: Paint touch up
Lucky wrote:Looks good.
What type of paint are you using?
Is a two part from an auto paint store?
How about the color. I need to touch up a white spot on my wing. How did you match your color?
I don't have a sprayer setup, so I'm going to be using one of the preval sprayer setups.
thanks for you comments
Dale
I like acrylic enamel. Take one of your inspection panels down to a higher end auto-paint store and have it matched. Go to harbor freight and pick up one of their all in one airbrush kits. Has the compressor and every thing you need. Pick up some thinner to clean the brush.
Jim
Mon Jan 08, 2018 11:49 pm
Re: Paint touch up
Jim,
Thanks for your tips and how are you cleaning before spraying. Alcohol & then a clean rag wipe?
Thanks for your tips and how are you cleaning before spraying. Alcohol & then a clean rag wipe?
Tue Jan 09, 2018 6:36 am
Re: Paint touch up
Lucky wrote:Jim,
Thanks for your tips and how are you cleaning before spraying. Alcohol & then a clean rag wipe?
I use a product called Prep-All. Thinner or Denatured alcohol will work just fine.
Jim
Tue Jan 09, 2018 12:41 pm
Re: Paint touch up
jaudette wrote:I like acrylic enamel. Take one of your inspection panels down to a higher end auto-paint store and have it matched. Go to harbor freight and pick up one of their all in one airbrush kits. Has the compressor and every thing you need. Pick up some thinner to clean the brush.
Jim
Exact ditto. The Harbor Freight air brush kits are $9 and will do a great job. In fact, you will start eyeing all the other paint touch-up jobs on your other vehicles as soon as you see the results.
Just a couple extra items: You might ask for a brand with plenty of solids. You can see a lot of touch-ups in bright sun even with a perfect color match and extra coats due to transparency. The problem can go away if you spend a little more for a higher solids brand of paint. The other suggestion is to pick up a cheap inline desiccator cartridge at Harbor Freight to add in front of your airbrush to prevent tiny drops of water or oil from speckling your work. They are only a few bucks and work for quite a while.
Tue Jan 09, 2018 8:53 pm
Re: Paint touch up
Jim, do you know anyone out here good with more than touch-up level paint work? I have a LOT to do (wing leading edges and other areas, cuffs, rudder, fin, tips, belly, etc). It may almost be worth stripping and starting over by the time I put all these new parts on there, but would like a professional opinion.
Thu Jan 11, 2018 10:23 am
Re: Paint touch up
A good way to blend a touchup using a 2-part paint is to use 3 masks - one the same size as the spot, and two more a 1/2 and 1 inch larger. Hold the smallest 1/4" above the spot, paint the spot using the full mix of paint, catalyst and reducer. Wait 15 minutes, then go over the repair using the next larger mask 1/4" above the surface after cutting the paint 50% with reducer. Repeat using the large mask 15 min later with the paint again diluted another 50% with reducer.
Thu Jan 11, 2018 2:45 pm
Re: Paint touch up
colopilot wrote:Jim, do you know anyone out here good with more than touch-up level paint work? I have a LOT to do (wing leading edges and other areas, cuffs, rudder, fin, tips, belly, etc). It may almost be worth stripping and starting over by the time I put all these new parts on there, but would like a professional opinion.
Here is my Bonanza before and after. It was a mess but turned out good!
Before:

After:

I'd be glad to show you how!
Jim
Thu Jan 11, 2018 7:56 pm
Re: Paint touch up
A few years ago, I learned the technique for blending paint. I was working on Lears, doing a lot of frame repairs that required paint touch up on the outside. Business jets have very few ‘panel lines’ to paint to, requiring blending of the touch up with the original paint. The process goes like this:
-Farecla Cut coumpound the area around the repair(at least five times bigger than the repair area)
-Clean entire are with isopropyl alcohol
-Paint repair area with paint mixed normally
-Cut mixed paint in cup by 50% with thinner and lightly spray area 1/3 greater original repair area.
-Reduce previously reduced paint by another 50% and spray the area outside the previous application.
-After this, the area you sprayed should be about 3x the original paint/repair area and you will see just a light ring/ haze around the outside where your last spray was.
-After a day of paint curing, polish the area lightly with Farecla G10 finishing compound. Light use of the polisher and lots of water will make the paint repair dissapear!
The key to this process is the first cut/compound. That is was breaks the gloss on the surface of the original paint and allows the touch up paint to adhere to it. This is definitely an art and takes a lot of practice but once you master it, you will be amazed at the results. It is truly possible to make invisible paint repairs.
- Jeredp offline


- Posts: 625
- Joined: Fri Apr 20, 2012 10:31 am
- Location: WA
- FindMeSpot URL: http://share.findmespot.com/shared/face ... 7NYN40QT2I
- Aircraft: Cessna 172
Mon Jan 15, 2018 10:30 pm
Re: Paint touch up
Thanks for everyone's tips and I'll post some before and after pics after doing the work in a couple weeks.
DISPLAY OPTIONS
Who is online
Users browsing this forum: No registered users and 1 guest
Latest Features
-
Live to Tell
A Minnesota pilot is surprised to learn that the sudden asymmetric drag of an out-of-rig ski can…Read More -
Creators
Working in some of the Yukon's most beautiful and remote environments, photographer Simon Blakesley captures aircraft in…Read More -
Aircraft Ownership and Maintenance
Upgrading to big tires can make a huge difference in backcountry performance, but with those gains come…Read More -
Tales from Yesteryear
In this tale from bush flying yesteryear, Don Cogger signs up to help Atlee Dodge Jr recovery…Read More


Latest Knowledge Base
-
Destinations
A regional guide with ideas for winter camping destinations in California, Nevada, New Mexico, and Arizona.Read More -
Aircraft
Finding an affordable aircraft that can handle the backcountry for $80K or less? A challenge for sure, but with the…Read More -
Aircraft
01.29.2018 - Zane - Updated tire diameter graphic to add 8.50x10 Guide to tires for use in the backcountry and off-airport landing…Read More -
Pilots
12.22.2013 - Initial article format Operating aircraft on skis and negotiating a snow-covered landscape is an entirely unique skillset and environment.…Read More


