Backcountry Pilot • 180 interior project

180 interior project

Aircraft building and project-level overhaul forum -- Kitplanes, experimental amateur-built, homebuilding, or even restoration of certified aircraft.
16 postsPage 1 of 1

180 interior project

As many here have done before, I started a small interior job that evolved into a full blown project. The prior interior of my 180 was in good condition, but very dated. I'm no seamstress, and never intended to be one, but it was actually quite easy. I gutted the interior, removed all of the old upholstery, manufactured two new aluminum interior panels and recovered them all as well as the glareshield. Stripped the interior paint, primed with two part epoxy and painted in enamel, relocated the intercom and replaced all the weather stripping on the doors and windows. The seats will be done next week at a local upholstery shop. Fortunately the headliner is in good condition, and will remain for the time being.

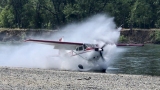
This is a bushplane, and kept it functional and simple. If it was too fancy, I wouldn't have been able to get it dirty with fish slime or moose blood :D

Image

Image

Image

Image

Image

Image
Image
upnorth180 offline
User avatar
Posts: 141
Joined: Wed Oct 28, 2015 6:41 am
Location: Northwestern Ontario
Aircraft: '54 C180
'65 C185
‘54 BE18
BE18 (floats)

Re: 180 interior project

swixtt wrote:Looks great. Very functional. It will be nice when you redo your seats. Hopefully you're getting them bolstered up a bit. I'd be very curious on the paint you used and process? I'm doing the same on my 170b but haven't decided on the paint yet. Also what hidden fastener did you use for the alum covered door panel? Assuming would be very similar to mine.


Thank you Swixtt. Yes the seats will have all new material and foam in them.

The paint process was simple. I used Klean Strip Aircraft Stripper on the paint (very good), primed with two part epoxy in grey, and painted in dark grey enamel. I removed everything that was removable and sprayed it, and rolled the door sills with a small fine roller.

The door panels are attached by 3/8" upholstery spring clips. I couldn't find a picture of them anywhere, but they are very simple. They are basically an X shaped spring set into a snap head. Once pushed into a drilled hole, they firmly snap in. As far as I know, they are original.
upnorth180 offline
User avatar
Posts: 141
Joined: Wed Oct 28, 2015 6:41 am
Location: Northwestern Ontario
Aircraft: '54 C180
'65 C185
‘54 BE18
BE18 (floats)

Re: 180 interior project

Looks great! What a gorgous 180.
mountainmatt offline
User avatar
Posts: 2803
Joined: Sat Apr 11, 2009 2:43 pm
Location: Colorful Colorado
FlyingPoochProductions
FlyColorado.org

Re: 180 interior project

Looks great!


Swixtt, my advice for painting the interior after my refurb on the 170 is to just rattle can it. Instead I bought a big air compressor, a bunch of expensive paint and a finicky paint gun that was a pain in the ass... probably because I'm not a painter and don't have the skills and experience to use it. A rattle can is easy to use though. My friend (Bart here on BCP) did the same utility interior on his 180 and used rattle can paint. Looked just as good or better than mine, and would be a lot easier to touch-up years later... just go back to the store and buy a can of the same paint. Also, not a lot of the paint shows anyways after you put in your interior panels or foam like I did.
robw56 offline
User avatar
Posts: 3263
Joined: Thu Jan 18, 2007 9:30 pm
Location: Ward
Aircraft: 1957 C-180A

Re: 180 interior project

That's a nice and clean 180. I need another 180/182 project. I was happy with how my 182 turned out. We are in the process of thinking about selling the 182 and getting a project 180k. But maybe I should finish my stinson project first lol.

Sent from my SM-G920W8 using Tapatalk
mmartin1872 offline
User avatar
Posts: 221
Joined: Tue Feb 08, 2011 7:18 pm
Location: Chilliwack
FindMeSpot URL: http://share.findmespot.com/shared/face ... rdxTuiNhdo
Aircraft: Cessna 182
Stinson 108-2
Stinson 108-3
Taylorcraft BC12D - Project
Starduster II
Thorpe S18
Piper Clipper
Poorman's 180 - Project

Re: 180 interior project

What is that pulley mounted above your trim wheel?
corefile offline
Supporter
User avatar
Posts: 637
Joined: Tue Jul 03, 2012 1:59 pm
Location: San Jose, Ca
Aircraft: Cessna 180 - sold

Re: 180 interior project

Float rudders?


Sent from my iPhone using Tapatalk
CamTom12 offline
User avatar
Posts: 3705
Joined: Sun Jul 08, 2012 1:08 pm
Location: Huntsville
FindMeSpot URL: https://share.delorme.com/camtom12
Aircraft: Ruppe Racer
Experimental Pacer
home hand jam "wizard"

Re: 180 interior project

corefile wrote:What is that pulley mounted above your trim wheel?


It's a roller for the water rudder cable, which latches onto the hook you can see left of the flap handle.
upnorth180 offline
User avatar
Posts: 141
Joined: Wed Oct 28, 2015 6:41 am
Location: Northwestern Ontario
Aircraft: '54 C180
'65 C185
‘54 BE18
BE18 (floats)

Re: 180 interior project

swixtt wrote:
The paint process was simple. I used Klean Strip Aircraft Stripper on the paint (very good), primed with two part epoxy in grey, and painted in dark grey enamel. I removed everything that was removable and sprayed it, and rolled the door sills with a small fine roller.

The door panels are attached by 3/8" upholstery spring clips. I couldn't find a picture of them anywhere, but they are very simple. They are basically an X shaped spring set into a snap head. Once pushed into a drilled hole, they firmly snap in. As far as I know, they are original.


sounds like the same clips i HAD on mine. they were in terrible shape so we went with a plastic retaining insert but i'm leery of these as the teeth in them will surely fail when i need to pull the door panel off again. wish i could find those metal upholstery type clips somewhere.

thanks for the info on the paint to you both. as Rob mentioned, which is good advice, i've seen planes done both ways. i'm planning utility selkirk foam for the back section and possible matching seat covering nearer the front. mine is a flying project so i do small sections at a time. mostly spending time removing glue, old paint, etc.

anyway, keep up the great work .... if you get a chance to post a pic of your seats that would be great!


Thank you, I will update the thread as soon as they are finished. You might try any local fastener store for the clips, or something similar. We have a paint store here that stocks all kinds of restoration products as well. They surely would have something that would work. if you can't find something, I'll go look and send them to you.

Using a roller was not what I had in mind initially, but the door sills and window trim were all that would be seen (everything else was removable). I had limited time in a heated hangar, and the masking would have taken far longer than the painting. Once it was done, I was very pleased with the finish. I would though encourage you to spend the time and money on a quality self etching primer. I used a two-part epoxy that was suitable for bare aluminum. The old paint flaked off in places as it simply couldn't bond to the aluminum without a primer base. Also, nothing wrong in my opinion with spray cans either, just go to your auto paint store, they will colour match enamel paints into a can. I had them mix my spray can from the quart of paint I picked out, so the colour was exact. Worked great.
upnorth180 offline
User avatar
Posts: 141
Joined: Wed Oct 28, 2015 6:41 am
Location: Northwestern Ontario
Aircraft: '54 C180
'65 C185
‘54 BE18
BE18 (floats)

Re: 180 interior project

Seats are done. The upholstery shop did a great job, basically everything new but the frames. The interior pictures aren't very good as I installed them in -30 with a 40 mph wind. Yes, winter in Northern Ontario sucks.

Image

Image

Image
upnorth180 offline
User avatar
Posts: 141
Joined: Wed Oct 28, 2015 6:41 am
Location: Northwestern Ontario
Aircraft: '54 C180
'65 C185
‘54 BE18
BE18 (floats)

Re: 180 interior project

Looks great!
robw56 offline
User avatar
Posts: 3263
Joined: Thu Jan 18, 2007 9:30 pm
Location: Ward
Aircraft: 1957 C-180A

Re: 180 interior project

Some thoughts on paint...

There are two ways paint adheres to the substrate. Mechanical, and chemical. Mechanical is scuffing the surface so the paint grabs, and chemical is changing the surface for the bond. Both ways provide great results if the steps are followed properly.

With respect to etch primer... Etch is porous, so another primer is needed on top before the topcoat. This adds weight, and if your not an experienced painter, the temptation is to shoot too thick, (more is better syndrome) which will end up with chipping paint.

Depending on who you talk to you will get many different opinions on painting. In my experience, the older guys typically lean more toward legacy techniques for comfort reasons rather than embracing how far paint has come. Regardless of which way you go, buy a good spry gun, have clean air run through a dryer, and use good paint. For me, I have had great success with proper prep and a two part epoxy.

The two biggest things for success with paint are prep and prep. W/o a good prepped surface, all is wasted. After that, spend the money on good gear and the best paint you can afford. With paint, you really do get what you pay for.

BTW... Your project looks great! Nice to see another bird getting the much needed TLC! =D> =D> =D>
Bigrenna offline
KB and Supporter
User avatar
Posts: 2339
Joined: Sun Sep 25, 2011 4:02 pm
Location: New England
Aircraft: C180H / C170B
www.bushwagoneast.com
www.avthreads.com

Re: 180 interior project

Thanks Bigrenna. It was a fun project, picked away at it in my shop as time allowed.

To describe my painting experience as mediocre and primitive would be a complement. It did turn out ok, but my expectations were reasonable. It isn't perfect, but had very limited time in a heated hangar and did what I could. I'm happy with it.
upnorth180 offline
User avatar
Posts: 141
Joined: Wed Oct 28, 2015 6:41 am
Location: Northwestern Ontario
Aircraft: '54 C180
'65 C185
‘54 BE18
BE18 (floats)

DISPLAY OPTIONS

16 postsPage 1 of 1

Who is online

Users browsing this forum: No registered users and 1 guest

Latest Features

Latest Knowledge Base