A few years back I purchased my 182A model in Fresno and it was bone stock, to the extent it still had the old vacuum bellows servos for an old auto pilot that sort of worked and it had the big wart on the back for a rotating ADF antenna, I think that's what it was. The airframe is low hours at about 2200. Anyway I tore all that old stuff out and pretty much went through the entire plane with updates and upgrades. It now has an Airglass nose fork with an 8:00 on the nose, 8:50 Mains with double piston brakes on new wheels, new carpeting goes all the way back into the Selkirk extended baggage, and of course to do that the battery had to move up to the firewall with a Burls batt box. Sleeping in the back is a real option that I have used on several occasions, actually quite comfy with padding down and I have figured out a slick little trick to enable opening the baggage door from inside to get out without climbing up over the front seats:) BTW, I have an EarthX battery in that box on the firewall that is not quite legal so I will be swapping it out for the FAA approved Odyssey that Burls recommends. Part of the problem with the EarthX is that it is just a bit short on Amp Hrs. required by the Surefly Ignition STC, (and the EarthX is not really STCd for this model) so I will take care of that during the annual.
The wings got The Sportsman STOL kit with the high dollar Quasar super bright wing tip landing lights with wig wag, the regular landing light is LED too, and Whelen Orion strobes with LED pos. lights were put on on both the tips and the tail cone. If you light this thing up it is amazingly easy to see in daylight. I have been told I am not allowed to log night landings if I use the Quasars:)
The panel got replaced / remodeled with a new main panel piece and an overlay over the entire area, (hard to describe but photos will clarify), all new switches and wiring, the overlay is that black trophy aluminum that can be laser etched for the labels which I did. I went with a 10" Dynon HDX system, Dynon integrated COM, Dynon control panel for Baro. setting and other functions, Dynon D10 is backup instrumentation and is kept completely separate from the main unit. The audio panel is called an Audio COM, a PAR200A, and it uses a 2nd remote radio just like the Dynon's and is controlled on the audio panel. It also got the Dynon integrated transponder and ADSB in and out module. I also installed a Lift angle of attack indicator which I really like, and I wired in some extra USB power jacks for the Ipad and other goodies too. The engine monitor on the Dynon is really great, very easy to see at a glance, but the really cool thing is that if any engine parameters reach the programmed redline, Betty will calmly inform you via headset audio about what ever it is. No need to be staring at the panel to see how things are, she is taking care if it. Some other interior goodies are the BAS shoulder harnesses, Rosen Visors, Precise Flight vents. The old interior spot lights were retrofitted with LEDs and a new dimmer controls them. At one point I added one of those flap handles that you can operate without leaning over but I sold it after using it awhile. It was good for the first 20 deg. flaps, and really nice for that, but at that point my elbow was into the co pilot seat and it was not so handy to get 30 and 40 deg. There is a technique to use where you just let go and grab the stock handle but I did not like it so it is gone.. It is easy to lean over with the BAS harness on. Nice little PTT switches are on the yokes.
I did all the above, (and probably some stuff I have forgotten), in phase one and flew it for awhile on the rather tired stock engine, then came phase two. I found a good first run IO-520 in Kansas, bought it to rebuild as a Pponk engine, and hauled it home in the plane in pieces. Then arrangements were made for all the various machining operations to be done to the crank, cases, cam, etc. in Tulsa, which was quite an education. Then I shipped all the pieces, along with new cylinder assemblies up to Dave at Pponk and he did the assembly. Along the way I paid extra for extra balancing and purchased a document that gave me permission to use 8.5 to 1 pistons in place of the 7.5s called for in the STC. (More HP yea!) This allowed use of stock 520 cyl. assemblies too. I also purchased a new Sea Planes West engine mount and their exhaust system. We put a remote mount oil filter on the firewall down below the battery box. lightweight starter, new light alternator, basically everything is new from the firewall forward except the cowling. The prop is a new 3 blade McCauley. Oh yea and one mag was removed and a Surefly Electronic ignition put in it's place. At lower power settings or up at altitude it advances the timing to to a max of 38 degrees. Tempest fine wire spark plugs were used too. One more thing I just remembered, the oil pan and the oil cooler got preheat pads and the cylinder bases got pre heating rings put on. I have learned that a Honda 1000 Generator is just enough to power them all to get a good preheat in cold weather.
The performance of the plane went well beyond what I expected. Especially in cruise speeds. With the stock engine and 2 blade prop I would generally see 140 mph. in cruise conditions, now I generally 166 mph, (145 knots). Now that is True Airspeed as reported on the Dynon HDX, it is the same instrumentation before and after the engine change. That is a 26MPH increase in cruise speeds from the engine and prop changeout, not bad I say.
The 58 model does not have cowl flaps and I was worried about cylinder temps during the engine install so special attention went into the baffle seals install and "shark gills" were added to the cowling for more exit area. I have learned that as long as I feed it the right amount of fuel to her it is easy to keep cylinder temps down below the 400F mark. It needs about 14 to 16 GPH when powered up in climb to altitude to stay cool. Once up there it can generally be leaned back to 11 or sometimes even 10 GPH and maintain good speed. (The Surefly is probably helping here.) I have generally gone with Pponk's recommendation to run it rich of peak and avoid cylinder problems. The Dynon engine monitor makes this easy to check.
I don't have the actual engine hours here with me but I will say it is under 50 hrs SMOH on the engine and prop. It is just barely broken in. I carefully followed the break in instructions that came with the engine. To summarize, the instructions say, fly it like you stole it! I kept it above 25" MAP for the first 25 hrs or so usually seeing 150 knots down on the desert deck, what a blast! I am quite sure I got the rings seated in properly while keeping my hair on fire. This engine is amazingly smooth. (Of course we balanced the prop down to the gnats ass) It seams most engines have a sweet spot for the smoothest operation but on this engine it does not matter how you set the RPMs and power, super smooth.
A few things to note. If I fill the tanks and put it in the hangar I get some fuel stains at the wing roots. Leave the tanks down a bit and it does not happen. I don't think this is considered an airworthiness hit so I hope to get the annual done and leave putting in new bladders for a new owner at this point. I will include the McFarlane flap roller kit with the trailing edge flap reinforcements that I purchased in the sale. No real problem there but I was planning to put that kit in one of these days. Also I have a small pile of extras like the old wheels and tires, brakes, wheel pants, heavy starter (which some people prefer), the old oil pan off the 520, and other stuff.
I did not track the expenses during this project as I did not really want to know the actual cost. I accepted early on that I would never recover the cost of all the parts and pieces let alone the hours of labor involved. I got a divorce prior to buying the 182 so no issue:) I certainly did not anticipate selling it so soon after doing so much work on it, but that is life. Deciding on a price is not an easy thing but I have been studying listings on TAP and BS. There is really not anything out there that compares to the equipment and modifications that have gone into this nice straight tail low time machine. I have been shopping for that Catamaran and there is a virtual buying frenzy going on in the boat world and I suspect it is the same with airplanes. Anyway, I think it is easily worth $140,000. I don't know the actual performance numbers of a 185, but I suspect this thing will fly along with them without them having to pull back much, if at all, and the nose wheel sure allows some significant cost saving on insurance!
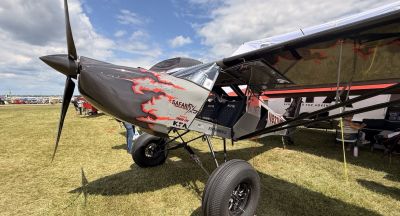
I will try to attach a few old photos below. They are not very good and were taken before the engine change. The annual inspection should happen during the last week of this month, June, or perhaps slip to early July. I have a friend and IA that can show the plane while I am gone. BTW, I did perform much of the labor on this and all my planes over the years but this has always been done under the supervision of an AP IA bonified FAA certified mechanic.
If interested give me a call or text at Two Oh Six Four Two Three Eight Two Four Zero or
[email protected]
Randall