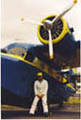
What: 1946 Taylorcraft BC12-D TSMOH 200hrs The owner(me)-assisted annual inspection started just last Saturday...off-and-on for two days now. An annual on an old airplane is always an adventure. This is the airplanes 2nd annual since I became the caretaker in July 2023. This is the first time I have assisted and I am using a different mechanic. I am a former USAF UH-1,MH-53, A-10, F-16, and F-117 Crew Chief but am new with general aviation maintenance. It is surprising what you think you know about fixing and inspecting airplanes when dealing with one that is unfamiliar.
Annual Findings, Day 1:
Paperwork inspected and all AD's complied-with...on paper. 80psi compression checks were 79, 80, 80 , 79 (only 200hrs on TSMOH...A65). Improper hardware on Carb Heat and Cabin Heat cable ends (where they attach to the carb and cabin heat boxes). Hard fuel lines are zip-tied (rather than Adel clamped) to the engine mount. Magneto fastening nuts were only snug and not tight. Magneto timing was only 19* BTDC. Gascolator cork gaskets were badly worn...just for fun we tried to put gascolator back together with original gaskets and, of course, it leaked all-over the place.
Right brake cable frayed inside the cockpit. There is an extra VHF antenna that is not connected. Right brake pedal's cable clamp (just behind the pedal, under your foot) is too close to the pedal stop and is sliding over the stop, causing binding. Left side gear strut fairing has a small crack that requires stop-drill (this is an issue because it is not a simple affair to just remove it.
One of the horizontal stab braces was about 1/4 turn too loose (lower left). Trim tab is missing 2 rivets. Trim tab has a lot of up-n-down play but we discussed it and decided that since it is working properly it would be more hassle than it's worth to unskin the horiz stab to troubleshoot it...and maybe find that that's just how it is. (Please chime in here.)
We discovered that the wing light wires were removed when the airplane was restored...the rear light wire is still there (we are wiring it for the eventual installation of lights). And we also found one old Ritz cracker located at the rear of the fuselage...just sitting there all lonely.
Annual Day 2:
New findings: One of the engine mount nuts had the wrong cotter pin (way too small). Fuel line through the firewall could use some good ol’ orange sealant to plug-up the gap. Speaking of gaps, I always wondered why so much air seems to move through the cabin. Where the wing meets the windscreen, under the removable fairings, is quite a large open gap...will probably cut some foam to shape and fill. There is also a sizeable gap under the floorboards on either side radiating out from the bungee mount area…perhaps some 100mph tape (although I do not want to trap any kind of moisture under the tape here). Is there supposed to be any kind of cover inside the fuselage over the bungees or is that area open to the outside by design?
The right brake cable is now replaced with 1/8” wire. The cable was worn under the floor board, just in-front of the pulley that allows the cable to go down to the landing gear; and only 2 strands were left. It's easy to see why it was missed at the pre-buy last year...but it should have been caught at the last annual (maybe those floor boards didn't come up last time??). The cable was obviously very old 3/32” (the one on the left is newer). I believe the cable did NOT break all within the last year...but who knows. Of greater issue is that midway between the two pulleys under the floorboard the cable runs over a spot where there is an aluminum stiffener and it is rubbing there (not a contributor to the issue) . That area’s getting a phenolic block. The prior issue about the adjuster clamp rubbing on the pedal stop is solved with the new cable; when the old cable started to break and stretch, that reduced the tension and the adjuster creeped towards the stop. I HAD noticed that the right pedal needed to be pressed further down than the left about halfway through the summer. Now we know why.
The debate about zip ties continues to rage at our local airport and at the EAA clubhouse. Some for, some against. The experimental guys just shrug their shoulders, all the military guys are aghast, and other regular single engine guys run the gamut. The final consensus (if you could call it that) is that zip ties are a factory solution to some applications in newer airplanes. Most of the vintage guys don't like it because there weren't zip ties when the Wright Brothers were soaring above the North Carolina dunes. The mechanics feel that it works for some wire bundles and other situations where excessive heat or chafing isn't an issue, but that the Adel clamp solution is ideal. Magnetos: The mags were rebuilt just this last June. When looked-at, the mags were obviously loose and were both rotated to the end of their adjustment slots in the 'retarded' position. It was observed that in the event a magneto were to get loose and perhaps move, that the magnetos will naturally rotate is such a fashion so as to rotate towards the retarded position...which makes operational sense. They are designed to error in the direction of LESS timing so as not to cause engine damage. Once properly adjusted, the mags are in the straight vertical position with almost equal adjustability in either direction in the middle of their respective slots.
We had to cut down new, cork gascolator gaskets because all the ones in the parts bin were ever-so-slightly larger than required. Is there a source/part number for a made-to-fit gasket? The new gaskets make a huge difference, although they were not leaking, the primer now sucks fuel on the first pull. Trim Tab: All the slop is at the end at the connection between the push-pull rod and the tab itself. The hole is elongated. Has anyone done a drill-out/bushing install here...or maybe drill-out and install a larger fastener? Also, the tab seems to have slipped on the adjustment cable (it goes down a bit too far and not up far enough). I assume that one could induce some slack in the cable and rotate the small pulley ahead of the vertical stab by hand to regain proper adjustment? It's not a cable-stop adjustment thing, the tab has the proper amount of total travel up and down, it's just 'off.' Wing-tip lights/wires: the wires are there after-all. …Well one wire at least: One white wire in the left and one red wire in the right wing. We figured that there should be two wires in there because you have to ground SOMEWHERE? The wires dead-end near the wing tanks and do not extend into the cockpit. The plan is to use the existing wires to pull-through the 4 new wires required for the Aero LED lights. Speaking of wires, any thoughts on the best way to secure the new wires to the old wire that we will use to pull the new wires through…without slipping? And does anybody have a picture of a battery box installation under their luggage compartment behind the seat?
Propeller nuts re-torqued. Taylorcraft Bar Trivia: After loosening fasteners on a wood propeller, how long do you have to wait before re-torquing them? Please answer below….
We've completed a 337 with supporting documents for the installation of 8.00x6 tires. While we're at it, a 337 for removal of one door while in flight will also be submitted.
More to follow in the coming days…
Taylorcraft 2024 Annual Day-by-Day
Wed Jan 01, 2025 5:05 pm
Wed Jan 01, 2025 9:24 pm
Re: Taylorcraft 2024 Annual Day-by-Day
2025 starting with a bang...I love it. Good post.
I honestly enjoy a good elbow-deep annual with findings born of safety & common sense and isn't a rulebook thumping, aside from AC 43-13b.
And once a [good] IA gets to know an airplane it smoothes out after the first 2 years. Usually.
I honestly enjoy a good elbow-deep annual with findings born of safety & common sense and isn't a rulebook thumping, aside from AC 43-13b.
And once a [good] IA gets to know an airplane it smoothes out after the first 2 years. Usually.
- Zzz offline


- Posts: 2854
- Joined: Fri Oct 08, 2004 11:09 pm
- Location: northern
- Aircraft: Swiveling desk chair
Half a century spent proving “it is better to be thought a fool than to open your mouth and remove all doubt.”
Wed Jan 01, 2025 10:34 pm
Re: Taylorcraft 2024 Annual Day-by-Day
Interesting stuff. I love the cracker bit haha.
- CoaSTOL Cowboy offline
- Posts: 42
- Joined: Tue Dec 24, 2024 1:09 pm
- Location: HTX
Wed Jan 01, 2025 11:58 pm
Re: Taylorcraft 2024 Annual Day-by-Day
It is so satisfying to gradually improve an airplane so that everything is just how it should be, and you feel that each little fitting or clamp is not going to let you down. Some have a lot more potential for improvement.
- daedaluscan offline


- Posts: 1269
- Joined: Sat Jan 12, 2013 1:06 pm
- Location: Texada BC
Thu Jan 02, 2025 2:51 pm
Re: Taylorcraft 2024 Annual Day-by-Day
Save yourself some trouble and just run a good shielded wire out to the nav lights and carry the ground with the shielding. Quick and simple and works great. The trim tab cable is notorious for slipping. Use some rosin if you need to, on the cable near the pulley. Check out your pulleys, as they're supposed to have a V groove in them, to grip the cable, not a U groove, like other pulleys. If the throat of the pulley is more U shaped, find a small lathe and use a sharp V tool to regroove it. Trim tab play sounds pretty typical, but if you want it less, you can either put a bushing in the tab arm, or as the old timers always did, weld an appropriate sized washer on the tab, over the hole. There's thousands of them out there that have been done that way. Recovering the surface isn't that big of a deal, nor is putting a custom inspection ring around the trim bellcrank.
My Tcraft had a naugahyde boot around the bungies, to keep them clean and also to slow down a little of the air coming in. That plane is old and they weren't too worried about it being all sealed up and comfy when it was built, plus I knew a guy that worked at Taylorcraft in '46 (he actually hung the first engine on my Tcraft at the factory and had the notes of it in his work diary) and everything was done as fast and inexpensively as humanly possible back then. They were always on the verge of going broke and they weren't that worried about fit and finish after a point. . Just be careful when you're sealing up stuff not to get anything that'll interfere with the gear leg travel. If it doen't have them already, I highly recommend safety cables for the bungies. I'd also suggest upgrading to a Steve's gaskolator. Money well spent in many ways! Enjoy it, they're a fabulous little airplane!!!
John
- hardtailjohn offline
- Posts: 924
- Joined: Thu Mar 16, 2006 7:06 pm
- Location: Marion, Montana
God put me here to accomplish a certain amount of things...right now I'm so far behind, I'll never die!!
Mon Jan 20, 2025 12:43 pm
Re: Taylorcraft 2024 Annual Day-by-Day
Great to hear a TCraft being cared for and flown!
I own an F-19 and helped with the pre-buy and ferry from WI->CA of a BC-12 last year.
Trim Tab - most I have seen have a lot of slop. I did see a post on the Taylorcraft Facebook group that mentioned a possible specification for the slop, but I have not found that written anywhere yet.
Brakes - Shinn Brakes should easily hold the plane for a run-up. Many write them off as being weak, barely able to hold the plane at a low power run-up, and just ignore fixing them because "that's as good as they get". A little attention to detail and they can be surprisingly good! The biggest misconception I have observed is the belief that shortening the cable due to "stretch" will make the brakes work better. While true you want to ensure the pedals don't bottom-out agains their forward stops, and cable length controls that, the usual culprit is out-of-adjustment wedges in the brake assembly. When the cable is relaxed, the "horseshoe" lever should be fully relaxed back to a nearly vertical position. Wedges can be adjusted to then cause engagement after only a few degrees of lever rotation.
Amazing planes even on just 65 hp. Take care of it and fly it well, it can go just about anywhere (except maybe over that tall tree at the end of the runway).
Flying Fiddler
Mon Jan 20, 2025 5:59 pm
Re: Taylorcraft 2024 Annual Day-by-Day
Day 3&4:
ELT activation wire from dash to ELT touches the rudder control cable on the left of the plane and is obviously chafing, but not worn through. ELT dash battery was inoperative, replaced, ops-check good.
Left brake pin (on the gear behind the brake drum…the ‘pivoting pin’ that attaches to the activation cable, return spring, and drum brake belcrank assembly) has only one cotter pin in it. There should be one on BOTH sides. Upon further investigation the pin appears to be fused together with its mounts located on the gear struts. The pivoting belcrank assembly is supposed to rotate around the pin (which thankfully it still does) and the pin is designed to be removable. This is obviously a long-standing problem because the pin has obviously been hammered upon on both ends…which is a good thing because it is mushroomed slightly on each end which is what prevented it from working loose. Despite our best efforts with a brass punch, the pin is IN THERE. This presents a multifaceted problem: Ideally the pin would be removed, lubed, and reinstalled (or replaced). We’re worried about breaking either: the welds on the gear in which the pin slides (not the worst thing in the world), or the bellcrank in which it is frozen…which I am sure is one of those parts that can only maybe be scrounged-up after-market . (Another theory floating around the peanut gallery at the airport is that someone in the past broke a weld on one of the pin mounts and welded it back just off-center and then just hammered the pin back into place.) At least with the ends mushroomed-out there is no danger of the pin falling out, however the pin can’t be inspected for cracks or corrosion. It likely is corroded which is why it is stuck, or at least in danger of corrosion due to an inability to properly lube the part.
Trim Tabs: We successfully adjusted the elevator tab position (it went too far nose-up and not far enough nose down) by pulling the two adjustment wires slack at the rear of the airplane and then having a 2nd person rotate the tab adjustment pulley slowly. Flight test to follow… Not only does the airplane refuse to keep climbing (slightly) in cruise flight with full nose down trim, but a measurement of the tab travel confirms that it is out of whack. It does go the proper total amount of travel, so it’s not a problem of adjusting the stops. It was just a slippage of the cable in the pulley that got it slightly off (we rosined it up). There is some additional slop in the tab-to-actuator rod bolt hole and also some additional lateral play in the rotating shaft in the elevator horn assembly.
Trim Tabs 2.0: The airplane has always pulled slightly to the left, ALWAYS in level cruise flight. A balsawood wedge is going to be glued to the rudder to attempt to correct the problem. Flight test to follow.
Brake Pedals: Everything is adjusted perfectly, what with the new right brake cable and all. The pedals do have a lot of wobble in them so we are going to slide them off and either purchase or have made some bronze bushings to take up the slack. The hope is that the brake pedal bosses are not out of round. There appears to be a lot of ‘meat’ on the pedals so bushing them should not be an issue. It’s not a make-or-break thing because it appears the brakes work great (We’ll find out when we do our first run-up). It’s just one more little thing that’s not ‘just right.’
Lower Cowling: One Dzus fastener needs a new backing wire. I hate how every time you do an oil change the one fastener falls out…and someone always seems to kick it into the corner of the hangar when lowering the cowling.
337: Mechanic is talking with the FAA now about the upgrade to the 8.00x6 tires. FAA said something to the effect that “…the brakes on that Taylorcraft are pretty weak for larger tires…” We’ll see what happens. (Multiple 337’s from other T’s with 8.50x6 wheels were sent along with my paperwork.)
Cockpit, Floor and Kick Panels: My gosh, it looks like the floor panels are worn-out…shucks, might have to replace them….oh, what, they don’t make them anymore? Oh darn, might have to make my own manufactured parts that ‘meet or exceed’ the standards of the original ones…from carbon fiber maybe…. It’s not like I weighed the originals and discovered that I’d save almost 4 lbs. switching to the carbon fiber parts or anything. Not suspicious at all. (Hmmm…I wonder how much the DOORS weigh?)
Sat Jan 25, 2025 7:33 am
Re: Taylorcraft 2024 Annual Day-by-Day
Final 2 Days:
As I heavily assisted with the annual this time, the last day was a FULL day of installing all removed panels. The sling-style seat was unlaced to provide access to the bottom of the cockpit, ELT, and landing gear bungees. Re-lacing took some time…always more time that you’d think.
Brakes: Under the centerline of the cockpit floorboards a phenolic block was epoxied under the location where the right-hand brake cable (replaced) was chafing against the centerline stiffener.
Aerodynamics: Never one to be satisfied with the status quo we did some experimentation with elevator and rudder gap seals. There are some rumors floating around out there about some benefits to be had in this area so I am curious to see what can be done. After installing the two plexi inspection panels on the tail, to either side of the elevator control horn, I realized that I should taper the leading edge of each panel. Each panel is either 1/8” or 3/16” thick with a nice square leading edge. It’d be a shame to install gap seals but then leave those two very UN-aerodynamic panels unaltered. I also noticed that there is a sizeable gap between each horizontal stabilizer and the fuselage that could be sealed somehow. No fairings back in 1946 I guess. The trick is how to do it in the least conspicuous (and perhaps legal) way… I thought about VG’s in the future but some of the vintage crowd here have very vocal opinions. My airplane was completely restored 15 years or so ago and looks like a hangar queen and I have heard some audible gasps from the old-timers about VG’s ruining the whole retro look…wait until they see the LED nav lights I have planned….
Electrics: Since the plane was in for annual already, and it is a terribly cold and windy January, I made a command decision and we ended-up running wires out to the wingtips for future nav lights…and it took 6 hours. I should have said nav/strobes. I am impressed by Aero LED’s line of lights…especially in light of the fact that they have the all-in-one wingtip lights that forgo the need for the rear white position light. The low amperage draw of the LED’s is a bonus. Funny thing is I‘m not really one for night-time flying. I love it but often ponder the concept of flying at night in an 80 year old airplane over the woods of Wisconsin. I’ve argued it up and down in my mind and it really comes down to the flexibility offered with lights when you leave a little later than you wanted to from a distant airport or encounter a little more headwind than expected on the way home (I always have a headwind). I have more than a few times started glancing at that cool Garmin watch with all the features, wishing it would just tell me when the end of civil twilight occurs…and wind-up greasing it in with 5 minutes to spare before darkness. Also, even though more and more folks are looking at their ADS-B display rather than out the window these days I think that maximum visibility with lights is never a bad thing.
Anyone with a Taylorcraft is probably aware that the factory installed wires in the wings and out to the tail if the airplane was ordered with this option (mine was). Unless anyone has ever really looked into the wings of the BC12-D, you might not be aware that there is only ONE wire in there and that the old service manual states that any lights should be grounded to the airframe. Now, where the ground is going to travel out from the wingtip and into any battery through the two wood spars I would like to know. Maybe via the wing ribs and across the aluminum leading edge and then through the wing attach fittings?! So we ran wires…four of them per the Aero LED installation guide, all color-coded to match their Model 660 nav/strobes. We used the old single wire as a wire-puller to get the new wires through all the rib grommets. Once we got to the fuel tanks we had to then route through the leading edges and then through into the cockpit. *Special Note: The wingspan of a BC12-D is 36 feet, add some twists and turns and a plunge down to a floor-mounted battery and that 50’ of wire I ordered is just enough. Get 60’ of wire and spare yourself sweating it out at the end of the project! Oh, and an airplane that was originally wired at the factory in 1946 and then rebuilt probably does NOT have any wires passing through from the wing and into the cockpit anymore. Ask me how I know.
The plan for the battery is to find or make a replica of the OEM battery box and install it on the floor between the pilot and passenger as per original. Or maybe I’ll just call it “uninstalled equipment” (I don’t have a generator and don’t plan on getting one) and Velcro it to the floor like in the Space Shuttle or whatever and call it good. (Don’t criticize, my brother-in-law is a Skunkworks engineer and they have Velcro that you could hang from the ceiling with…) The battery master solenoid, switches, and circuit breakers will go into the kick-panel just behind the passenger’s feet under the front of the seat (not totally under the seat cushion..on the kick panel)…maybe. I’d hate to clutter the original, classic 5-gauge panel with switches and breakers. I can’t remember if the switches and breakers are required to be in full view of the pilot or not. This is TBD. There will be room made for future things like maybe instrument bezel light rings, a USB charging outlet, and possibly ADS-B OUT so that I could fly into Canada or through Class C or B airspace…or for visibility to all the bozos that are not looking out the window at my fancy LED strobe lights. Or maybe enable me to take a week’s vacation to give me enough time to climb above 10,000’ and into ADS-B airspace in the Taylorcraft?
DISPLAY OPTIONS
Who is online
Users browsing this forum: No registered users and 0 guests
Latest Features
-
Live to Tell
A Minnesota pilot is surprised to learn that the sudden asymmetric drag of an out-of-rig ski can…Read More -
Creators
Working in some of the Yukon's most beautiful and remote environments, photographer Simon Blakesley captures aircraft in…Read More -
Aircraft Ownership and Maintenance
Upgrading to big tires can make a huge difference in backcountry performance, but with those gains come…Read More -
Tales from Yesteryear
In this tale from bush flying yesteryear, Don Cogger signs up to help Atlee Dodge Jr recovery…Read More


Latest Knowledge Base
-
Destinations
A regional guide with ideas for winter camping destinations in California, Nevada, New Mexico, and Arizona.Read More -
Aircraft
Finding an affordable aircraft that can handle the backcountry for $80K or less? A challenge for sure, but with the…Read More -
Aircraft
01.29.2018 - Zane - Updated tire diameter graphic to add 8.50x10 Guide to tires for use in the backcountry and off-airport landing…Read More -
Pilots
12.22.2013 - Initial article format Operating aircraft on skis and negotiating a snow-covered landscape is an entirely unique skillset and environment.…Read More


