It always amazes me to look at the engine room of any of these light aircraft, and think about the gazillions of hours represented by that apparent rats nest of wires, hoses, etc…….even though they are actually well organized.
You have my respect for doing that from scratch!
MTV
Amorphous Maule M7/M6 Rebuild Project
Fri Nov 25, 2022 7:22 am

Sun Nov 27, 2022 8:48 pm
Re: Amorphous Maule M7/M6 Rebuild Project
Looking great asa. I’m mounting my 930 at the top of my center stack in my 182 as you have. Sitting in pilot seat looking over the glare shield it seemed there was no other choice.
This gives me confidence I’ve made the correct choice.
This gives me confidence I’ve made the correct choice.
- skyward II offline
- Posts: 447
- Joined: Sun Jul 05, 2020 9:42 pm
- Location: Upland, CA/Etna, Wy
Thu Dec 01, 2022 8:42 am
Re: Amorphous Maule M7/M6 Rebuild Project
Little things...
Going without a headliner makes the back panel all the more important since it seals the tail off so got that knocked out. 5mm plywood with the remaining carpet on it.

Got the pilot/copilot kick panels finished as well. Copilot one was going to be minimal, just to protect the cables/pulley and keep stuff out of belly because theres a window there. But then I liked it so I mimicked it on the pilot side too. The inside of the boot cowl will be painted flat black. Have been trying to wrap up a bunch of interior panels so I can get them off to powdercoat, never know what the lead time is there until you drop off... 2 days, 2 months...


And a nice change of pace, building flap cables. Very nice to work on cables that fit on the bench instead of strung out on the floor. Unfortunately I had ordered the wrong turnbuckle ends so only got one of the 3 flap cables done. Seems stupid that they even make turnbuckles that don't work with the new style clips...

Going without a headliner makes the back panel all the more important since it seals the tail off so got that knocked out. 5mm plywood with the remaining carpet on it.
Got the pilot/copilot kick panels finished as well. Copilot one was going to be minimal, just to protect the cables/pulley and keep stuff out of belly because theres a window there. But then I liked it so I mimicked it on the pilot side too. The inside of the boot cowl will be painted flat black. Have been trying to wrap up a bunch of interior panels so I can get them off to powdercoat, never know what the lead time is there until you drop off... 2 days, 2 months...
And a nice change of pace, building flap cables. Very nice to work on cables that fit on the bench instead of strung out on the floor. Unfortunately I had ordered the wrong turnbuckle ends so only got one of the 3 flap cables done. Seems stupid that they even make turnbuckles that don't work with the new style clips...

Thu Dec 01, 2022 2:32 pm
Re: Amorphous Maule M7/M6 Rebuild Project
Did you consider doing an extended baggage? Once again, everything is looking really nice. I like it without the headliner.
Joe
Joe
Thu Dec 01, 2022 5:29 pm
Re: Amorphous Maule M7/M6 Rebuild Project
asa, a couple points that might help
good work.
That cold tailcone air does sneak up front along the left side and under the floor, so it does need to be sealed. The door catch outside protrusions also collect a lot of outside air.
Normally the control column gaitor has the laceing to the fore but maybe you'll like it aft instead.
Thankyou for the continued pictures.
- maules.com offline
- Posts: 561
- Joined: Mon Jan 09, 2006 9:35 pm
- Location: west coast
Thu Dec 01, 2022 9:09 pm
Re: Amorphous Maule M7/M6 Rebuild Project
the headliner in my M6 is shredded so I am really curious as to how you are going to finish yours. following the build and really enjoying it. thanks for the continued updates and pictures.
Roamer
Roamer
- Steelroamer offline

- Posts: 119
- Joined: Fri May 09, 2014 3:10 pm
- Location: Kenora
- FindMeSpot URL: https://maps.findmespot.com/s/D8VB
- Aircraft: maule M6 on Floats
Sat Dec 03, 2022 8:30 am
Re: Amorphous Maule M7/M6 Rebuild Project
Steelroamer wrote:the headliner in my M6 is shredded so I am really curious as to how you are going to finish yours. following the build and really enjoying it. thanks for the continued updates and pictures.
Roamer
I too am curious how I will finish it haha. What you see in pic is about it. The inside of top orated will be visible but sides will have interior panels. Panels will get powder coated and some edge trim but otherwise they’re done. Will I like it? Who knows. I left the headliner provisions in place in case not.
Sat Dec 03, 2022 9:35 pm
Re: Amorphous Maule M7/M6 Rebuild Project
Both horizontals mounted! Stubs filled with silicone per Maule SB. New stainless struts. Everything fit up well, used anti-seize in the slip joints.These new couple pictures show what lighting change can do to the contrast of oratex tapes. Since the weave density is slightly different on the tapes vs the fabric, they catch the light different even though they are exactly the same color in person.

Both elevators complete, balanced (didn't have to do anything, all 3 control in spec), and ready to be mounted. Waiting on hinge pins to arrive Wednesday.

It's the small things... Like this little cable cover thingy. Maule just uses a little piece of leather, but since the cable moves up and down (rudder pivot is not vertical), it wears in the fabric. Idea stolen from Andy Young. These and the trim tabs in the other pics are painted with a silver paint I found that matches the fabric VERY well. Lucky to have found it.

Wing root/skylight closeout panels. Before/after.


Both elevators complete, balanced (didn't have to do anything, all 3 control in spec), and ready to be mounted. Waiting on hinge pins to arrive Wednesday.
It's the small things... Like this little cable cover thingy. Maule just uses a little piece of leather, but since the cable moves up and down (rudder pivot is not vertical), it wears in the fabric. Idea stolen from Andy Young. These and the trim tabs in the other pics are painted with a silver paint I found that matches the fabric VERY well. Lucky to have found it.
Wing root/skylight closeout panels. Before/after.
Mon Dec 05, 2022 10:24 am
Re: Amorphous Maule M7/M6 Rebuild Project
Looking good! I hope I can see this plane in person someday.
- mobileandmonitoring offline
- Posts: 22
- Joined: Wed Jul 08, 2020 11:07 am
- Location: Homer
- Aircraft: Maule M-6-235
Tue Dec 06, 2022 8:35 pm
Re: Amorphous Maule M7/M6 Rebuild Project
mobileandmonitoring wrote:Looking good! I hope I can see this plane in person someday.
Thanks! Excited to have it up in Talkeetna this summer.
--------------
Amorphous is the name of the game in Asa land. Every day I work on a few very different items. Keeps it interesting. Also I just upgraded from iphone 8 to iphone 13 so maybe the pics will get marginally better.
Did a dry fit on the large back seat patroller window. It's a little nerve racking bending the acrylic around that fuselage tube but if it works it works. It's a huge window, 28" tall, and I am using tinted acrylic. Fabricated the angle surrounds that hold it in place so I could do a full dry run before painting the surrounds and siliconeing the whole thing in place, hopefully in the next couple days. Paint is drying now.

"Completed" the flap control system, at least until I can put the wings on. Everything is in place although I'll disassembly the torque tube when it's time to put the wings on. All new cables, new hardware, all parts fresh paint or powdercoat.

Had the hole in the exhaust for the old EGT probe welded so have been waiting on finishing the EGT probes. Did those today and finished the EGT/CHT wiring finally. My middle cylinders have a long slip joint which forced me to put the probe 4.25" down from the flange. This is outside the recommended 2-4" distance, but ya gotta do what ya gotta do.


Various progress/shop pics...


(concrete blocks under tail are tied on so I don't accidentally nose it over while it's light on the tail. Although I think the tail would fit the ceiling first).
Wed Dec 07, 2022 8:54 am
Re: Amorphous Maule M7/M6 Rebuild Project
asa wrote:.....finished the EGT/CHT wiring finally. My middle cylinders have a long slip joint which forced me to put the probe 4.25" down from the flange. This is outside the recommended 2-4" distance, but ya gotta do what ya gotta do. .....
Seems like the important thing is to have the probes the same distance down so you get apples-to-apples readings, which you have done.
BTW I'm really enjoying the photos you post of your progress, looks awesome so far!

Cessna Skywagon -- accept no substitute!
Wed Dec 07, 2022 10:25 pm
Re: Amorphous Maule M7/M6 Rebuild Project
hotrod180 wrote:asa wrote:.....finished the EGT/CHT wiring finally. My middle cylinders have a long slip joint which forced me to put the probe 4.25" down from the flange. This is outside the recommended 2-4" distance, but ya gotta do what ya gotta do. .....
Seems like the important thing is to have the probes the same distance down so you get apples-to-apples readings, which you have done.
BTW I'm really enjoying the photos you post of your progress, looks awesome so far!
I appreciate the support! And yes that was my philosophy on EGT location and mimics the JPI manual.
More progress.
Elevators are on. Built the elevator cables halfway in place, I'll go into the minutia on this in case anyone is curious about the smaller details of what happens. Had put one end on the cables and ran them through the fuselage but hadn't crimped on the front shackle yet. So I mounted elevators, adjusted hard stops to get the +30/-20 deg travel and set turnbuckles to middle of range. Assembled the front end of cable to the control horn and used cable clamps to hold the cable in a pseudo-crimped state. This allowed me to test control travel and all. Verified that the elevator stops in tail were hitting before the control column stops. Crimped cables and removed cable clamps. Used turnbuckles for fine adjustment and tensioning to the spec (25-45lbs).
Remaining work back on the tail... running trim cables, elevator gap seals, leading edge tape, N numbers.


Also got the left rear window in with the freshly painted (flat black) surround angles. RTV'd it all in but the surrounds are just cleco'd for now. I think it looks good. I like the level of tint.


Thu Dec 08, 2022 4:10 am
Re: Amorphous Maule M7/M6 Rebuild Project
Looks great! So I have to ask…. Is the garage door opening tall enough to get her out or are you going to have to remove the wheels or gear? 
Kurt
Kurt

Fri Dec 09, 2022 9:22 am
Re: Amorphous Maule M7/M6 Rebuild Project
G44 wrote:Looks great! So I have to ask…. Is the garage door opening tall enough to get her out or are you going to have to remove the wheels or gear?
Kurt
It'll be close! It's on car dollys with the tail jacked up now so it'll get about 4" shorter when it's just sitting on it's wheels. When I measured I have about an inch of clearance but am fully prepared to take the wheels off if needed. To get it in at the start of the project, it was on 31's and standard gear and it fit with the 31's mostly deflated. Now it's on 850's with extended gear. It helps that there is a 2" drop off right outside the door. Since the high point is behind the wheels, the wheels drop off prior to the high point coming to the door so that's 2 free inches. The benefits of having it at home in a garage connected to my kitchen and living room far outweigh the space restrictions haha.
-----------------------------
Trim cables built. Had that all totally done but then put on the trim wheel and decided it had too much wobble for me so I ordered a new one from Maule. Am going to try to drill and install a bushing on my wobbly one but for a couple reasons that may not be totally fruitful. Building the trim cables in place was fairly easy, but different since the movement stops are at the control, not at the trim tab. I set tab to middle of movement range (NOT neutral or aligned with elevator, middle is 13deg down). Set sprocket/chain/control in middle of range as well as turnbuckles. Locked all that in place temporarily then built the cables and crimped. Tightened both turnbuckles the same amount to tension and they came out perfect with the right range of motion.
(In this pic the flap bolts do not have cotter pins)

Had a late night end-of-work-day urge to sit in it for the first time so I bolted in the seat. I've decided upholstery will be phase 2 of the project, along with painting the wings. Current upholstery is in good condition but dirty and not the color I'd choose but not terrible. Goal is to get her flying in February and I think I'm good track for that with my current scope.


Stop asking to buy my crocs, they aren't for sale.
Fri Dec 09, 2022 12:53 pm
Re: Amorphous Maule M7/M6 Rebuild Project
Thanks for describing your strategies for accomplishing these various tasks. You’ve obviously done a lot of research and planning on how to get stuff done properly….great lessons.
Looking forward to hearing how it flys. At one point in my career, I was given the keys to a brand new M-7-235 on floats to evaluate for our missions. That plane was equipped with the Patroller doors and rear windows. Visibility from it was amazing, front or back seat.
MTV
Looking forward to hearing how it flys. At one point in my career, I was given the keys to a brand new M-7-235 on floats to evaluate for our missions. That plane was equipped with the Patroller doors and rear windows. Visibility from it was amazing, front or back seat.
MTV
Sun Dec 11, 2022 7:13 am
Re: Amorphous Maule M7/M6 Rebuild Project
Maybe you already mentioned it it and if you did I apologize if you did but what are your plans for the wings? Prop? Are you going to put some sort of trim stripe on the silver? Fun following along.
Kurt
Kurt
Sun Dec 11, 2022 8:03 am
Re: Amorphous Maule M7/M6 Rebuild Project
G44 wrote:Maybe you already mentioned it it and if you did I apologize if you did but what are your plans for the wings? Prop? Are you going to put some sort of trim stripe on the silver? Fun following along.
Kurt
I want to repaint the wings but couldn’t find a shop to do it in time so for now they will just get bolted back on as-is and I’ll fly it to a paint shop when I find one to do it. So they won’t match but they’re great condition. Only thing I’m doing to them now is new wiring, LED lighting all around, and new aileron cables.
Prop - I have a fresh rebuilt 82” Hartzell. Previous owner had it overhauled immediately before I bought it. It’s been sitting in my living room on a bucket for 8 months.
Stripes - I haven’t decided, but there will likely be something.
Sun Dec 11, 2022 10:48 am
Re: Amorphous Maule M7/M6 Rebuild Project
Asa,
I realize you have a lot of work to do, but…..I HIGHLY recommend you essentially double the number of rivets in the top wing skins, or at least ones you can reach. Two friends of mine were killed in an M-7 when the top wing skins departed in flight.
In my opinion, those top skins aren’t stuck good enough.
MTV
Sun Dec 11, 2022 12:38 pm
Re: Amorphous Maule M7/M6 Rebuild Project
mtv wrote:Asa,
I realize you have a lot of work to do, but…..I HIGHLY recommend you essentially double the number of rivets in the top wing skins, or at least ones you can reach. Two friends of mine were killed in an M-7 when the top wing skins departed in flight.
In my opinion, those top skins aren’t stuck good enough.
MTV
I will look into that, but unlikely my mechanic would ever sign that off without paperwork.
This got me really curious so I googled it. I assume it’s this one?
https://aviation-safety.net/wikibase/40608
A very sad story, looks like the factors had already piled up against them and the wing skin was the final one. Sort of eerie, that was N5656A, my last M7 was N5656L, also on floats in AK during that time.
Sun Dec 11, 2022 2:42 pm
Re: Amorphous Maule M7/M6 Rebuild Project
Finished the remaining sills for the big window which wraps up all the interior pieces. Final fit check with everything then pulled it all out to go to powdercoat. Haven't fully decided on color yet but my baseline is black to match the inside of the oratex. It will make the cargo area dark, yes, but also the whole damn plane is windows so maybe I'll survive. Sills around doors and windows will remain bare aluminum for now. Will browse through colors at the powder shop tomorrow and might change my mind. The pics below represent how the interior will be when done - nothing up top.


Got my seats out, fixed the fiberglass on the pax seat, repainting frame, and cleaned the upholstery on all of them. They were disgusting from being a workhorse in montana. They won't match but they're in great condition!

Leaving for a trip to South America tomorrow so no work for 10 days or so.
-asa
Got my seats out, fixed the fiberglass on the pax seat, repainting frame, and cleaned the upholstery on all of them. They were disgusting from being a workhorse in montana. They won't match but they're in great condition!
Leaving for a trip to South America tomorrow so no work for 10 days or so.
-asa
DISPLAY OPTIONS
Who is online
Users browsing this forum: No registered users and 0 guests
Latest Features
-
Live to Tell
A Minnesota pilot is surprised to learn that the sudden asymmetric drag of an out-of-rig ski can…Read More -
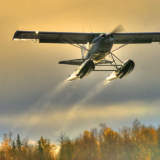
Creators
Working in some of the Yukon's most beautiful and remote environments, photographer Simon Blakesley captures aircraft in…Read More -
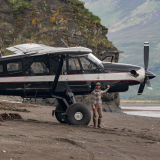
Aircraft Ownership and Maintenance
Upgrading to big tires can make a huge difference in backcountry performance, but with those gains come…Read More -
Tales from Yesteryear
In this tale from bush flying yesteryear, Don Cogger signs up to help Atlee Dodge Jr recovery…Read More


Latest Knowledge Base
-
Destinations
A regional guide with ideas for winter camping destinations in California, Nevada, New Mexico, and Arizona.Read More -
Aircraft
Finding an affordable aircraft that can handle the backcountry for $80K or less? A challenge for sure, but with the…Read More -
Aircraft
01.29.2018 - Zane - Updated tire diameter graphic to add 8.50x10 Guide to tires for use in the backcountry and off-airport landing…Read More -
Pilots
12.22.2013 - Initial article format Operating aircraft on skis and negotiating a snow-covered landscape is an entirely unique skillset and environment.…Read More


