Backcountry Pilot • One more Cessna interior project

One more Cessna interior project

Aircraft building and project-level overhaul forum -- Kitplanes, experimental amateur-built, homebuilding, or even restoration of certified aircraft.
64 postsPage 3 of 41, 2, 3, 4

Re: One more Cessna interior project

jrc111 wrote:Does anybody know where to get the shoulder harness belt hardware that clips on to overhead hooks? Great pictures and job!

Thanks, Ron

Hooker Harnesses uses a piece of hardware that looks very similar and might work. I've also seen them come up occasionally sites like Beegles eBay store, Texas Air Salvage and Flying Fish.

-DP

Image
Last edited by denalipilot on Sun Jan 31, 2016 3:45 pm, edited 1 time in total.
denalipilot offline
Supporter
User avatar
Posts: 2789
Joined: Mon Oct 15, 2007 4:53 pm
Location: Denali
Aircraft: C-170B+

Re: One more Cessna interior project

McFarlane will have heater control cables for you. If you can't find what you're looking for on their website, then give them a call. They'll set you up.
Pinecone offline
User avatar
Posts: 996
Joined: Thu Jun 11, 2015 6:37 pm
Location: Airdrie
Aircraft: Cessna A185F

Re: One more Cessna interior project

Thanks for the cable thoughts. I have scoured Mcfarlanes site and can only find the carb heat and cowl flap cables. I already bought the cowl flap cable and have ordered the carb heat cable so all PMA'd parts where it counts. Now, will try thto phone call route tomorrow.
And, thanks for the photos of your good work! keep them coming!
flyingzebra offline
User avatar
Posts: 479
Joined: Sat Jan 24, 2009 4:53 am
Location: Northwest Washington state
Aircraft: Cessna Skylane 182 N3440S, Aviat Husky N2918L

Re: One more Cessna interior project

With some effort, I was able to salvage my old original cables ok.
The $500 price tag from Cessna for a new cowl flap cable was good motivation!
Being spiral wound coil covered, trying to pump cable lube with an ATV cable lube kit
had limited success due to the leakage through the contaminated coil.
My successful technique?
For the split cowl flap in my 54'180, I coiled it in a circle secured with tywraps.
I soaked the cable in diesel fuel, using the oil drain tray I usually use for changing the oil on my truck oil. After soaking, I was able to operate the cable reasonably well. I then rinsed the cable clean with avgas. From Aircraft Spruce I ordered 1/2" adhesive lined heat shrink #11-11540 and using my heat gun I covered the clean spiral wound cable shroud. At that point, I could then successfully inject fresh lube up the entire length of the cable with my ATV cable lube kit.
Works really well now ...
54c180 offline
User avatar
Posts: 56
Joined: Wed Nov 11, 2015 4:25 am
Location: Melfort
Aircraft: C-180

Re: One more Cessna interior project

Good thinking, I'll have to remember that procedure.
Some of the new cables do have an improvement, though- Teflon lining.
However, I installed a new Teflon-lined carb heat cable on my old C150/150TD, and discovered that it had a problem due to being too slick-- it would self-apply, usually on takeoff. Not good!
I fixed it by disconnecting the airbox end, pulling the knob out until some cable showed, then putting a small kink in that cable to add some friction. Worked fine after that.
hotrod180 offline
Supporter
User avatar
Posts: 10534
Joined: Wed Jan 26, 2005 11:47 pm
Location: Port Townsend, WA
Cessna Skywagon -- accept no substitute!

Re: One more Cessna interior project

On older C180 cabin air controls, this is what I have gleaned from a bunch of phone calls and research: Nobody carries any of the cabin controls except Yingling and they only carry 0411090-22 which is cabin heat. They also carry 0411090-29 which is the parking brake cable. Nobody carries 0411090-13 which is cabin air. However the 0411090-29 cable is 53", longer than the 0411090-13 which, by the drawings, is 46". This will work in place of the cabin air cable except that it has a 3 3/8" throw where the 0411090-13 has a 4" throw. What I think I am going to do is install the parking brake cable (0411090-29) in place of my cabin air by cutting it to length and setting it up so that if will close the cabin air (and thereby isolate the engine bay from the cockpit in a fire case). the only downside is that it will be 5/8" short of fully open out of the 4" travel range.
So now I'm looking for information about installing an ignition switch with a start position. There are no STC's for this listed on the FAA site for the 180. Any thoughts?
flyingzebra offline
User avatar
Posts: 479
Joined: Sat Jan 24, 2009 4:53 am
Location: Northwest Washington state
Aircraft: Cessna Skylane 182 N3440S, Aviat Husky N2918L

Re: One more Cessna interior project

0411090-29 (parking brake) $92.40
0411090-22 (cabin heat) $118.13
Yingling
flyingzebra offline
User avatar
Posts: 479
Joined: Sat Jan 24, 2009 4:53 am
Location: Northwest Washington state
Aircraft: Cessna Skylane 182 N3440S, Aviat Husky N2918L

Re: One more Cessna interior project

flyingzebra wrote:...So now I'm looking for information about installing an ignition switch with a start position. There are no STC's for this listed on the FAA site for the 180. Any thoughts?


I'm curious why you want to do this. I've always preferred the ignition switch and starter button to be separate. You can turn the engine over with the mags cold to see if the oil pressure comes up, to suck some gas into the engine, or whatever. Other than maybe saving whatever little room the starter button takes up, I can't see why I'd ever do this. Different strokes for different folks though.
hotrod180 offline
Supporter
User avatar
Posts: 10534
Joined: Wed Jan 26, 2005 11:47 pm
Location: Port Townsend, WA
Cessna Skywagon -- accept no substitute!

Re: One more Cessna interior project

So, here's my "duh" moment and confession: I really hadn't thought of that.
I was just mostly thinking about making the old girl feel all updated and new.
flyingzebra offline
User avatar
Posts: 479
Joined: Sat Jan 24, 2009 4:53 am
Location: Northwest Washington state
Aircraft: Cessna Skylane 182 N3440S, Aviat Husky N2918L

Re: One more Cessna interior project

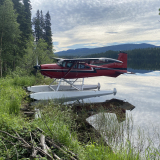
OK, time for an update. Life, as always, seems to get complicated just when you were thinking you had some spare time #-o . In spite of a trip to Texas to get our old house ready for sale, and a trip to Alaska for some job interviews, there has been some progress.

Some things i have learned along the way for anyone else that might want to try taking on this small project:

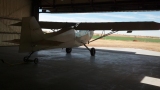
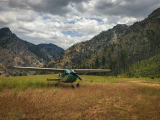
Keeping the plane ready to fly was the right choice. Not only has it kept the pressure down on trying to get the work done as fast as possible so i could get back into the air, having it ready to fly has allowed me to meet the unanticipated twists and turns our lives have faced this spring. It has meant some repetitive disassembly/reassembly/disassembly, but in the long run, well worth it. It is very noisy, thank goodness for noise cancelling [-o<

After trying many chemicals, scrubbing platforms and techniques, i have found that MEK and paper towels are the cheapest and most efficient combination for removing the petrified baby diarrhea Cessna felt would be a great idea to paint all over the interior. They also work best for removing the adhesive sprayed/brushed over the petrified baby diarrhea. The best technique seems to be a spray bottle with MEK, spray dampen the paper towel and spray the surface to be cleaned, wipe till that area of the towel is saturated with petrified baby diarrhea and refold to a clean area, spray and repeat x 40-50 hours, piece of cake.

For adhesive applied to bare aluminum, 3M adhesive remover works best. Here a rag works best, dampen with adhesive remover and hold to surface for several minutes (because most of the adhesive is on the overhead :roll: ) Here is where you really want your beer handy so you have something productive to do while you wait.

Rigging a fan to circulate the air in the back of the plane while using the MEK, good idea. Even with a good mask, i think i lost a few more brain cells till i finally figures this out :mrgreen:

SAS Safety 6605 Thickster Exam Grade Disposable Latex 14 Mil Gloves are the best! i went through LOTS of "chemical resistant" gloves, including some pretty pricey ones only to have them quickly fail after a few minutes of exposure to MEK, The Thicksters hold up great!

Over all, i'm glad i have taken this project, i have cleaned up a good bit of corrosion and it will be lighter and better looking in the end, But with a move back to Alaska in a month, the finished product is going to take longer than i anticipated.

The pile so far
Image

27#'s lighter
Image

So, now you know more than you ever wanted about Cessna interior renovation.

Chris
slowhawk offline
User avatar
Posts: 501
Joined: Thu Aug 07, 2008 8:33 am
Location: Nowhere

Re: One more Cessna interior project

Great info there. Please tell me you are not moving back to Alaska!!! Do tell-
SixTwoLeemer offline
User avatar
Posts: 1285
Joined: Thu Feb 07, 2008 10:53 am
Location: Wasatch Front
Altitude is Time…. Airspeed is Life!

Re: One more Cessna interior project

SixTwoLeemer wrote:Great info there. Please tell me you are not moving back to Alaska!!! Do tell-

Hey Lanny
Yes we are trading rocks and desert for rocks and water. The school situation for the kids has been tenuous from the start but we had an advocate in the principle that finally quit in December , since then, not so good. In February, when momma said "this is not working" the resumes went out and Alaska answered the call. I was looking at Soldotna, but Skagway has an exceptional school, so there we are.....

Sorry for the thread drift (on the thread I started)

Chris
slowhawk offline
User avatar
Posts: 501
Joined: Thu Aug 07, 2008 8:33 am
Location: Nowhere

Re: One more Cessna interior project

Seems life throws curveballs at the most inopportune times. Good luck with the move. I have an uncle in Skagway I hope so go see in the next few years.
whee offline
User avatar
Posts: 3386
Joined: Fri Jan 20, 2006 1:59 pm
Location: SE Idaho

Re: One more Cessna interior project

Glad to hear the interior project is making baby steps. It's a tedious endeavor.

Congrats on the new job and location change. I am sure grateful for all the work you have done making Escalante a great airport. I was hoping to make it there someday and tell you that in person. =D>
mountainmatt offline
User avatar
Posts: 2803
Joined: Sat Apr 11, 2009 2:43 pm
Location: Colorful Colorado
FlyingPoochProductions
FlyColorado.org

Re: One more Cessna interior project

Here are some before/after pictures.

Image

Image

Image

Image

I just have a few more panels to go and I will be done with the MEK =D>

mountainmatt wrote:Glad to hear the interior project is making baby steps. It's a tedious endeavor.

Congrats on the new job and location change. I am sure grateful for all the work you have done making Escalante a great airport. I was hoping to make it there someday and tell you that in person. =D>


Sorry I won't be there to meet you. I am bummed after all the work and effort that it will likely return to the status quo.

Chris
slowhawk offline
User avatar
Posts: 501
Joined: Thu Aug 07, 2008 8:33 am
Location: Nowhere

Re: One more Cessna interior project

First off I want to say thanks for posting this work in progress. This thread and others like this are filled with great information. Now a possibly stupid question. The fibrous looking coating that is such a struggle to remove (petrified gook) had what purpose do you think? Ok two stupid questions... Would it be an option to just clean up the bulkheads and paint them and leave the gooky stuff alone and adhere the Selkirk foam over it? Just a stupid question and I'm sure there is a good reason it must come out.

Thanks again!
Easy Riser offline
User avatar
Posts: 78
Joined: Sat Oct 04, 2014 5:39 am
Location: Selman
Aircraft: Rans S7
'67 Cessna 180 the African Queen

Re: One more Cessna interior project

Chris,

Looks like keeping the Alaska station wagon was the best thing after all. Since I am looking for an old 50's model Cessna this thread has been a good read for me too. Thanks for posting your progress here. I hope you and your family have a safe move and enjoy being back in AK.

Good luck!

Evan
Crzyivan13 offline
User avatar
Posts: 1811
Joined: Sat Nov 24, 2012 9:50 pm
Location: Ohio- OI27 Checkpoint Charlie
FindMeSpot URL: https://share.delorme.com/EvanDavis
Aircraft: 1957 Cessna 182A

Re: One more Cessna interior project

Easy Riser wrote:First off I want to say thanks for posting this work in progress. This thread and others like this are filled with great information. Now a possibly stupid question. The fibrous looking coating that is such a struggle to remove (petrified gook) had what purpose do you think? Ok two stupid questions... Would it be an option to just clean up the bulkheads and paint them and leave the gooky stuff alone and adhere the Selkirk foam over it? Just a stupid question and I'm sure there is a good reason it must come out.

Thanks again!


I have contemplated it's purpose for many hours as i have scrubbed and have not gained much enlightenment as to why it is there. My guess is an additional layer of sound proofing since it is only applied to the cabin area. Otherwise, it was a sadistic plot created by the good people of Cessna to cause future owners of their aircraft many hours of pain and suffering in their quest to remove it, those are the possibilities. You could just leave it and paint or Selkirk foam over it. Just painting would still look kind of funky i think. For me, i think it just came down to completeness, if i was going to do it, i was going to do it right, or maybe i just like the MEK fumes 8) .

Crzyivan13 wrote:Chris,

Looks like keeping the Alaska station wagon was the best thing after all. Since I am looking for an old 50's model Cessna this thread has been a good read for me too. Thanks for posting your progress here. I hope you and your family have a safe move and enjoy being back in AK.

Good luck!

Evan


Thanks Evan,
yes, i would have hated having your nice Zlin sitting out in the rain and wind in Skagway, and it would have been difficult to get the family packed inside #-o

Chris
slowhawk offline
User avatar
Posts: 501
Joined: Thu Aug 07, 2008 8:33 am
Location: Nowhere

Re: One more Cessna interior project

Here is some corrosion that i found under the black goo on an airplane i was considering.


Image

Image

Image

Image

Image

Image

Image

Its my understanding that the black stuff was for sound deadening and the yellow stuff is glue for the interior insulation.

I think it would be a mistake to just paint over the stuff and not properly remove it when redoing an interior on one of these old airplanes.
Crzyivan13 offline
User avatar
Posts: 1811
Joined: Sat Nov 24, 2012 9:50 pm
Location: Ohio- OI27 Checkpoint Charlie
FindMeSpot URL: https://share.delorme.com/EvanDavis
Aircraft: 1957 Cessna 182A

Re: One more Cessna interior project

I think it would be a mistake to just paint over the stuff and not properly remove it when redoing an interior on one of these old airplanes.


I would agree. Even tough i have not found much corrosion under the brown goo, you would never know with removing it. The biggest problem areas i found are where the headliner fabric was in constant contact with the aluminum. In for a penny, in for a pound. If i am going to make the effort to do it at all, i want to do it right, at least that's how i feel about it.

Chris
slowhawk offline
User avatar
Posts: 501
Joined: Thu Aug 07, 2008 8:33 am
Location: Nowhere

DISPLAY OPTIONS

PreviousNext
64 postsPage 3 of 41, 2, 3, 4

Who is online

Users browsing this forum: No registered users and 0 guests

Latest Features

Latest Knowledge Base