Backcountry Pilot • WingX for my 182

WingX for my 182

Have you modified your aircraft? STC? STOL Kit? Major rebuild from just a data plate?
29 postsPage 1 of 21, 2

WingX for my 182

Image

UPS brought me a package today. WingX is here, ya hoo! Talked with Willie @ Stene Aviation. He said to expect a 40hr install for the first timers. As a rule I don't do important projects uninterrupted. That means taking a weeks vacation from work to do this. If I can't do this job in the next few weeks then I plan on flying to Stene's and doing it over there. I studied the instructions and the job looks fairly simple. It's mostly just coming up with the time. Any suggestions, especially from those who has done this before?
Thanks........Sam
SkylaneSam offline
User avatar
Posts: 143
Joined: Thu Oct 06, 2011 7:38 pm
Location: Puget Sound & Idaho

Re: WingX for my 182

Whatever you decide, please chronicle the entire install here with some photies [-o< [-o< [-o<

Ive always wanted to see how these things attach. BTW.....how much delivered? and what year is your 182??
SixTwoLeemer offline
User avatar
Posts: 1285
Joined: Thu Feb 07, 2008 10:53 am
Location: Wasatch Front
Altitude is Time…. Airspeed is Life!

Re: WingX for my 182

Image

Shes a 1956
I'll photo document the entire process and post it as it progresses.
Delivered prices:
WingX package............$4995
STOL addition.............$ 175
Shipping...................$ 125
Shipping time.............. 4 days
SkylaneSam offline
User avatar
Posts: 143
Joined: Thu Oct 06, 2011 7:38 pm
Location: Puget Sound & Idaho

Re: WingX for my 182

Sam,

I just finished installing the Sportsman Cuff and Wing X on my 54 180. Here are a few pics. The plane is in the paint shop, but I can include some more when I get it back next week.

Initial fitting with duct tape to hold in position and painters tape to mark a line where the edge will be.
Image

Another view
Image

I have flint tanks, so I had to work around the filler cap door.
Image

Drilling out existing rivets from top spar to add stiffeners.
Image

New Stiffeners shown in place.
Image

Image

Completed
Image
skywagon offline
User avatar
Posts: 22
Joined: Thu Aug 09, 2007 8:42 pm
Location: Allen, Texas
FindMeSpot URL: http://share.findmespot.com/shared/face ... 0XVgxnU4Kq

Re: WingX for my 182

The first photos showed what appears to be the stock Cessna wing wing x and sportsman add on. The installed tips look like Wing X with the sportsman rib? What do you think of the wing tips with the lights in them? Are they good enough as a replacement to the landing light or are they just good enough to be recognition lights? Are they adjustable for landing / Taxi? With those tips it has to be one long wing span. 40ft?
Skydive206 offline
User avatar
Posts: 551
Joined: Wed Mar 25, 2009 7:54 pm
Location: Williamsburg, MO

Re: WingX for my 182

Skydive206: I think this is two different planes.

Skywagon: Curious why you didn't go for the one piece Sportsman version of the Wing-X, rather than the extra cuff?

Sam: Same question, although I'm guessing it's because you have a different STOL kit.

In any case, you will love it! I had to re-learn how to land, couldn't believe I needed to approach that slow...
skyjeep offline
User avatar
Posts: 88
Joined: Sat Mar 24, 2012 10:14 am
Location: Post Falls

Re: WingX for my 182

Thanks, I see that now. When I bought all my Wing Xs Paul had them built and sold them for each Stol kit. When I picked up my last set more than a few years ago he told me that was going to stop and just offer the kit with your STOL piece. I have one airplane pre camber, 1 plane pre but cambered end rib, and 1 cambered wing, all with sportsman. My wing x extensions fit fine (better than my tips) but if I installed the cuff pieces after the extension I could have made a better fit to my wing cuff.
Skydive206 offline
User avatar
Posts: 551
Joined: Wed Mar 25, 2009 7:54 pm
Location: Williamsburg, MO

Re: WingX for my 182

skyjeep,
When I ordered the WingX it wasn't available with a one piece Horton STOL cuff option. I wish it was.
Thus they sell a separate cuff to put on. They call it a Bushton. I haven't been able to tell the difference between it and the Horton.
Sam
SkylaneSam offline
User avatar
Posts: 143
Joined: Thu Oct 06, 2011 7:38 pm
Location: Puget Sound & Idaho

Re: WingX for my 182

Any chance we will ever see USA approval for the 175 series aircraft? Their web sight has been saying approval expected for as long as I can remember. Would make a good mod for my C175B/180CS
Dave
RangeFlyer offline
User avatar
Posts: 75
Joined: Tue Jan 20, 2009 5:23 pm
Location: El Paso
Dave R.

Re: WingX for my 182

Yeah, and what about the 170?.... maybe some day.
robw56 offline
User avatar
Posts: 3263
Joined: Thu Jan 18, 2007 9:30 pm
Location: Ward
Aircraft: 1957 C-180A

Re: WingX for my 182

When you have finished the install and flown a bit can you give a report. I'm wondering if I should do the same with my 182 and put some larger tires on so I can land on my 600' farm strip. I have been thinking of selling and buying a Maule to get into shorter strips. But starting to rethink this as I have a really nice plane and have spent a pile $$ on it.
Thanks, Scott
BCBushwacker offline
User avatar
Posts: 5
Joined: Mon Jan 14, 2013 8:54 pm
Location: Vernon, BC

Re: WingX for my 182

I like the Wing X but for a strip that short I would go with the Sportsman first and then Wing X. The Sportsman shows its performance best at airspeeds of 70 down to 45 mph. Makes the plane controllable and comfortable at those speeds where you will need to be to get stopped. The Wing X starts to shine at 75 up to 100. With the Wing X the plane feels like a stock 182 on takeoff (Flaps 0)and you struggle to get airborn at 65, plane climbs out at 70 and it feels like your on the edge, 80 the ground starts pulling away and your like "Wow!". With the Sportsman you can rotate at 55, the plane lifts off at 65, and climbs out at 70 and the whole time comfortable and stable. It takes time to trust the Sportsman and fly the plane slow. Put the 2 together and you can bring in and take out a lot of weight.
Skydive206 offline
User avatar
Posts: 551
Joined: Wed Mar 25, 2009 7:54 pm
Location: Williamsburg, MO

Re: WingX for my 182

robw56 wrote:Yeah, and what about the 170?.... maybe some day.


I called them last summer, and they said they are still intending to certify the kit on the 170/172/175 in the US, but the FAA has not been very helpful. It sounds like its not a real priority for the to beat their head against that wall. I understand completely, but I do hope they get it done someday.

MTV
mtv offline
Knowledge Base Author
User avatar
Posts: 10515
Joined: Sat Feb 25, 2006 1:47 am
Location: Bozeman

Re: WingX for my 182

Skydive206 wrote:The first photos showed what appears to be the stock Cessna wing wing x and sportsman add on. The installed tips look like Wing X with the sportsman rib? What do you think of the wing tips with the lights in them? Are they good enough as a replacement to the landing light or are they just good enough to be recognition lights? Are they adjustable for landing / Taxi? With those tips it has to be one long wing span. 40ft?


We put a set of RMD tips with lights on a 185 when we added the Sportsman cuff. Those tips are very good quality items. The lights work fine for bot recog and as landing lights. Great product.

MTV
mtv offline
Knowledge Base Author
User avatar
Posts: 10515
Joined: Sat Feb 25, 2006 1:47 am
Location: Bozeman

Re: WingX for my 182

I should have mentioned, I already have the Horton Stol kit as well as flap gap seals as well. I rotate at between 50 and 55 knots. Right now I can land in 600' and take of in about 800'. The WingX Stol extensions appeal to me as they claim 25% shorter takeoff and landings.
BCBushwacker offline
User avatar
Posts: 5
Joined: Mon Jan 14, 2013 8:54 pm
Location: Vernon, BC

Re: WingX for my 182

Hey Scott,
What is the elevation of your 600' farm strip? There's a couple of airfields out there: Vernon @ 1114' el and Kelowna @ 1421'el. I imagine your farm is somewhere around those elevations. Do you have any obstacles at either end?
I've got the Horton/flap & aileron gap seals on mine as well. They were all ready installed when I bought it. I feel the Horton improves the stock early Cessna cuff quite a bit. Figured I'd just leave them on for now and install the WingX.
I decided to do it myself. I'm going to break up the install into sections. I completed the R wings doubler, packer, inspection covers, etc. It was actually very easy. A big thanks to skywagon for the pictures. Reading an install text is one thing but I grasp the concept way faster seeing pictures.
Thanks skywagon :D
SkylaneSam offline
User avatar
Posts: 143
Joined: Thu Oct 06, 2011 7:38 pm
Location: Puget Sound & Idaho

Re: WingX for my 182

I'm about 1200' msl. I have no obstructions on either end. In fact if needed I could continue the ground run onto neighbours field but not with the stock tires and fairings. I used to fly into my brothers field. A one way 1200' field with 30' trees. It was a little sketchy but for tickling the tree tops once in awhile I never had any problems. I only flew out with 1 pax and half fuel. Was usually off in 800'. My other thought is to put on VG's. definitely cheaper. I love my plane but would like to keep it at the farm and also fly into some of these dirt strips I hear about. I was in Palm Springs when OregonMaule was there and would have loved to have gone out to the desert with the guys but could only sit back and read about the fun. :o
Cheers, Scott
BCBushwacker offline
User avatar
Posts: 5
Joined: Mon Jan 14, 2013 8:54 pm
Location: Vernon, BC

Re: WingX for my 182

Well the WingX project is complete, except for paint.
As SixTwoLeemer requested, I have pictures of the install.

After familiarizing myself with the blueprints. I first laid out the access holes on the bottom of the wings and cut them out with my dremel tool.
I used an aggressive tip which cut them out very fast.
Image

I switched to this tip for a more detailed/controlled cut along my mark.
Image

This flap sander did great for the final size of the hole and taking the sharp edge off.
I do NOT put the nut plate on at this time. I wanted the hole as big as possible to get my arm in the wing.
Image

Next, put the whip extension on the dremel. This made cutting the rib real professional with no mess.
Image

Here's where I cut the rib to make room for the doubler and packer.
I removed the rivet after cutting to prevent chattering.
Image

I laid out the doubler & packer to know exactly which rivets to drill out.
You also drill out in between each one after putting the packer & doubler in place.
Image

Deburring the holes & chip chasing between the spar & skin.
Image

Bolting the doubler & packer in place made it easy to drill the extra rivet holes.
Image

Another picture of the doubler and packer.
Image

I removed it all for final deburring & chip chasing. Then Cleco'd it all together.
Image

Rivet it all in place. Clean, vacuum & zinc chromate the wing bay.
Image

Another picture of the wing bay.
Image

I trimmed the nut plates to fit between the stringers.
Image

Cleco it all in place
Image

Squeeze rivet time
Image

Last, screw on the cover plates. It took me almost 10 hrs to do each wing. Next time It would only take a day to do both wings.
Now that I got it figured out. At times when I had questions, I called Stene Aviation. Willie helped me out which made this
whole job go very smooth. THANK YOU WILLIE!
Image

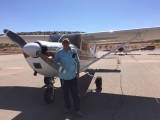
Next came the wing extensions. I flew the 182 to Stene Aviation for this part of the job.

Willie is marking out each stringer
Image

Truing up the extension
Image

Cleco in place
Image

Willie prefitting the Bushton Cuff
Image

Marking where to cut out for the aileron
Image

I did the simple stuff, like drilling/riveting in the nut plates.
Image

After cutting the inboard extension to clear the aileron.
Image

Preparing to install the Bushton Cuff and matching it to the Horton. This was the biggest pain in the butt.
IMO it's best just to have a Sportsman cuff.
Image

Trim & rivet the trailing edge in place
Image

Another little job for me. Relocate the strobe power supply.
Image

Final bolting of the extension to the wing.
Image

Attaching the wing tip.
Image

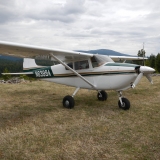
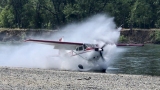
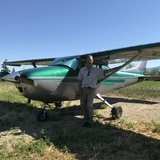
All done. Time to go flyin'
Image

Well, that's how to install WingX with a Horton Cuff.
I can't say enough for the help and support of Willie at Stene Aviation.
SkylaneSam offline
User avatar
Posts: 143
Joined: Thu Oct 06, 2011 7:38 pm
Location: Puget Sound & Idaho

Re: WingX for my 182

Dang.............Zane, why did my photos come out small....like thumb nails?
I copied the image URL out of my photo album. I think that's how I did it when I started this post and the first photos came out normal size.
When you click my photos in my album they open up bigger.
Hummm..........I did something wrong.
Sam
SkylaneSam offline
User avatar
Posts: 143
Joined: Thu Oct 06, 2011 7:38 pm
Location: Puget Sound & Idaho

Re: WingX for my 182

Looks great Sam. Thanks for the pics.
A1Skinner offline
Supporter
User avatar
Posts: 5186
Joined: Sat Jan 21, 2012 11:38 am
Location: Eaglesham
FindMeSpot URL: [url:1vzmrq4a]http://share.findmespot.com/shared/faces/viewspots.jsp?glId=0az97SSJm2Ky58iEMJLqgaAQvVxMnGp6G[/url:1vzmrq4a]
Aircraft: Cessna P206A, AT402/502/602

DISPLAY OPTIONS

Next
29 postsPage 1 of 21, 2

Who is online

Users browsing this forum: No registered users and 2 guests

Latest Features

Latest Knowledge Base