Backcountry Pilot • Tom's Supercub Restoration

Tom's Supercub Restoration

Aircraft building and project-level overhaul forum -- Kitplanes, experimental amateur-built, homebuilding, or even restoration of certified aircraft.
70 postsPage 3 of 41, 2, 3, 4

Re: Tom's Supercub diet

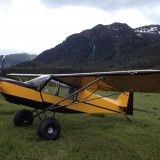
mountainmatt wrote:Looks great Tom. How do you like flying with the CGR-30?

I'll guess 1087.


I'd like to hear about the CGR-30 also.....
Jeff
Alpina23 offline
User avatar
Posts: 83
Joined: Wed Feb 20, 2013 7:46 am
Location: Grays Harbor
FindMeSpot URL: http://share.findmespot.com/shared/face ... xE66krEPHB
Aircraft: 1953 C170B
1947 Stinson Voyager

Re: Tom's Supercub diet

I LOVE the cgr. It's awesome. Had one egt probe go bad or was bad. Worked for three hours and went bad. Got to call EI. But the more I fly with the cgr the more I like it. Same with the trig radios. I find that I'm leaning more not. I put a vernier mixture in as well
Tom offline
Posts: 791
Joined: Mon Mar 03, 2008 12:17 pm
Location: Loudon NH
Aircraft: PA-18 7EC C-172

Tom's Supercub diet

Well that escalated quicklyImage
Tom offline
Posts: 791
Joined: Mon Mar 03, 2008 12:17 pm
Location: Loudon NH
Aircraft: PA-18 7EC C-172

Re: Tom's Supercub diet

So for a the last year or so I've been flying on a borrowed wing, while I rebuild mine. It had a bent spar and some busted ribs.
Image

This was my first time covering anything and I learned that what I thought ready to cover isn't really ready. I had a friend fly out from nc to help after Christmas. Lots of long nights and shiner kept us motivated
Image
Image

We were able to get it covered and the rib stitching laid out in a couple days. Now the fun part
Image

How come everyone leaves when it's time to stitch?
Image

Got a sweet new hat
Image

Next was taping
Image
Image
Then some brush coats of poly brush Image

Now to the paint booth
Image
Image
Image

Finally on to silver.
Image
Image
Image
I did leave out all the fun of going back over and sticking down any lifted pinks and sanding and spraying and sanding and spraying and now the wing is ready for paint. I'm going to paint everything at once.
Tom offline
Posts: 791
Joined: Mon Mar 03, 2008 12:17 pm
Location: Loudon NH
Aircraft: PA-18 7EC C-172

Re: Tom's Supercub Restoration

Should a let us know, happy to help out. Unless you're in TX
Bearhawk Builder offline
User avatar
Posts: 31
Joined: Fri Jan 31, 2014 6:38 pm
Location: Bethel

Re: Tom's Supercub Restoration

Bearhawk Builder wrote:Should a let us know, happy to help out. Unless you're in TX


Still in tx. Figure I will do it while I can and have the knowledge of Steve here.
Tom offline
Posts: 791
Joined: Mon Mar 03, 2008 12:17 pm
Location: Loudon NH
Aircraft: PA-18 7EC C-172

Re: Tom's Supercub Restoration

Decided to blast and prime and paint my steel parts in the wing. Glad I did
Image

Image

Image
Tom offline
Posts: 791
Joined: Mon Mar 03, 2008 12:17 pm
Location: Loudon NH
Aircraft: PA-18 7EC C-172

Re: Tom's Supercub Restoration

Got some new hinges from Dakota cub, off to blast the cad coating. Paint doesn't stick to them that good. Image
Pulled the windows and windshield and engine. [IMG]http://uploads.tapatalk-cdn.com/20160305/a4e1ac0b215f427f91fd3b157243da64.jpg[/and boot cowl IMG]
Image
Image
Stealth cub. Blends in with its environment.
Image

Cut the u channel off the front of the d window on the right
Image
Image
Piper welded that channel on and never primed under it. The top and bottom are welded and then the channel is drilled to hold interior panel screws.
Tom offline
Posts: 791
Joined: Mon Mar 03, 2008 12:17 pm
Location: Loudon NH
Aircraft: PA-18 7EC C-172

Re: Tom's Supercub Restoration

Looking a Blackrock's Baja pictures, it looks like Bearhawk doesn't do channels with unpainted tubing in the middle. Might be a better idea.
180Marty offline
Supporter
User avatar
Posts: 2313
Joined: Mon Jan 02, 2006 11:59 am
Location: Paullina IA

Re: Tom's Supercub Restoration

You're into it now Tom, aren't you glad you don't know what you don't know?
Bearhawk Builder offline
User avatar
Posts: 31
Joined: Fri Jan 31, 2014 6:38 pm
Location: Bethel

Tom's Supercub Restoration

ImageImage

Building a 3 piece boot cowl, nut plates everywhere. Titanium firewall
Tom offline
Posts: 791
Joined: Mon Mar 03, 2008 12:17 pm
Location: Loudon NH
Aircraft: PA-18 7EC C-172

Re: Tom's Supercub Restoration

Looks great! Wish I had those metal working skills.

Why are you fastening the boot cowl with nut plates? Lots of Bearhawk guys do the same but I can't think of any reason I'd want the boot cowl removable.
whee offline
User avatar
Posts: 3386
Joined: Fri Jan 20, 2006 1:59 pm
Location: SE Idaho

Re: Tom's Supercub Restoration

Interesting style of just polybrush under the tape area before laying tapes.... I always brush the whole wing to seal it, then lay the tapes.
Jon, I like the boot cowl removeable in case you've got some work to do up there. It doesn't happen often, but it is sometimes easier than standing on your head.
John
hardtailjohn offline
User avatar
Posts: 924
Joined: Thu Mar 16, 2006 7:06 pm
Location: Marion, Montana
God put me here to accomplish a certain amount of things...right now I'm so far behind, I'll never die!!

Re: Tom's Supercub Restoration

I'm doing the same. Nutplate mania. Tom are you doing them with countersunk screws? That's the one that gets me in terms of effort involved. Have to dimple for the flush rivets for the nutplate wings, and dimple for the countersunk screw, and relieve the former to accommodate the dimpled nutplate. Ugh.
Zzz offline
Janitorial Staff
User avatar
Posts: 2854
Joined: Fri Oct 08, 2004 11:09 pm
Location: northern
Aircraft: Swiveling desk chair
Half a century spent proving “it is better to be thought a fool than to open your mouth and remove all doubt.”

Re: Tom's Supercub Restoration

My instrument panel will be removable with a few screws and I can't think of anything else I'd need to work on that removing the boot cowl would allow me access to. I'm all ears though; I want to do it right the first time but I also don't want to do anything that isn't necessary.
whee offline
User avatar
Posts: 3386
Joined: Fri Jan 20, 2006 1:59 pm
Location: SE Idaho

Re: Tom's Supercub Restoratio

$00.02 USD

Removable boot cowls seems "Mo Beta Brah" (superior). There will be a day when... At least debugging a system you will be possibly thankful. :D

But, time is money and better to get her in the air fast. (Unsolicited opinion) YMMV

Either way, I have never seen a removable boot cowl but, wish I had several times! [-o<

I had a panel that would "Sink a Battleship" on my old PA23-250C. There were several side/forward panels that made maintenance much easier on avionics etc....
https://en.m.wikipedia.org/wiki/Piper_PA-23
8GCBC offline
User avatar
Posts: 4623
Joined: Thu Aug 05, 2010 11:55 pm
Location: Honolulu
Aircraft: 2018 R44
CFII, MEI, CFISES, ATPME, IA/AP, RPPL, Ski&Amphib ops, RHC mechanic cert, RHC SC— 3000TT

Re: Tom's Supercub Restoration

Set up the pilots side if the boot cowl to be removable in the S20. It's already been taken off, too. [emoji12]
gbflyer offline
User avatar
Posts: 2317
Joined: Sun Oct 14, 2007 5:35 pm
Location: SE Alaska

Re: Tom's Supercub Restoration

My goal is to have the lightest, best performing cub around, with an electrical system. We incorporate things into the rebuilds after working on Cubs and seeing what doesn't work. We had to do some avionics work on the last cub we built, and you pull the panel off and get behind the panel. It's great. Plus you can hang the engine and run all the cables and whatnot with out the boot cowl on. That's another plus.
Tom offline
Posts: 791
Joined: Mon Mar 03, 2008 12:17 pm
Location: Loudon NH
Aircraft: PA-18 7EC C-172

Re: Tom's Supercub Restoration

Thanks for the explanation Tom and everyone else. Sorry I derailed your thread a little.

I want to build the lightest, best performing Bearhawk around with an electrical system. All those nut plates and screws weigh ounces more than a rivet. Ounces make pounds[emoji3]. Plus they take time to install. I don't know what I'll do; making one side removable like GB did sounds like a good option since I can't make up my mind.
whee offline
User avatar
Posts: 3386
Joined: Fri Jan 20, 2006 1:59 pm
Location: SE Idaho

Re: Tom's Supercub Restoration

whee wrote:Thanks for the explanation Tom and everyone else. Sorry I derailed your thread a little.

I want to build the lightest, best performing Bearhawk around with an electrical system. All those nut plates and screws weigh ounces more than a rivet. Ounces make pounds[emoji3]. Plus they take time to install. I don't know what I'll do; making one side removable like GB did sounds like a good option since I can't make up my mind.


I think the weight of nutplates and screws is nothing in comparison to the extra effort. #-o
Zzz offline
Janitorial Staff
User avatar
Posts: 2854
Joined: Fri Oct 08, 2004 11:09 pm
Location: northern
Aircraft: Swiveling desk chair
Half a century spent proving “it is better to be thought a fool than to open your mouth and remove all doubt.”

DISPLAY OPTIONS

PreviousNext
70 postsPage 3 of 41, 2, 3, 4

Who is online

Users browsing this forum: No registered users and 0 guests

Latest Features

Latest Knowledge Base