Matt,
You're 100 % right on the BAS stuff, and those harnesses could save your life. They saved mine, and I've been a big fan since.
MTV
Project Retro Wagon - 180A
Mon Jul 08, 2013 6:26 am

Tue Jul 09, 2013 9:00 pm
Re: Project Retro Wagon - 180A
I'd like to upgrade to BAS harnesses in mine. Love the movement in them compared to fixed harnesses....but I know mine have been proven to work. I don't think putting BAS in would be too much of a hassle...it's safety related.

Wed Jul 10, 2013 4:23 am
Re: Project Retro Wagon - 180A
I am a BAS Harness survivor. Best mod you can have! Word has it that the Cherokee 140 crash last month in Medano Pass was probably survivable. Both front seat pax died of massive head trauma. No shoulder harnesses.......
- flynbeekeeper offline
- Posts: 372
- Joined: Fri Oct 19, 2007 8:01 pm
- Location: southern colorado
Tom
Sat Jan 04, 2014 8:19 pm
Re: Project Retro Wagon - 180A
This thread needs an update.
Keeping in line with my New Year resolution, I have decided to lose some weight, and gain some useful back. I can't just lay back and let Rob, Gary, and Greg have all the fun. It would be great to see 100+ lbs come off this already great 180.
Before I get started, I have a few questions.
1) The black glue/goo that is on the interior panels; is it really worth removing it if one is not interested in painting the interior? I do plan to add Selkirk 1/4" foam, but I would like to glue the foam directly to the durable black goo rather than removing it and painting over it with zinc chromate. From all my research, the black goo is non corrosive and a b***h to get off.
2) My current seats are retro, uncomfortable, and heavy. I weighed them the other day and discovered that all 3 weigh in at 77 lbs! I know there's 20-25 lbs I can lose here. I keep reading about removing the old Cessna steel springs and adding ceconite, but how much can one expect to lose? Can this be done on the stock rear Cessna seats? Anyone have any pictures of the seat uncovered showing the ceconite?
3) Flooring. I love the thought of the SCS rubber mat flooring, but the cost is high and the weight gains are minimal. Is there an advantage of rubber mat over carpet? I assume carpet is lighter. It seems a lot of these older retro planes have whatever berber carpet that fit the times. Mine is currently a multi-colored mustard berber that I would expect to see on "That 70's Show". Very heavy and would be better used in a 1970 Ford Econoline.
4) Ideas of rear headset jacks. I have a 1957 180 and I can't find a good, logical place to mount the headset jacks without having them in the way. I have seen a few place them in the middle of the rear bulkhead, but I just know my son will pull on the cords when given the chance. Any thoughts would be great.
5) How much should I budget for a panel and interior upgrade. HAHA! Kidding, I know it's going to exceed my time and wallet, but the gains will be worth it. (And I have read Bigrenna's thread at least 15 times; my wife says thank you Greg!)
Looking forward to any comments.
Matt
- mountainmatt offline

- Posts: 2803
- Joined: Sat Apr 11, 2009 2:43 pm
- Location: Colorful Colorado
FlyingPoochProductions
FlyColorado.org
FlyColorado.org
Sat Jan 04, 2014 9:52 pm
Re: Project Retro Wagon - 180A
In my 55 170b I made covers for the rear ashtrays with the headset jacks in them then installed the ashtrays upside down so you don't kink the cords.
tricycles are for little girls
Sat Jan 04, 2014 10:56 pm
Re: Project Retro Wagon - 180A
Wow. Good one.ccurrie wrote:In my 55 170b I made covers for the rear ashtrays with the headset jacks in them then installed the ashtrays upside down so you don't kink the cords.

Sun Jan 05, 2014 7:42 am
Re: Project Retro Wagon - 180A
Oh my God... here we go again!!! Good news on the decision bro (just make sure your wallet is full)
Some quick thoughts:
RE: Time - If you start pulling stuff apart, count on way way more time than you expect. You cant get around this. I flew my 180 home last November, pulled it apart on Jan 1st -ish, boldly discussing with my IA our flight to OSH 2013. (Now pushing to make OSH 2014.)
RE: Black Goo - There is typically two kinds of crap on the inside of these old Cessnas. A petroleum based black goo which was brushed on, and a hard glue that was sprayed on. Cessna used the black goo stuff for sound/corrosion proofing, and the hard glue to hold the fiberglass insulation.
Having stripped the interiors of two C100's now, I can honestly say in the pantheon of tasks that the removal of the black goo was really no biggie. It dissolves fairly easily with mineral spirits, and even easier with MEK. The hard glue is a different story and is a bit tougher to remove (although again not as big a deal as everyone complains.) The thing to think about is that the hard glue was often sprayed directly on top of bare alum, which, in rare cases promoted corrosion. Its good to get under there and look. Yes this stuff has weight, perhaps twice as heavy as paint, but I think the real reason for removal is 1) ascetics and 2) adhesion. If are going to shoot paint, then of course you need it gone. A good paint job is all about prep. If the surface is not smooth, then the paint job will suck.
I know you said you aren't going to paint, but If you plan on "gluing" a Selkirk type foam in, then you need it gone so the 3M has a perfect sub-straight to adhere to. As the goo is a petroleum material, no good glue will work on it. This means that you really should remove everything, which means that if there are bare alum spots left, you really need to paint. Sounds like you dont really care about the astetics, so my recommendation would be to remove it, clean it, and shoot a nice coat of epoxy prime in the interior as a good sealer. There is a nice white as well as a nice grey that you could leave. Of course if you do that, then following up after the prime 20 min later with a nice coat of Imron really isnt that big of a deal. : )
Net net... dont put glue right over anything old. If you do choose to remove it, please do your body a favor and use good protection and have PLENTY of ventilation.
RE: Carpet - This is a toughie. As with everything, there is a trade off. The lighter the material, the less the sound deadening and less the padding/protection. I have seen all kinds of "internet" hyperbole and all I can do is report on my findings. In both the C170 and C180, the old carpets removed were 11-12lbs each. I put a super light weight mat down which is about 2.5-3 lbs. Its pretty and durable, but if I were working the A/C or having folks (other than me) loading, I would get something more robust in there.
RE: Seats - Again, lots of hyperbole here. I redid both the seats on the 170 and 180. Both were completely stripped, refinished, and all steel springs removed. Im not sure what "ceonite" is, but Ron Matta of Aviation Creations installed what he calls nylon "blatters." On both aircraft I went with a heavier leather and two or three densities of foam. Net net is both seats are amazingly comfortable. The 180 seats were a bit more complex and the weight savings a bit less dramatic. I have to find my notes, but on the 180 I think I only saved 1-2lbs total. The 170 however was way more dramatic. These were the round backs and not square backs (I think what you have?) Doing the same process, I saved 5-6lbs each seat. If I had gone with cloth rather than leather, I would have saved a bit more. On your airplane (for weight,) I would do it in a heart beat. For comfort, no question on both aircraft.

As far as the back seat goes, yes, you can put a blatter in and remove the steel. We all know back seats are boat anchors. They average 35lbs each and are a pain. I didnt do my stock seat nor was I able to weigh the subframe, but if I were to take a random guess, I bet one could get a stock bench (with cloth) down to 22lbs easy.
RE: Headset Jack - Originally I had a 4 place, but went ahead and upgraded to a 6 place. Both rear pairs were put in the "B" pillar gusset just under the middle (in your case rear) window. Later models had a square relief cut into this part where a jacks install. We fabbed two angle brackets and riveted them to the gusset. Since there is no interior, the jacks slid in longitudinally and are super out of the way. The 5th and 6th place jacks were located in the same place to save wire weight routing them aft. The reality is that rarely will I have the 3rd row seat installed, and when it is, there is plenty of room to run your headset wire forward to that location. The left side also has a 1/8 mini jack for rear pax isolated audio. The pic is really bad and I had to enhance it, but you get the idea...

RE: Panel - Yes... New panel = $$$. But this is one place I saved tons of weight. At some point I gave up keeping track, but I think the net savings in my panel upgrade was in the 25lb range. I would recommend two things. One, panel mounted Garmin 796. Two, Electronics International engine monitor. The MVP-50 is the bomb, but also you can now install their new CGR-30. (they have their winter rebate going on. $300 on the CGR and $400 on the MVP. And if you wait till OSH, the savings is even bigger) The main reason to install the E.I. product is the ability to remove most of the junk in the Type Data Cert. MP/RPM, OP, OT, carb Temp, fuel gauge, etc etc... Also give you great CHT/EGT and total engine/fuel monitoring... Amazing bit of kit.
RE: Other weight savings - Firewall battery was a big one for me. Again I dont have my notes, but I think the net net by removing the stock battery/cables and moving it to the firewall saved me around 22lbs.
Selkirk w/ no panels is a good way to go. I never weighed a single 1/4 panel, but its about the same weight as the fiberglass that is removed. This means you save the weight of the removed panel. If I remember right, each panel I removed was about 2.5lbs. When you add em up, kick, door, pax, and baggage, you are in the 20lb range... hatshelf is another 2.5lbs... and dont forget the headliner! That was about 11lbs in both my 170 and 180.
Of course, as Rob has mentioned, if you are diligent, you can pull another 1-2lbs of gunk from the bowels, and probably 5lbs of old unused wiring... Lots to dig into if you are so inclined!
Final thought... Dont get to geeked out, but have fun with it. My philosophy: "As light as possible, as heavy as necessary."
Regardless, feel free to shoot me a PM or give me a call. Welcome to the club!
Some quick thoughts:
RE: Time - If you start pulling stuff apart, count on way way more time than you expect. You cant get around this. I flew my 180 home last November, pulled it apart on Jan 1st -ish, boldly discussing with my IA our flight to OSH 2013. (Now pushing to make OSH 2014.)
RE: Black Goo - There is typically two kinds of crap on the inside of these old Cessnas. A petroleum based black goo which was brushed on, and a hard glue that was sprayed on. Cessna used the black goo stuff for sound/corrosion proofing, and the hard glue to hold the fiberglass insulation.
Having stripped the interiors of two C100's now, I can honestly say in the pantheon of tasks that the removal of the black goo was really no biggie. It dissolves fairly easily with mineral spirits, and even easier with MEK. The hard glue is a different story and is a bit tougher to remove (although again not as big a deal as everyone complains.) The thing to think about is that the hard glue was often sprayed directly on top of bare alum, which, in rare cases promoted corrosion. Its good to get under there and look. Yes this stuff has weight, perhaps twice as heavy as paint, but I think the real reason for removal is 1) ascetics and 2) adhesion. If are going to shoot paint, then of course you need it gone. A good paint job is all about prep. If the surface is not smooth, then the paint job will suck.
I know you said you aren't going to paint, but If you plan on "gluing" a Selkirk type foam in, then you need it gone so the 3M has a perfect sub-straight to adhere to. As the goo is a petroleum material, no good glue will work on it. This means that you really should remove everything, which means that if there are bare alum spots left, you really need to paint. Sounds like you dont really care about the astetics, so my recommendation would be to remove it, clean it, and shoot a nice coat of epoxy prime in the interior as a good sealer. There is a nice white as well as a nice grey that you could leave. Of course if you do that, then following up after the prime 20 min later with a nice coat of Imron really isnt that big of a deal. : )
Net net... dont put glue right over anything old. If you do choose to remove it, please do your body a favor and use good protection and have PLENTY of ventilation.
RE: Carpet - This is a toughie. As with everything, there is a trade off. The lighter the material, the less the sound deadening and less the padding/protection. I have seen all kinds of "internet" hyperbole and all I can do is report on my findings. In both the C170 and C180, the old carpets removed were 11-12lbs each. I put a super light weight mat down which is about 2.5-3 lbs. Its pretty and durable, but if I were working the A/C or having folks (other than me) loading, I would get something more robust in there.
RE: Seats - Again, lots of hyperbole here. I redid both the seats on the 170 and 180. Both were completely stripped, refinished, and all steel springs removed. Im not sure what "ceonite" is, but Ron Matta of Aviation Creations installed what he calls nylon "blatters." On both aircraft I went with a heavier leather and two or three densities of foam. Net net is both seats are amazingly comfortable. The 180 seats were a bit more complex and the weight savings a bit less dramatic. I have to find my notes, but on the 180 I think I only saved 1-2lbs total. The 170 however was way more dramatic. These were the round backs and not square backs (I think what you have?) Doing the same process, I saved 5-6lbs each seat. If I had gone with cloth rather than leather, I would have saved a bit more. On your airplane (for weight,) I would do it in a heart beat. For comfort, no question on both aircraft.
As far as the back seat goes, yes, you can put a blatter in and remove the steel. We all know back seats are boat anchors. They average 35lbs each and are a pain. I didnt do my stock seat nor was I able to weigh the subframe, but if I were to take a random guess, I bet one could get a stock bench (with cloth) down to 22lbs easy.
RE: Headset Jack - Originally I had a 4 place, but went ahead and upgraded to a 6 place. Both rear pairs were put in the "B" pillar gusset just under the middle (in your case rear) window. Later models had a square relief cut into this part where a jacks install. We fabbed two angle brackets and riveted them to the gusset. Since there is no interior, the jacks slid in longitudinally and are super out of the way. The 5th and 6th place jacks were located in the same place to save wire weight routing them aft. The reality is that rarely will I have the 3rd row seat installed, and when it is, there is plenty of room to run your headset wire forward to that location. The left side also has a 1/8 mini jack for rear pax isolated audio. The pic is really bad and I had to enhance it, but you get the idea...
RE: Panel - Yes... New panel = $$$. But this is one place I saved tons of weight. At some point I gave up keeping track, but I think the net savings in my panel upgrade was in the 25lb range. I would recommend two things. One, panel mounted Garmin 796. Two, Electronics International engine monitor. The MVP-50 is the bomb, but also you can now install their new CGR-30. (they have their winter rebate going on. $300 on the CGR and $400 on the MVP. And if you wait till OSH, the savings is even bigger) The main reason to install the E.I. product is the ability to remove most of the junk in the Type Data Cert. MP/RPM, OP, OT, carb Temp, fuel gauge, etc etc... Also give you great CHT/EGT and total engine/fuel monitoring... Amazing bit of kit.
RE: Other weight savings - Firewall battery was a big one for me. Again I dont have my notes, but I think the net net by removing the stock battery/cables and moving it to the firewall saved me around 22lbs.
Selkirk w/ no panels is a good way to go. I never weighed a single 1/4 panel, but its about the same weight as the fiberglass that is removed. This means you save the weight of the removed panel. If I remember right, each panel I removed was about 2.5lbs. When you add em up, kick, door, pax, and baggage, you are in the 20lb range... hatshelf is another 2.5lbs... and dont forget the headliner! That was about 11lbs in both my 170 and 180.
Of course, as Rob has mentioned, if you are diligent, you can pull another 1-2lbs of gunk from the bowels, and probably 5lbs of old unused wiring... Lots to dig into if you are so inclined!
Final thought... Dont get to geeked out, but have fun with it. My philosophy: "As light as possible, as heavy as necessary."
Regardless, feel free to shoot me a PM or give me a call. Welcome to the club!
- Bigrenna offline


- Posts: 2339
- Joined: Sun Sep 25, 2011 4:02 pm
- Location: New England
- Aircraft: C180H / C170B
www.bushwagoneast.com
www.avthreads.com
Sun Jan 05, 2014 8:19 am
Re: Project Retro Wagon - 180A
About 5 years ago we redid the seats in the 180 much like Gregs. They still look like new and this plane sits outside all day in the AZ heat.
You can lose more weight than Greg did, if you choose to go a little simpler, and maybe a little less comfy. It's all about the compromises. I love confor foam, tempur foam, etc... but didn't do it because of the weight (it's like a brick). I also went with a lighter / tighter fitting leather. OTOH, I had them slip seat heaters inbetween the cushion and leather. I'm a weenie in the cold, and love heaters in the truck, so what the heck...
I retained the round backs as well, even though they offered to give me a set of abandoned late model seats when I recovered them. Light is good... As I remember, they also had rear seats being similarly done when I did mine, but I can't comment to the weight savings, as I opted for the 206 mid seat style install.
Sadly the gentleman that did them passed away in a boating accident, but I believe his father (who started the business) is now running the show. They are on Falcon in Phoenix, I suspect you can find something local, but can fwd you their contact info if you'd like. One good thing about going this route is they are a repair station, and you will get all the burn certs and paperwork, if that is important to you.
Take care, Rob

Sun Jan 05, 2014 9:30 am
Re: Project Retro Wagon - 180A
I found some of my notes/pics.
RE: seat weight. IMO, the difference between a what materials you choose is not that big of a deal when compared with the point of the seat, which is to keep your ass comfy.
Here are some quantitative numbers:
C180 Non articulating seat w/ cloth upholstery and factory steel springs - 14.86lbs
C180 Articulating seat stripped- 10.01lbs
C180 Non articulating seat stripped - 6.46lbs
C180 Non articulating seat w/ leather, nylon blatters and multidensity foam - 14.7 lbs
C180 Articulating seat w/ leather, nylon blatters and multidensity foam - 19.1lbs
C180 Headrest w/ leather - 0.70 lbs
C170 round back seat w/ cloth upholstery, old school foam, steel springs, and lower surround - 15.2lbs
C170 round back seat w/ multi density foams, leather, nylon blatters etc... 9.8 lbs
Net net: If I could save 0.5-2 lbs on my pilot seat by not going with leather and by using thinner foam would I do it??? No way.
Hope this info is helpful.
Last edited by Bigrenna on Sun Jan 05, 2014 3:46 pm, edited 1 time in total.
- Bigrenna offline
- Posts: 2339
- Joined: Sun Sep 25, 2011 4:02 pm
- Location: New England
- Aircraft: C180H / C170B
www.bushwagoneast.com
www.avthreads.com
Sun Jan 05, 2014 12:04 pm
Re: Project Retro Wagon - 180A
Thanks for all the info gents.
That's a good idea on the ash trays, but I plan to remove them as I don't need them anymore. That was my first thought before I planned on removing panels.
Greg, thanks for all the info. That is exactly what I needed to hear on the black goo. The spray on glue will indeed be removed as my research indicated that is what is likely to lead to corrosion. This is primary on the posts and bulkheads and the goo is on the panels. It sounds like I will be better off to remove the black goo and paint. My only hesitation is I like to inspect the airframe from time to time, and very little of this airframe is zinc chromated. A year ago while shopping for a 180, I saw first hand how paint hides problems and I like the idea of "what you see is what you get". This is just a personal thing, and it sounds like I'd be better off to do it right. The pros of painting outweigh the cons.
Great info and numbers on the seats. This is exactly what I need to move to the next step. My front seats are the square, non-reclining style. A combination between your 170 and 180 seats (I believe, I need to remove the covering to see exactly what style I have.) Right now each front seat weighs 20.5lbs, so if I could get them down to 12-13, that would be fantastic.
Rob, I believe you went with a ceconite base and added foam/leather? Any idea what your front seats weigh? Thanks for the contact, I'll give them a call for a quote. I also envy your back 206 seats, perhaps something to think about in the distant future.
Greg, I believe you have that rubber mat contact in your 170 or 180 thread. Looks great, I'll give them a buzz when the time comes. Also, thanks for the details on the rear headset jacks, that gives me an idea. I know my 57' is a little different, but I'll brainstorm with my A&P and come up with something.
I have some ideas on the panel and I echo your importance of an engine analyzer and panel mounted Garmin. More on that later....
After a few week long XC week trips with the family this fall, an extended baggage and firewall battery has moved to the top of the mod list. I also promised myself I will be adding a 406 ELT this spring. Hopefully I can get the interior finished sooner than later and then work on the mods.
A year later, I can confidently say that the 180 was the right choice for my mission. My wife agrees too. We have been on more family trips and have flown more hours in the last 4 months than the previous 4 years. I need to tackle this project in stages as resources are limited and the ability to remain flying during periods is crucial. As with most things in life, this will be a balance. But I can no longer ignore the potential that awaits.
You you can see in this beginning of this thread, I promised myself I would fly the plane in the current configuration for a year and see what needs to change and what can remain. That time has passed and I have come to the sober conclusion that almost everything needs to change.
"As light as possible, as heavy as necessary." Noted, thx!
- mountainmatt offline
- Posts: 2803
- Joined: Sat Apr 11, 2009 2:43 pm
- Location: Colorful Colorado
FlyingPoochProductions
FlyColorado.org
FlyColorado.org
Sun Jan 05, 2014 4:22 pm
Re: Project Retro Wagon - 180A
Looks like you are going in the right direction.
For extended baggage, I would urge you to contact Hitchkock and get the Airglas carbon fiber kit over the Selkirk. A bit more expensive, but for a reason. Its is WAY WAY better made and much stronger. It also should fit the first time (unlike the Selkirk which will require tons of trimming. The best part.... it weighs about 5lbs less!
(I could certainly spend a bunch of your $$ very easily) But one place to also save weight is w/ the strobes. Swapping wingtip strobes with Aeroleds NSPs. My 180 had Whelen packs on each wingtip that weighed almost 5lbs each. The NSPs I replaced them with were mere ounces. The added benny is that they are so freaking bright!
RE: seats - I'm guilty of pimping Ron's name (he has become a friend,) but I would also call Aviation Creation and see what he would charge you for a lightweight seat. He's got some lighter weight cloth and would gladly use thinner foam. He's def competitive RE: price and uses only certified materials. He also does things like the double needle stitching and embroider in house. http://www.aviationscreations.com/ I scanned the "skywagon" logo from my parts book and tweaked it in Illustrator, then digitized it for the embroidery machine so Ron could stitch it. (I also have the Cessna one I did for the C170) Let me know if you want it.
- Bigrenna offline
- Posts: 2339
- Joined: Sun Sep 25, 2011 4:02 pm
- Location: New England
- Aircraft: C180H / C170B
www.bushwagoneast.com
www.avthreads.com
Sun Jan 05, 2014 5:26 pm
Re: Project Retro Wagon - 180A
Matt'
Couple things to consider:
When you move the battery from baggage to firewall (and I'd do sooner as opposed to later) also switch to the Odyssey battery....that alone will save you ten to twelve pounds, not counting the weight savings from wiring, box, etc. Atlee Dodge sells a battery mount for that.
Second, a friend has a pristine Cessna Airmaster that his Dad rebuilt. It had a leather interior. He put it on amphib floats, and weight was a big issue. He removed all that gorgeous leather and replaced it with some type of fake leather. He told me he saved forty pounds, and I honestly could not tell the difference. Do some checking..there's some cool stuff out there.
Third, get rid of that back seat and replace it with Atlee Dodge or BAS folding seats...MUCH more functional, and they CAN be lighter.
MTV
Sun Jan 05, 2014 7:37 pm
Re: Project Retro Wagon - 180A
Thanks Greg for all the insight and experience.
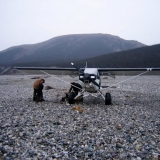
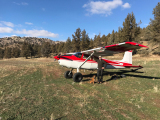
After going back and re-reading this thread, I feel like I should do a quick Alaskan Bushwheel update for the 31x13x6 bushwheels on a Cessna 180. I have approx 50 hours on the tires and 100+ landings on all types of surfaces (less than 3% on a hard surface). This is my experience and opinion, YMMV.
If I had to only pick ONE tire for my purposes, a 31 would not be it. For me and my mission, off airport landings are fewer and far between and landing on improved and unimproved airports and airstrips are becoming the norm. The 31 is simply overkill and the speed penalties are very noticeable on a 180. At 22 sq, the speed loss is about 10-12 mph TAS, which hits the clock and wallet at the end of the day. This may be the difference between beating a weather front moving through, skipping a fuel stop, or landing at dusk with just enough daylight at my non lighted home field. A few other things, climb performance is slightly decreased, and my biggest annoyance while flying is the feeling the tires on the spring gear "dance" in the air with every bump. (This would be true for any heavy, large tire).
The good: The ground handling is not as bad as I expected (but I can see why many prefer the stiffer sidewall of a 29” bushwheel). It may seem like the sidewalls are soft, but at the controls it feels solid while taxiing and landing in crosswinds. I've tested them hard, and have yet to find a strong enough issue in this area to make me spend more money. The AOA has increased, but I can’t tell like I could on the Stinson. The prop clearance on the 31’s is unreal, even with the 88” seaplane prop. But what I like most about the bushwheels, they really diminish the abuse on the Cessna airframe. If I'm not planning a long cross country where the bushwheels are necessary, I will likely keep the 31's mounted (or until someone wants to swap me some good condition 29's. haha).
Overall, the best combo is having a tire for the specific mission. I thought I would never say this, but I'm really glad I kept the 8.00x6 tires, it's worth the hassle to swap them out for those long cross countries. I can see why the 8.50x10 tires on 10" rims are so popular on Skywagons, and why Wup recommends them for normal backcountry use.
That's my 0.02
- mountainmatt offline
- Posts: 2803
- Joined: Sat Apr 11, 2009 2:43 pm
- Location: Colorful Colorado
FlyingPoochProductions
FlyColorado.org
FlyColorado.org
Sun Jan 05, 2014 7:46 pm
Re: Project Retro Wagon - 180A
mtv wrote:Matt'
Couple things to consider:
When you move the battery from baggage to firewall (and I'd do sooner as opposed to later) also switch to the Odyssey battery....that alone will save you ten to twelve pounds, not counting the weight savings from wiring, box, etc. Atlee Dodge sells a battery mount for that.
Second, a friend has a pristine Cessna Airmaster that his Dad rebuilt. It had a leather interior. He put it on amphib floats, and weight was a big issue. He removed all that gorgeous leather and replaced it with some type of fake leather. He told me he saved forty pounds, and I honestly could not tell the difference. Do some checking..there's some cool stuff out there.
Third, get rid of that back seat and replace it with Atlee Dodge or BAS folding seats...MUCH more functional, and they CAN be lighter.
MTV
Yep, I plan on using the Altee Dodge STC and Odyssey battery. I haven't heard much bad from those running the Odyssey on a O-470.
Good to know on the fake leather (feather?), I will see what my options are when the time comes.
At this point, I don't see the Altee Dodge seats happening. My budget is just too tight for them at the moment. And honestly, I would rather spend the money on a Sportsman STOL kit if I had the chance. Don't get me wrong, I would love to have Atlee Dodge seats at some point, but it's low on my list of priorities. I know, I know....
Matt
- mountainmatt offline
- Posts: 2803
- Joined: Sat Apr 11, 2009 2:43 pm
- Location: Colorful Colorado
FlyingPoochProductions
FlyColorado.org
FlyColorado.org
Sun Jan 05, 2014 8:13 pm
Re: Project Retro Wagon - 180A
Matt, I have come to the same realization, regarding bushwheels. Don't get me wrong I love my 26'' bushwheels and baby bush tailwheel, but they are overkill for most of the flying I do. 8.00s will get you in and out of 99% of most real airstrips. Bushwheels are only worth it when you are going off airport. When I get my plane back up and running I will have 2 weight and balances, one with the 8.00s and scott 3200, and the other with bushwheels. I may even get a second prop (cruise) to put on at the same time when the seaplane prop and bushwheels aren't needed. The difference will be about 30lbs of weight and maybe as much as 20mph, that extra speed will be nice when just flying around here at sea level. Good luck with your project, I'm looking forward to seeing what you do with it!

Sun Jan 05, 2014 10:46 pm
Re: Project Retro Wagon - 180A
mountainmatt wrote:mtv wrote:Matt'
Couple things to consider:
When you move the battery from baggage to firewall (and I'd do sooner as opposed to later) also switch to the Odyssey battery....that alone will save you ten to twelve pounds, not counting the weight savings from wiring, box, etc. Atlee Dodge sells a battery mount for that.
Second, a friend has a pristine Cessna Airmaster that his Dad rebuilt. It had a leather interior. He put it on amphib floats, and weight was a big issue. He removed all that gorgeous leather and replaced it with some type of fake leather. He told me he saved forty pounds, and I honestly could not tell the difference. Do some checking..there's some cool stuff out there.
Third, get rid of that back seat and replace it with Atlee Dodge or BAS folding seats...MUCH more functional, and they CAN be lighter.
MTV
Yep, I plan on using the Altee Dodge STC and Odyssey battery. I haven't heard much bad from those running the Odyssey on a O-470.
Good to know on the fake leather (feather?), I will see what my options are when the time comes.
At this point, I don't see the Altee Dodge seats happening. My budget is just too tight for them at the moment. And honestly, I would rather spend the money on a Sportsman STOL kit if I had the chance. Don't get me wrong, I would love to have Atlee Dodge seats at some point, but it's low on my list of priorities. I know, I know....
Matt
Hi Matt,
I don't have the weight for my seats handy, but will fly my 180 to Phx in the am, and it is on one of the W&B worksheets in the plane. I'll try and remember to take note. The shop at Falcon I was referring to also has a fake leather (burn certed) option as well. They use it alot over selkirk panels to match the rest of the interior (not that I'd do that). I believe the brand they use is called Ultra Leather. I know a couple folks that went that route and it looks really nice...
Take care, Rob
Mon Jan 06, 2014 6:49 am
Re: Project Retro Wagon - 180A
robw56 wrote:Matt, I have come to the same realization, regarding bushwheels. Don't get me wrong I love my 26'' bushwheels and baby bush tailwheel, but they are overkill for most of the flying I do. 8.00s will get you in and out of 99% of most real airstrips. Bushwheels are only worth it when you are going off airport. When I get my plane back up and running I will have 2 weight and balances, one with the 8.00s and scott 3200, and the other with bushwheels. I may even get a second prop (cruise) to put on at the same time when the seaplane prop and bushwheels aren't needed. The difference will be about 30lbs of weight and maybe as much as 20mph, that extra speed will be nice when just flying around here at sea level. Good luck with your project, I'm looking forward to seeing what you do with it!
Over the years, I've found the 8.50 x 6.00 tires (Goodyears, not McReary) to be a pretty good compromise on several airplanes. They are substantially taller than 8.00 tires, but difference in speed isn't bad.
I too would consider the 8.50 x 10 tires on adapters or ABI wheels as perhaps the best compromise around. Most folks really don't need Bushwheels on a 180/185 for what they do, but one gopher hole on a backcountry strip can ruin your week with 8.00s.
FWIW
MTV
Mon Jan 06, 2014 10:11 am
Re: Project Retro Wagon - 180A
Matt
FYI, We just moved my battery to the firewall this last annual. I just looked at the weight and balance and I lost a little less than 26 lbs with the move. We used a Burl Battery box from Burl's Aircraft LLC in Alaska and an Odessey battery 12V-SBS J16.
You may not lose at much weight as I did because the old battery cable was a very healthy welding cable. ;-()
Both positive and negative cables ran from the back to the front.
The Burl battery box installation was covered with an STC and the workmanship was top notch
Dave
55 180
Boise
Last edited by Rigster on Tue Jan 07, 2014 7:53 am, edited 1 time in total.

Mon Jan 06, 2014 10:56 am
Re: Project Retro Wagon - 180A
mountainmatt wrote:Thanks Greg for all the insight and experience.
After going back and re-reading this thread, I feel like I should do a quick Alaskan Bushwheel update for the 31x13x6 bushwheels on a Cessna 180. I have approx 50 hours on the tires and 100+ landings on all types of surfaces (less than 3% on a hard surface). This is my experience and opinion, YMMV.
If I had to only pick ONE tire for my purposes, a 31 would not be it. For me and my mission, off airport landings are fewer and far between and landing on improved and unimproved airports and airstrips are becoming the norm. The 31 is simply overkill and the speed penalties are very noticeable on a 180. At 22 sq, the speed loss is about 10-12 mph TAS, which hits the clock and wallet at the end of the day. This may be the difference between beating a weather front moving through, skipping a fuel stop, or landing at dusk with just enough daylight at my non lighted home field. A few other things, climb performance is slightly decreased, and my biggest annoyance while flying is the feeling the tires on the spring gear "dance" in the air with every bump. (This would be true for any heavy, large tire).
The good: The ground handling is not as bad as I expected (but I can see why many prefer the stiffer sidewall of a 29” bushwheel). It may seem like the sidewalls are soft, but at the controls it feels solid while taxiing and landing in crosswinds. I've tested them hard, and have yet to find a strong enough issue in this area to make me spend more money. The AOA has increased, but I can’t tell like I could on the Stinson. The prop clearance on the 31’s is unreal, even with the 88” seaplane prop. But what I like most about the bushwheels, they really diminish the abuse on the Cessna airframe. If I'm not planning a long cross country where the bushwheels are necessary, I will likely keep the 31's mounted (or until someone wants to swap me some good condition 29's. haha).
Overall, the best combo is having a tire for the specific mission. I thought I would never say this, but I'm really glad I kept the 8.00x6 tires, it's worth the hassle to swap them out for those long cross countries. I can see why the 8.50x10 tires on 10" rims are so popular on Skywagons, and why Wup recommends them for normal backcountry use.
That's my 0.02
I have a buddy who tested the 26 inch Good Years on his 180 and he feels like this tire complements the 180s versatility very nicely. He reported no noticeable wear after 100+ pavement landings. His plane was a late 60s model, and from what he could tell it was a pretty fast one. He trued out at just about 127-130 knots at 2250 rpm and 21" M.P. 7500 ft msl with those tires. He landed off airport on baseball size rocks and softish gravel on several occasions and they seemed to work very well. Only concern was that he did notice that one of the tires slipped on the rim, and the valve stem was cocked. Had it gone much further, this could have been disastrous. They looked really good on the plane as well. Does anyone know what the speed penalty is on the 29 x 10s? I would like to get a set of these on mine.
- Scolopax offline

- Posts: 1696
- Joined: Tue Sep 27, 2005 5:02 pm
- Location: Nottingham
- FindMeSpot URL: http://share.findmespot.com/shared/face ... 4aYqSexnZC
Mon Jan 06, 2014 12:09 pm
Re: Project Retro Wagon - 180p
Matt,
The 29x 10 tires are going to slow you down about as much as the big Bushwheels. Again, I think the 8.50 x 10 tires on either adapters or 10 inch wheels from ABI would be a nice setup on a 180. I've flown both them and the 29 x 10 tires on 185s, and never cared much for the 29s.
If you do go with the 29 x 10 tires, you'll want to get them buffed down to remove some rubber and the tread.....these things are heavy and stiff.
In my experience, the Goodyear blimp tires are a pretty good match for the 180/185 for most stuff. That said, they're only just a little taller and a little wider than the Goodyear 8.50 x 6.00 tires, which are a LOT cheaper.
Perhaps the biggest advantage of the 26 over the 8.50 tires is that the blimp tires have no tread, so don't throw as many rocks at your stabilizer....a significant concern with wagons......
MTV
DISPLAY OPTIONS
Who is online
Users browsing this forum: No registered users and 3 guests
Latest Features
-
Live to Tell
A Minnesota pilot is surprised to learn that the sudden asymmetric drag of an out-of-rig ski can…Read More -
Creators
Working in some of the Yukon's most beautiful and remote environments, photographer Simon Blakesley captures aircraft in…Read More -
Aircraft Ownership and Maintenance
Upgrading to big tires can make a huge difference in backcountry performance, but with those gains come…Read More -
Tales from Yesteryear
In this tale from bush flying yesteryear, Don Cogger signs up to help Atlee Dodge Jr recovery…Read More


Latest Knowledge Base
-
Destinations
A regional guide with ideas for winter camping destinations in California, Nevada, New Mexico, and Arizona.Read More -
Aircraft
Finding an affordable aircraft that can handle the backcountry for $80K or less? A challenge for sure, but with the…Read More -
Aircraft
01.29.2018 - Zane - Updated tire diameter graphic to add 8.50x10 Guide to tires for use in the backcountry and off-airport landing…Read More -
Pilots
12.22.2013 - Initial article format Operating aircraft on skis and negotiating a snow-covered landscape is an entirely unique skillset and environment.…Read More


