Hello - long time lurker, first time poster here. Looking for advice on what to do with my floats.
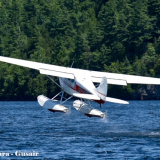
I recently bought a 172 XP with EDO 2440 floats. The floats will need to be moved from my temporary storage location to an airport where they can be installed. The floats are too wide and would technically require an oversize permit from the highway authorities to be moved on a trailer assembled. This leads me to two questions that I am looking for some feedback on:
1. I could disassemble the floats (remove the spreader bars) and then they would be narrow enough to easily transport on any road without any special consideration. Any concerns with "splitting" the floats?
2. Is splitting the floats an easy task for an end user? anything to worry about? I would have a licensed mechanic reassemble them at the airport but i would need to disassemble them myself. Unfortunately the only information i can find on my floats is a very low resolution parts diagram. If anyone has any basic instructions or tips on how to disassemble it would be appreciated. It's not apparently obvious to me how to remove the spreader bars. For example in the photo below, one plate has bolts and rivets - i'm hoping i don't need to need to drill any rivets out to disassemble the floats. I was hoping that basic wrenches and sockets would do the job.
Any help is greatly appreciated. Thanks!
Some pics here:
https://imgur.com/a/aKfNqpN
https://imgur.com/a/sBvmNcg
Transporting and disassembling float advice
Sun Mar 10, 2019 1:29 pm
Sun Mar 10, 2019 1:45 pm
Re: Transporting and disassembling float advice
Just take one barrel off the spreader bars. Tip the other float up so that the spreader bars are point upwards, tuck the released barrel against the float with the spreader bars still attached and then with padding rest the spreader bars onto the single barrel for support. Strap it all down nice and secure and off you go.

Sun Mar 10, 2019 2:19 pm
Re: Transporting and disassembling float advice
What he ^^^ said. Nothing there is rocket science. If the 2440s are X braced with flying wires (been a while since I dealt with 2440s) mark where the threads meet the nuts before you remove them. That way, you'll have a close approximation of where they need to go as a start when re-assembling. Saves a lot of adjusting.
MTV
MTV

Sun Mar 10, 2019 2:24 pm
Re: Transporting and disassembling float advice
What he said ^^^^on the flying wires, enjoy the float flying.
Sun Mar 10, 2019 2:59 pm
Re: Transporting and disassembling float advice
Thanks for the tips guys!
So to remove the spreader bar, i just need to remove bolts and it should come out pretty easy?
So to remove the spreader bar, i just need to remove bolts and it should come out pretty easy?
Sun Mar 10, 2019 4:30 pm
Re: Transporting and disassembling float advice
cdnbrewer wrote:Thanks for the tips guys!
So to remove the spreader bar, i just need to remove bolts and it should come out pretty easy?
Well, that’s the theory. Unfortunately, some floats never get demoted, and corrosion can make it tough to take apart. But, disassembly isn’t a bad thing every few years.
Take them apart. If it’s tough, take the other side apart as well. Clean them up prior to reassembly, and you’re good for a few seasons.
But while they’re off the plane, take a good look at everything, remove any signs of corrosion, and apply an appropriate anti corrosion compound.
MTV
Sun Mar 10, 2019 4:38 pm
Re: Transporting and disassembling float advice
cdnbrewer wrote:Thanks for the tips guys!
So to remove the spreader bar, i just need to remove bolts and it should come out pretty easy?
Yes remove the bolts thru the spreader bars and the cast “clamshells” and separate. As to wether or not it will go “easy” is a matter of luck, depends on how long they’ve been together or what sealers were used etc... it’s possible they are very stuck together and you’ll need the whole family to tug them apart or they may get just fall apart, let us know how it goes[emoji3]
“Flying wires” go from the airplane down to the floats, stiffening the assembly and leveling the wings. “Boxing wires” go from float to float and maintain the floats alignment to each other. 2440 EDO don’t have boxing wires so don’t waste your time trying to find them or their nuts.
At Kenmore we routinely move floats as others have described above, but we always approach an old unknown set of floats deep suspicion in our hearts.
Sun Mar 10, 2019 4:56 pm
Re: Transporting and disassembling float advice
Hi
I’ve transported my 2870’s many times over the roads here in Maine. What I did was modify my snowmobile trailer with two full length 4x4s. I routered down the center of the 4x4 s to accept the keels of the floats. Lay the boards on the trailer and slide the floats on, a little water on the boards helps them slide. Once they are loaded I run some sheetrock screws up through the bottom into the 4x4 s to keep them in place. Strap the floats to the trailer and you’re ready to go. You can also go to the hardware store and get a “wide load” tape to put on the front of the vehicle. You can also get a wide load permit from the authorities if you want. Once you do it the first time it will be easy to do it again and again.
I believe the 2870s are larger than the 2400s so you shouldn’t have a problem. Most states have a ten foot wide limit. My 2870s hang over the sides of the trailer but have never had any problems. And a lot easier than disassembling the floats. Hope this helps.
Scott

Sun Mar 10, 2019 6:02 pm
Re: Transporting and disassembling float advice
I've done all three....wide load permit, disassemble one, tip up one with wood support A-frame bracing to the narrow the load. Tie everything down well with ratchet straps. My experience with taking things apart that have seen water and debris has meant work and penetrating oil. Take pics to share and flag the rear of any overhang with red rags.
Gary
Gary
Sun Mar 10, 2019 6:29 pm
Re: Transporting and disassembling float advice
Can you build a rack on a trailer to tilt them on their side to get the width down to 8 feet or 8 feet 6 inches without taking them apart? That is now unlimited hydroplane racers load their boats to meet the width requirements. Just thinking a little ways out of the box.
Tim
Tim

Sun Mar 10, 2019 8:41 pm
Re: Transporting and disassembling float advice
Iffiest load I've ever hauled was my 2960s on some jury-rigged plywood fence atop my mechanic's trailer. I was 65% sure that they would survive the trip but I figured he had done it before so I gave it a shot.
When we were almost to the destination he called and said "If they fall off, just keep driving.". But we made it.
All's well that ends well.
When we were almost to the destination he called and said "If they fall off, just keep driving.". But we made it.
All's well that ends well.
Mon Mar 11, 2019 7:08 am
Re: Transporting and disassembling float advice
Frankly, every set of floats should probably be disassembled every twenty years or so anyway.....check for corrosion and lube.
MTV
MTV
Mon Mar 11, 2019 7:28 am
Re: Transporting and disassembling float advice
I've taken lots of things apart for transport. Follow the posters above stated advice and you'll be fine. I was also going to suggest titling them to get them under the maximum width. If you disassemble them, take LOTS ofpictures of every attachment point, paying particular attention to the detail in how the bolts, washers, nuts, and other attaching hardware is put together. Nothing better than having a picture to recall something you 'forgot'!! Good luck.
Mon Mar 11, 2019 12:42 pm
Re: Transporting and disassembling float advice
-0-
Last edited by dogpilot on Thu Aug 06, 2020 1:03 am, edited 1 time in total.
Mon Mar 11, 2019 1:03 pm
Re: Transporting and disassembling float advice
Wipline 2100A amphibious floats:
Three bolts per side on crossbars. Then, roll (using locked landing gear) on truck bed or store in hangar.

Above floats are leaving next Monday to Washington.
Three bolts per side on crossbars. Then, roll (using locked landing gear) on truck bed or store in hangar.
Above floats are leaving next Monday to Washington.

CFII, MEI, CFISES, ATPME, IA/AP, RPPL, Ski&Amphib ops, RHC mechanic cert, RHC SC— 3000TT
Wed Mar 13, 2019 4:49 pm
Re: Transporting and disassembling float advice
Hi Guys,
Thanks so much for all your replies. As these floats are new to me, I think the prudent thing would be to disassemble them and check for corrosion and replace the hardware. Hopefully they won't be too hard to disassemble.
I see in the log books that in 2006 the floats were "Planing Bottom, Aft Bottom and Fwd Bottom skins replaced, sealed, de-corroded alodined and painted". I hope this means they were disassembled and if so hopefully that makes them easier for me to disassemble 13 years later.
For those who have disassembled EDO floats - would you mind taking a look at the blurry parts diagram in the link below and let me know what bolts i need to remove to separate the floats?
In the red circle there are 2 long bolts that go through the clamps, with a smaller one in between. I'm thinking these for sure need to be removed. What i can't tell is if the bolts circled in orange or green need to come out as well.
https://imgur.com/a/jusl8XP
Thanks again,
Mike
Wed Mar 13, 2019 6:45 pm
Transporting and disassembling float advice
cdnbrewer wrote:Hi Guys,
Thanks so much for all your replies. As these floats are new to me, I think the prudent thing would be to disassemble them and check for corrosion and replace the hardware. Hopefully they won't be too hard to disassemble.
I see in the log books that in 2006 the floats were "Planing Bottom, Aft Bottom and Fwd Bottom skins replaced, sealed, de-corroded alodined and painted". I hope this means they were disassembled and if so hopefully that makes them easier for me to disassemble 13 years later.
For those who have disassembled EDO floats - would you mind taking a look at the blurry parts diagram in the link below and let me know what bolts i need to remove to separate the floats?
In the red circle there are 2 long bolts that go through the clamps, with a smaller one in between. I'm thinking these for sure need to be removed. What i can't tell is if the bolts circled in orange or green need to come out as well.
https://imgur.com/a/jusl8XP
Thanks again,
Mike
It would be very difficult to replace those skins mentioned without disassembling the floats, I bet that was done then. Heck, it’s very difficult to replace those skins even with the floats disassembled.
All those bolts longer bolts circled will need to be removed. Depending on how sealed the cast “clamshells” are you may end up removing all the little bolts that hold them on as well.
It’s best to just get started and do it, many factors will affect your frustration level.
EDO and wipline spreader bars attach very differently. Personally I find the larger wiplines very frustrating to box up.
Thu Mar 14, 2019 7:44 pm
Re: Transporting and disassembling float advice
In BC it’s a $20 permit to transport. You can obtain permit from any lisencing office. Unless you want to disassemble there is no reason to add cost to moving them. I moved mine from Edmonton to Vancouver island on one permit. In 2016.
Mon Mar 18, 2019 7:36 pm
Re: Transporting and disassembling float advice
Permits on Ontario take 6-8 days to be processed. I can supply the name of a permit broker who will remove the pain of obtaining the permit if you want.
I’m in the oversized/heavy haul business. Once thought that I was being treated unfairly by Ontario permit office just because I was from Alberta. Learned they treat everyone with equal unfairness. Have been quoted on that statement in a national magazine! Oops!
I’m in the oversized/heavy haul business. Once thought that I was being treated unfairly by Ontario permit office just because I was from Alberta. Learned they treat everyone with equal unfairness. Have been quoted on that statement in a national magazine! Oops!
Sun Apr 07, 2019 4:47 pm
Re: Transporting and disassembling float advice
A quick update for those for are interested or possibly as a future reference for anyone else with this model of float.
The snow finally melted enough in my location to get access to the floats.
Photos of the inside of the EDO2440 floats looking up at the spreader bar interface:
https://imgur.com/a/mcQzcfk
https://imgur.com/a/GdlVlmL
I then removed the 4 bolts that go through the spreader bar. The two side by side bolts go go through the spreader bar and are secured with the clamshell blocks. The singular bolts on the inboard and outboard sides of the floats also go through the spreader bar and terminate in the aluminum fittings.
https://imgur.com/a/ukyIPcp
The bolts themselves were not easy to get out as they seemed to have sealant on them which bound them a little in their bores.
After all the bolts were out i unfortunately could not get the spreader bar to budge even a microscopic amount. Looking closely it appears that there is sealant between the spreaderbar and the fittings which is probably acting as a glue and preventing any free movement. i tried to use a wooden block and a hammer to tap on the fitting to provide a bit more force to separate but got nervous that any additional force would cause damage.
So it looks like they will be moved together and i'll just get an oversized permit for $65 each time I need to move them by road.
Thanks again for all your help and suggestions!
DISPLAY OPTIONS
Who is online
Users browsing this forum: No registered users and 0 guests
Latest Features
-
Live to Tell
A Minnesota pilot is surprised to learn that the sudden asymmetric drag of an out-of-rig ski can…Read More -
Creators
Working in some of the Yukon's most beautiful and remote environments, photographer Simon Blakesley captures aircraft in…Read More -
Aircraft Ownership and Maintenance
Upgrading to big tires can make a huge difference in backcountry performance, but with those gains come…Read More -
Tales from Yesteryear
In this tale from bush flying yesteryear, Don Cogger signs up to help Atlee Dodge Jr recovery…Read More


Latest Knowledge Base
-
Destinations
A regional guide with ideas for winter camping destinations in California, Nevada, New Mexico, and Arizona.Read More -
Aircraft
Finding an affordable aircraft that can handle the backcountry for $80K or less? A challenge for sure, but with the…Read More -
Aircraft
01.29.2018 - Zane - Updated tire diameter graphic to add 8.50x10 Guide to tires for use in the backcountry and off-airport landing…Read More -
Pilots
12.22.2013 - Initial article format Operating aircraft on skis and negotiating a snow-covered landscape is an entirely unique skillset and environment.…Read More


