Amorphous Maule M7/M6 Rebuild Project
Fri Jan 06, 2023 8:39 am
Re: Amorphous Maule M7/M6 Rebuild Project
Wrapping panels in Oratex! Who'd have thunk it? Maybe you can wrap the wings too before you fly.  What's the OG paint on them look like?
- Zzz offline

- Posts: 2854
- Joined: Fri Oct 08, 2004 11:09 pm
- Location: northern
- Aircraft: Swiveling desk chair
Half a century spent proving “it is better to be thought a fool than to open your mouth and remove all doubt.”
Fri Jan 06, 2023 9:07 am
Re: Amorphous Maule M7/M6 Rebuild Project
This is turning out amazing. I was very comfortable in my arbitrarily unhappy with Maule and BH's world... you two and a few guys at the cub sight are making me question my sanity 
Fri Jan 06, 2023 10:26 am
Re: Amorphous Maule M7/M6 Rebuild Project
Your work looks awesome, Asa-- BCP needs to add a "like" button!

Cessna Skywagon -- accept no substitute!
Fri Jan 06, 2023 8:27 pm
Re: Amorphous Maule M7/M6 Rebuild Project
Zzz wrote:Wrapping panels in Oratex! Who'd have thunk it? Maybe you can wrap the wings too before you fly.
The first instance of oratex I saw, a guy had done a cub where he did oratex on the boot cowl and cowling. It's also in the oratex manual so there's some guidance. It has some tricks but overall very quick and easy. For permanent adhesion you really have to prime the aluminum parts before applying. On bare/scuffed aluminum, the glue/fabric sticks well but can be pulled off cleanly like a sticker.
Wings are white with red leading edge. Black mini-stripe between red/white. Ideal for my aesthetic would be solid black or solid red wings I think. Maybe even solid blue. I like non-white colors for frost melting and solid different-than-fuselage colors for some reason. Or maybe keep it 50 shades of gray and do a different color off the grayscale for the wings. I have neither time nor skill to paint them properly so I'll deal with that later. Until then, just a another mismatched Maule.

More arts and crafts:
Finished the right side boot cowl in paint and oratex, inside is flat black, not sure why I keep not getting a picture of that. Now both sides are ready for installation.


Like typically happens, I went to strip the paint off this small forgettable part to get ready to rehab/reinstall it and then decided it would be less work and better results to just make a new one. This aspect of the construction is really enjoyable to me and it sure beats stripping paint. From picking up the old part to a new primed piece was probably 45 minutes with a scrap of 0.025" alclad. When practical, I've been switching rivnuts to nut plates to help out the next human who rebuilds this thing...


Sat Jan 07, 2023 12:12 am
Re: Amorphous Maule M7/M6 Rebuild Project
Nice part. Gettin close…
- skyward II offline
- Posts: 447
- Joined: Sun Jul 05, 2020 9:42 pm
- Location: Upland, CA/Etna, Wy
Sun Jan 08, 2023 8:00 pm
Re: Amorphous Maule M7/M6 Rebuild Project
Some enjoyable work happening the past couple days.
The culmination of the part from last post, for posterity.

Final dry fit of the left boot cowl. Transponder antenna is on there down low and OAT for the EDM900 is the silver thing. People will say there are better places to put OAT and I agree but this was an exceptionally easy place.

There were no issues with fitment or anything so I only un-cleco'd (de-cleco? decleco?) the edges that needed silicone, namely the firewall and front lower portion. This made it much easier than having to position the whole thing with silicone.

Complete left boot cowl! One cleco left at the top where the center strap (part from last post) will overlap.

The flat black paint on the inside came out great, it looks like the inside of the oratex fabric. I started this project using a green zinc based primer on parts. Later switched to the grey primer which I've fell in love with - shoot great, hardens quick, durable. That panel around the landing gear is the only visible remnant of green primer. It's leaving a legacy I guess. An astute observer might notice that my instrument panel grey is eerily similar to my primer grey...

Finishing up left side boot cowl subassembly today by riveting in the cowl fastener receptacles, nut plates, and boot cowl window. All came out looking good! Excited to mount this tomorrow once the silicone is dry.


Also got the skylight sealed in for good, but no pictures. That was heinous trying to get all the fasteners in, and smooth/clean the silicone before the 12min skin time of the sealant. There's like 40 #6 screws and it spans both sides of the airplane on the top, inside and out, so it was a definite sprint even with tools and fasteners all laid out ready to go. But it's done!
The culmination of the part from last post, for posterity.
Final dry fit of the left boot cowl. Transponder antenna is on there down low and OAT for the EDM900 is the silver thing. People will say there are better places to put OAT and I agree but this was an exceptionally easy place.
There were no issues with fitment or anything so I only un-cleco'd (de-cleco? decleco?) the edges that needed silicone, namely the firewall and front lower portion. This made it much easier than having to position the whole thing with silicone.
Complete left boot cowl! One cleco left at the top where the center strap (part from last post) will overlap.
The flat black paint on the inside came out great, it looks like the inside of the oratex fabric. I started this project using a green zinc based primer on parts. Later switched to the grey primer which I've fell in love with - shoot great, hardens quick, durable. That panel around the landing gear is the only visible remnant of green primer. It's leaving a legacy I guess. An astute observer might notice that my instrument panel grey is eerily similar to my primer grey...
Finishing up left side boot cowl subassembly today by riveting in the cowl fastener receptacles, nut plates, and boot cowl window. All came out looking good! Excited to mount this tomorrow once the silicone is dry.
Also got the skylight sealed in for good, but no pictures. That was heinous trying to get all the fasteners in, and smooth/clean the silicone before the 12min skin time of the sealant. There's like 40 #6 screws and it spans both sides of the airplane on the top, inside and out, so it was a definite sprint even with tools and fasteners all laid out ready to go. But it's done!
Last edited by asa on Mon Jan 23, 2023 11:58 am, edited 1 time in total.
Mon Jan 09, 2023 8:38 pm
Re: Amorphous Maule M7/M6 Rebuild Project
Another day, another boot cowl installed. Went well overall. Afterwards, cleaned out the belly and went ahead and put the floorboards and interior panels in. I am overall very aesthetically pleased by the footwell area and so far, the cabin in general. I wanted the inside of the boot cowls to just blend into the shadows behind the other components and I think I achieved it. I noticed that the only things that have color are the very important things - fire extinguisher, throttle/prop/mixture controls, flap handle, fuel selector. Seems appropriate.


Gotta get the glamour shot with my work light...

And onto the glareshield

Gotta get the glamour shot with my work light...
And onto the glareshield
Tue Jan 10, 2023 10:31 am
Re: Amorphous Maule M7/M6 Rebuild Project
Looks great!
Cessna Skywagon -- accept no substitute!
Tue Jan 10, 2023 1:39 pm
Re: Amorphous Maule M7/M6 Rebuild Project
If your taking ideas on names, I'm claiming The Grey Ghost as my suggestion.
Wed Jan 11, 2023 12:01 pm
Re: Amorphous Maule M7/M6 Rebuild Project
Gray Matter
Wed Jan 11, 2023 3:15 pm
Re: Amorphous Maule M7/M6 Rebuild Project
Good one, you win with Grey Matter
Wed Jan 11, 2023 10:07 pm
Re: Amorphous Maule M7/M6 Rebuild Project
I was more in the "50 Shades of Grey" realm but those are both good. Honestly I'm not much of a vehicle name person so we'll see.
Today's task was the glareshield. The one that came with it was pretty worn out and hacked up. Decided to just go for it and make it like I wanted instead of just throw it on. I decided to add a larger avionics access panel on top that would also cut out some of the damaged fiberglass. Also wanted to extend it to give me a small overhang on the instruments. Not so much for blocking the sun, but for a clean look. It's only about 3/8" but I think it looks good and hides the panel edges.
Tape the instruments/wiring off since I'll be doing some work above it. Don't want to clean out shavings or have metal shavings in my electrical system.

After initial work, this was the mockup. I went with an FR4 fiberglass sheet for the access panel just in case I wanted to put something with an antenna behind the panel under the glareshield. The green lip is just some pre-primed aluminum strips I had on hand.

Trim, sand, prime, some body filler, sand again, install nut plates,, rivet aluminum lip to the fiberglass, install for test fit.

Aaaaand.... covered and installed. I don't rivet after 10pm due to lessons learned so I'll do that in the morning. The covering material is the glareshield vinyl from SCS interiors. $50 for 1 unit which is 18"x54" and comes with a burn cert. Looks great. Might replace screws with black. Not sure about the windshield fitment/interface so I cut the fabric conservatively just in case. Second pic you can see the small overhang.


Today's task was the glareshield. The one that came with it was pretty worn out and hacked up. Decided to just go for it and make it like I wanted instead of just throw it on. I decided to add a larger avionics access panel on top that would also cut out some of the damaged fiberglass. Also wanted to extend it to give me a small overhang on the instruments. Not so much for blocking the sun, but for a clean look. It's only about 3/8" but I think it looks good and hides the panel edges.
Tape the instruments/wiring off since I'll be doing some work above it. Don't want to clean out shavings or have metal shavings in my electrical system.
After initial work, this was the mockup. I went with an FR4 fiberglass sheet for the access panel just in case I wanted to put something with an antenna behind the panel under the glareshield. The green lip is just some pre-primed aluminum strips I had on hand.
Trim, sand, prime, some body filler, sand again, install nut plates,, rivet aluminum lip to the fiberglass, install for test fit.
Aaaaand.... covered and installed. I don't rivet after 10pm due to lessons learned so I'll do that in the morning. The covering material is the glareshield vinyl from SCS interiors. $50 for 1 unit which is 18"x54" and comes with a burn cert. Looks great. Might replace screws with black. Not sure about the windshield fitment/interface so I cut the fabric conservatively just in case. Second pic you can see the small overhang.
Thu Jan 12, 2023 9:52 am
Re: Amorphous Maule M7/M6 Rebuild Project
That looks great!! Having that big access hole up top is so much better than laying on your back trying to reach stuff.!!
DENNY
DENNY
DENNY
Fri Jan 13, 2023 4:02 pm
Re: Amorphous Maule M7/M6 Rebuild Project
A little more work on glareshield. Riveted everything and switched to black screws. Also checked fit of the windshield surround pieces. Since this is a new fuselage, you never really know if things are going to fit until you try, or you can build in place. All these fairings fit pretty well. Windshield was supposed to ship by end of this week but I did not hear if it did or not.

When I made the access panel, I installed 4 nut plates in the mounting pattern for my GDL50 mount in case I decided to put it up there, or anything else I wanted to mount. Ended up putting it hidden under the glareshield though so maybe I'll use these for a compass or a bobblehead. Drilled a wire pass through just forward of the mount holes as well, you can barely see the X slit.

Thanks to the GDL 50, dual AHRS and synthetic vision. Hope to never need either of these but nice to have. GDL also gives ADS-B and is another GPS source for the 660. It's hard wired to power so it boots when the avionics bus is powered on and shuts down on the condition that power is removed AND the 660 shuts off.

Initial test fit of some secondhand gear fairings. Not sure if I'll refurbish these or make new.

When I made the access panel, I installed 4 nut plates in the mounting pattern for my GDL50 mount in case I decided to put it up there, or anything else I wanted to mount. Ended up putting it hidden under the glareshield though so maybe I'll use these for a compass or a bobblehead. Drilled a wire pass through just forward of the mount holes as well, you can barely see the X slit.
Thanks to the GDL 50, dual AHRS and synthetic vision. Hope to never need either of these but nice to have. GDL also gives ADS-B and is another GPS source for the 660. It's hard wired to power so it boots when the avionics bus is powered on and shuts down on the condition that power is removed AND the 660 shuts off.
Initial test fit of some secondhand gear fairings. Not sure if I'll refurbish these or make new.
Fri Jan 13, 2023 9:10 pm
Re: Amorphous Maule M7/M6 Rebuild Project
Looking awesome
Sat Jan 14, 2023 2:13 pm
Re: Amorphous Maule M7/M6 Rebuild Project
Likely the most informative and interesting post in a long time. Well done ASA. I only wish I had 1/1000th of your talent. Thanks for the information!
MW
MW
- 185Midwest offline


- Posts: 437
- Joined: Sun Sep 30, 2018 11:58 am
- Location: Fort Wayne
- Aircraft: C-185
Sun Jan 15, 2023 4:10 pm
Re: Amorphous Maule M7/M6 Rebuild Project
185Midwest wrote:Likely the most informative and interesting post in a long time. Well done ASA. I only wish I had 1/1000th of your talent. Thanks for the information!
MW
I appreciate that! Easy to hide mistakes on the internet haha. I often do things twice. Do it once, sit down on my couch late at night and think "I could do it better" so I go do it again before you all ever see it...
Was getting a jump on the paperwork side of the project this morning. All of this work boils down to 4 new STC's (AV30, extended gear, EDM900, Oratex). Then lots of new parts. Almost to a full deck of Maule green tags. My plan is to do five 337's. I say plan but I've already got them typed up. One for each STC plus one covering the overall rebuild. How would others do it? I think I could easily add the Oratex STC to the rebuild but it just adds more crap to a long 337.

Finally test fit the cowl. I'm not a religious person, quite the opposite, but maybe this will change that - it fit on the first try, every fastener. Will remove for sand/paint. No repairs needed on it that I've found so far. This picture makes the paint look amazing but it's not that good in real life. I don't feel bad sanding it down. Had been procrastinating this step for a few days but now it's over and went better than expected.

Tue Jan 17, 2023 5:44 pm
Re: Amorphous Maule M7/M6 Rebuild Project
You gonna wrap that cowling in Oratex? 
- Zzz offline
- Posts: 2854
- Joined: Fri Oct 08, 2004 11:09 pm
- Location: northern
- Aircraft: Swiveling desk chair
Half a century spent proving “it is better to be thought a fool than to open your mouth and remove all doubt.”
Tue Jan 17, 2023 6:08 pm
Re: Amorphous Maule M7/M6 Rebuild Project
I find myself checking this thread way too frequently. It is really fun to watch this come together. Keep it up!
Tue Jan 17, 2023 8:25 pm
Re: Amorphous Maule M7/M6 Rebuild Project
Zzz wrote:You gonna wrap that cowling in Oratex?
Haha I might if I thought it'd be successful. Not so sure it could quite handle the front contour.
twflyer wrote:I find myself checking this thread way too frequently. It is really fun to watch this come together. Keep it up!
Thanks! Glad I can serve as entertainment to someone other than me.
Received my windshield after ordering it in late October. Ordered through Cee Baileys for $600 which was the cheapest company. They outsourced it to LP Aero, which sells their same windshield for $940 (Maule, Solar Grey, 0.150" thickness). So I saved $340 by adding a middle man? Economics!
It's not as dark in real life as it looks in these pics, I think because the protective spray coating. I'm not sure you'd know it wasn't clear, it's lighter tint than the green that came off the plane.

After initial fitment, it definitely needed a trim. At least 1" off bottom, a wedge off the sides, nothing on top. I used a dremel with a reinforced cutoff wheel. Worked great, good control, no jumping or anything. It left a nice edge but I used an 80grit flap wheel on my drill to smooth it out. Did this fit-trim process 4 times because I was worried about taking too much off.

After a few rounds of trimming. Close enough to fit the fairings on but I'd like to do some small trims in places where it's tight. Will still have to drill the holes on top, sand the edges better, mask it off, etc etc to install but hopefully the trimming will be done in the morning.

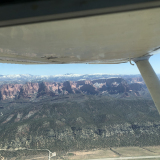
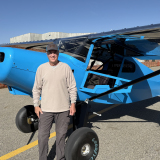
Turns out that there is a world OUTSIDE the garage too...

DISPLAY OPTIONS
Who is online
Users browsing this forum: No registered users and 1 guest
Latest Features
-
Live to Tell
A Minnesota pilot is surprised to learn that the sudden asymmetric drag of an out-of-rig ski can…Read More -
Creators
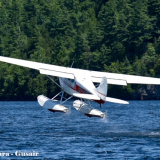
Working in some of the Yukon's most beautiful and remote environments, photographer Simon Blakesley captures aircraft in…Read More -
Aircraft Ownership and Maintenance
Upgrading to big tires can make a huge difference in backcountry performance, but with those gains come…Read More -
Tales from Yesteryear
In this tale from bush flying yesteryear, Don Cogger signs up to help Atlee Dodge Jr recovery…Read More


Latest Knowledge Base
-
Destinations
A regional guide with ideas for winter camping destinations in California, Nevada, New Mexico, and Arizona.Read More -
Aircraft
Finding an affordable aircraft that can handle the backcountry for $80K or less? A challenge for sure, but with the…Read More -
Aircraft
01.29.2018 - Zane - Updated tire diameter graphic to add 8.50x10 Guide to tires for use in the backcountry and off-airport landing…Read More -
Pilots
12.22.2013 - Initial article format Operating aircraft on skis and negotiating a snow-covered landscape is an entirely unique skillset and environment.…Read More


