When the subject of fuel quantities in an airplane comes up, we always hear the old saw “my butt can’t stand sitting in one of these things that long anyway” or similar.
But, to me, that’s not why I like long range tanks. To me, long range tanks allow me to explore country with low fuel availability. They allow me to overfly a place that rapes you in fuel cost. And they’re insurance for that time I plane everything to a T and Mother Nature has different ideas.
I’ve got five hours range plus in my plane, but I never sit in it that long on one flight, but I have options.
Fuel bags: I hate gas inside the cabin. Gas containers leak, or they smell of fuel. Passengers puke when you combine a bit of turbulence and fuel vapors.
The ABW fuel bags work for some, but mine leaks, and I’d never buy another.
Long range fuel is a very good thing. Early in my career, a gent pushed me to fly a couple extra legs on a trip. Rather, I let him. Anyway, I sweated fuel big time on that trip, and I swore I’d never push fuel again.
With small tanks and a big motor, at some point you’ll find yourself really wishing for more gas capacity, believe me.
MTV
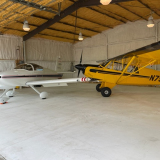
Modernizing an old 182: STOL kit now in progress
Sat May 19, 2018 7:01 am

Sat May 19, 2018 7:10 am
Re: Let the games begin! Modernizing an old 182.
Very well put Mike. Even the ability to fly direct someplace and home without having to stop is nice, and saves time. I'd rather have some extra tanking capabilities then be short. Better to hav and not need them need and not have right?mtv wrote:When the subject of fuel quantities in an airplane comes up, we always hear the old saw “my butt can’t stand sitting in one of these things that long anyway” or similar.
But, to me, that’s not why I like long range tanks. To me, long range tanks allow me to explore country with low fuel availability. They allow me to overfly a place that rapes you in fuel cost. And they’re insurance for that time I plane everything to a T and Mother Nature has different ideas.
I’ve got five hours range plus in my plane, but I never sit in it that long on one flight, but I have options.
Fuel bags: I hate gas inside the cabin. Gas containers leak, or they smell of fuel. Passengers puke when you combine a bit of turbulence and fuel vapors.
The ABW fuel bags work for some, but mine leaks, and I’d never buy another.
Long range fuel is a very good thing. Early in my career, a gent pushed me to fly a couple extra legs on a trip. Rather, I let him. Anyway, I sweated fuel big time on that trip, and I swore I’d never push fuel again.
With small tanks and a big motor, at some point you’ll find yourself really wishing for more gas capacity, believe me.
MTV
Not taking anything away from your build Garth, this thing is gonna be awesome!

Sat May 19, 2018 7:47 am
Re: Let the games begin! Modernizing an old 182.
Well said. I just put flint tip tanks in my bird. I can’t see sitting in the thing for six hours, but it also means I don’t have as many fuel detours when I’m flying in the back country. The additional 23 usable gives me almost 3 hours at 65%.
EDIT: Obviously, one of the considerations with extended fuel is the cost. I think the kit from flint was around $4,500 and the install was about 65 hours (much more than advertised). I think the install time could be cut down with owner assistance, which I did, but it was pretty involved. I will say that the flint tanks are very high quality and the instructions were very clear and concise.
Jim
Last edited by jaudette on Sat May 19, 2018 7:58 am, edited 1 time in total.
Sat May 19, 2018 7:48 am
Re: Let the games begin! Modernizing an old 182.
mtv wrote:When the subject of fuel quantities in an airplane comes up, we always hear the old saw “my butt can’t stand sitting in one of these things that long anyway” or similar.
But, to me, that’s not why I like long range tanks. To me, long range tanks allow me to explore country with low fuel availability. They allow me to overfly a place that rapes you in fuel cost. And they’re insurance for that time I plane everything to a T and Mother Nature has different ideas.
I’ve got five hours range plus in my plane, but I never sit in it that long on one flight, but I have options.
Fuel bags: I hate gas inside the cabin. Gas containers leak, or they smell of fuel. Passengers puke when you combine a bit of turbulence and fuel vapors.
The ABW fuel bags work for some, but mine leaks, and I’d never buy another.
Long range fuel is a very good thing. Early in my career, a gent pushed me to fly a couple extra legs on a trip. Rather, I let him. Anyway, I sweated fuel big time on that trip, and I swore I’d never push fuel again.
With small tanks and a big motor, at some point you’ll find yourself really wishing for more gas capacity, believe me.
MTV
Excellent, spot on Mike!

Sat May 19, 2018 9:30 am
Re: Let the games begin! Modernizing an old 182.
I agree that at some point I may want more fuel capacity than I have on board. Right now it's perfectly fine, and not insignificantly because the cost of extended tanks is high and I have other things to do first. I'm pre-wiring the plane for Flint tanks, and the CGR-30 was configured with aux tank gauges and interface on purpose (they will just be grounded to read zero for now). Until that day however, I will simply plan ahead and use my nice new fuel totalizer to make sure I don't run out. I can live with the occasional inconvenience that may involve. There is also nothing wrong with pulling the black knob back a bit for greater efficiency and range.
I hadn't thought about the fuel bag smell issue, but that's a big reason not to use them. Nobody wants to huff avgas for hours (well, most of us anyway) and it could mask the scent of a system leak. Of course it's also potentially a big flammable sack waiting to burst open in a crash which is never fun.
I hadn't thought about the fuel bag smell issue, but that's a big reason not to use them. Nobody wants to huff avgas for hours (well, most of us anyway) and it could mask the scent of a system leak. Of course it's also potentially a big flammable sack waiting to burst open in a crash which is never fun.

Sun May 20, 2018 3:10 pm
Re: Let the games begin! Modernizing an old 182.
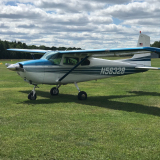
Great project. I have a 1956..., love the airplane...but as you found out any flexible wire or hose is well past Service life...look at the gaskets between fuel cell and filler ports...worth replacing whe you ha e one cell out...and you can do other...as we fly these planes a bit harder the leaks appear
- Airdave100 offline

- Posts: 124
- Joined: Sun Jun 08, 2014 6:10 pm
- Location: Fredericksburg
- Aircraft: 1956 Cessna 182....N5632B
Tue May 22, 2018 1:11 pm
Re: Let the games begin! Modernizing an old 182.
Airdave100 wrote:Great project. I have a 1956..., love the airplane...but as you found out any flexible wire or hose is well past Service life...look at the gaskets between fuel cell and filler ports...worth replacing whe you ha e one cell out...and you can do other...as we fly these planes a bit harder the leaks appear
Are you talking about the corks? That gets replaced with the fuel cell install kits. Both cells are being replaced with new kits.
Wed Jul 04, 2018 7:51 pm
Re: Let the games begin! Modernizing an old 182.
I seem to be in this phase where a lot of time on little steps eventually adds up to something meaningful. I spent today and most of the weekend out there finishing the engine mounting (a minor correction and torquing it properly), installing the EI probes, and installing the new Acorn exhaust. I goofed and ordered the wrong oil probe with my kit, but they had a new one to me in a couple days. EI and SPW/Acorn have both been very responsive and helpful so far when I need advice or have questions.
Once I get this latest batch of work inspected by my A&P, I will reinstall the intake, carb, new Steve's gascolator, fuel flow transducer, and the fuel cells. That will leave the airframe electrical and avionics/panel to do. Electrical should go relatively quickly I hope, and Saircorp is working up the CAD for my new panel as I write this. I also saw some really interesting news that the electronic ignition I've been pining for may receive STC by AirVenture, so there's a halfway decent chance of installing ignition invented after WW2 in the near future.
The one big question mark remaining is the tail inspection bulletin from Cessna and what if anything we'll find in there. That can be a single day of fun, or turn into more weeks of repair. Crossing fingers.
Fri Jul 20, 2018 3:19 pm
Re: Let the games begin! Modernizing an old 182.
This picture looks quite a bit like the last. I noticed some weird seepage on the mount coming from what looked to be the top of a bolt. After cleaning the area, I realized that there was a tiny hole in a weld which had been uncovered by chipping the paint during installation. Tiny holes can become big cracks later so that needed to be fixed. I asked SPW if this should just be repaired in place, however they immediately FedEx'd me a new mount and said swap it.
Jaudette and I managed to remove the engine and mount, and reinstall it all in just 2.5 hours this morning. I expected a much worse time of it based on the first time it went on, but with the mystery gone it was mostly just installing in the right order and getting the engine mount bolts to align (tricky). The only casualty was a lock washer tab for an engine bolt so I will need a new washer, but am otherwise ready to continue on.
This work is progress to nowhere, but I still think important to note since a cracked weld in an engine mount can manifest itself in bad ways. I don't like wasting a bunch of time on redundant efforts, but at least it's how it should be.
Fri Jul 20, 2018 5:23 pm
Re: Let the games begin! Modernizing an old 182.
colopilot wrote:This picture looks quite a bit like the last. I noticed some weird seepage on the mount coming from what looked to be the top of a bolt. After cleaning the area, I realized that there was a tiny hole in a weld which had been uncovered by chipping the paint during installation. Tiny holes can become big cracks later so that needed to be fixed. I asked SPW if this should just be repaired in place, however they immediately FedEx'd me a new mount and said swap it.
Jaudette and I managed to remove the engine and mount, and reinstall it all in just 2.5 hours this morning. I expected a much worse time of it based on the first time it went on, but with the mystery gone it was mostly just installing in the right order and getting the engine mount bolts to align (tricky). The only casualty was a lock washer tab for an engine bolt so I will need a new washer, but am otherwise ready to continue on.
This work is progress to nowhere, but I still think important to note since a cracked weld in an engine mount can manifest itself in bad ways. I don't like wasting a bunch of time on redundant efforts, but at least it's how it should be.
Good on you for catching that and good on SPW for taking care of you, a real win win. Much better to take care of it now while it’s “easy”
Those mounts are filled with some sort of anti corrosion glop which make them hard to repair in the field.
We’ve been so pleased with our O-520 mounted on a SPW mount attached to our 182, turbine smooth!
Sat Jul 21, 2018 7:20 am
Re: Let the games begin! Modernizing an old 182.
Rewinding a bit here on fuel tanks. I seem to always get aircraft that carry a huge amount of fuel. That does not make the time here and there I want even more. While many posters had issues with fuel cans, I have found some that actually don't leak. I use the RotoPax, off-road ones. They come in a variety of sizes and are flat for floor loading. They come in rockingly handy when I need that extra hour of fuel to get back from someplace. They lay flat on the floor and are under 4" thick. They have multiple tie down points. They have a line of water containers I also use. You can actually stack stuff on top of them, they are quite tough.
They are also quite proud of them, a bit pricey. I look for them used, they don't wear out. Also dump that fascist CARB nozzle and order the one for water, a nozzle as it is supposed to be.

They are also quite proud of them, a bit pricey. I look for them used, they don't wear out. Also dump that fascist CARB nozzle and order the one for water, a nozzle as it is supposed to be.
Sun Jul 22, 2018 6:23 am
Re: Let the games begin! Modernizing an old 182.
At the airfield I keep my 185 we just completed a total rebuild of a early straight tail 182. It was going to be used as a jump plane so its mission was different. One thing the owner added that makes a big difference was wing extensions. They add so much performance wise and little to no speed reduction.
I will add my 2 cents on the fuel capacity. To me the advantage of extra fuel other than the obvious is the ability to not have to stop for fuel as often. I fly to Maine, about 280mi each way several times a month and can easily do it with round trip fuel. On the couple of occasions I did not refuel after the round trip a fuel stop adds about an hour to the flight and you burn more fuel.
I also have the SPW mount on the IO520 and will say its very smooth. One thing to keep in mind is that the mount is not really bonded to the engine electrically and the engine needs a good ground for the starter. I called SPW about this as I was having cranking issues and was informed that indeed it is not bonded.
Tom
- a3holerman offline
- Posts: 278
- Joined: Mon Oct 05, 2015 7:29 am
- Location: Cape Cod
- Aircraft: Cessna 185
Wed Oct 03, 2018 11:04 am
Re: Let the games begin! Modernizing an old 182.
For the last couple replies - thanks for the fuel tank info, those look nice. On electrical bonding, yeah I figured as much. The mount is primered and painted so I expected zero electrical path from it. As such, my firewall-forward harness includes at least one (maybe two, need to check) large ground straps.
I had to slow down on the work for a bit, but the past few weeks have been very productive. Now marked off the list:
- Fuel cells are in both wings and mostly connected
- Steve's gascolator installed
- Acorn exhaust installed
- Intake and carb installed, including updated IO-470-U balance tube
- Tempest oil filter adapter installed (OEM adapter failed inspection due to bad threads)
- Atlee firewall battery installed
- Old tail beacon and nav antenna both removed (mostly because the antenna was epoxied to the beacon tail cap )
)
Happening now or in the very near future:
- Airbox install
- Firewall-forward electrical hookups using a new custom harness
- Tail and wing wiring, including all new RG400 radio coax, dedicated ground runs, etc.
- EI fuel flow transducer install, pending some new fuel lines
- Lower cowl cut-and-patch for the exhaust since it exits the other side now, plus carb heat inlet ducts no longer needed
- Carb and cabin heat installs per SPW kit
- Connect lines to right side fuel cell, lock in sump, and install fuel neck bolts and Cies senders
- Engine probe wire connections back to the interface modules
- ... mount EI interface modules to "equipment bay" (a piece of .090 aluminum mounted inside the firewall)
- Power up the EI gauges for the very first time, probably temp mounted in the old panel for now
- Install the MT prop, mags (A&P is going through them now), clean up valve covers and put in new gaskets
- Add fuel, calibrate the gauges, fire the engine up!
Major stuff still to do before flight:
- Panel install including avionics wiring, pitot/static and transponder recertification.
- New antennas (may wait on com's for now)
- Install flush tail cap, LED lights in tail and wings, new LED interior lights (no incandescent bulbs anywhere any more)
- Prop governor adjustment, clean up anything on the engine after test runs, correct any probe issues, etc
- Interior install
- Put some more air in the tires
- Paperwork. The mountain of this we are about to generate is going to be epic.
- Sign off the annual we very nearly completed a little over a year ago
- MAY install a Surefly ignition before first flight, STC is extremely close and I confirmed it will work with my airframe/engine combo. Timing will depend on where I fall on the list of interested parties, but I would really like to get this in. The other work may take long enough to push me into their delivery schedule nicely.
Sair is finishing my panel design as we speak here too. I expect to have the final CAD within a couple days, and a plastic template for test-fit shortly thereafter. Assuming it all fits or just requires minor edits, we should be proceeding with the metal panel cutting pretty soon.
I have a couple intake parts for the new balance tube on the way that I missed previously, but all in all the firewall-forward work is rapidly coming to a close. I think we'll hear that big Continental make some noise in the next couple weeks if all goes well!


I had to slow down on the work for a bit, but the past few weeks have been very productive. Now marked off the list:
- Fuel cells are in both wings and mostly connected
- Steve's gascolator installed
- Acorn exhaust installed
- Intake and carb installed, including updated IO-470-U balance tube
- Tempest oil filter adapter installed (OEM adapter failed inspection due to bad threads)
- Atlee firewall battery installed
- Old tail beacon and nav antenna both removed (mostly because the antenna was epoxied to the beacon tail cap
Happening now or in the very near future:
- Airbox install
- Firewall-forward electrical hookups using a new custom harness
- Tail and wing wiring, including all new RG400 radio coax, dedicated ground runs, etc.
- EI fuel flow transducer install, pending some new fuel lines
- Lower cowl cut-and-patch for the exhaust since it exits the other side now, plus carb heat inlet ducts no longer needed
- Carb and cabin heat installs per SPW kit
- Connect lines to right side fuel cell, lock in sump, and install fuel neck bolts and Cies senders
- Engine probe wire connections back to the interface modules
- ... mount EI interface modules to "equipment bay" (a piece of .090 aluminum mounted inside the firewall)
- Power up the EI gauges for the very first time, probably temp mounted in the old panel for now
- Install the MT prop, mags (A&P is going through them now), clean up valve covers and put in new gaskets
- Add fuel, calibrate the gauges, fire the engine up!
Major stuff still to do before flight:
- Panel install including avionics wiring, pitot/static and transponder recertification.
- New antennas (may wait on com's for now)
- Install flush tail cap, LED lights in tail and wings, new LED interior lights (no incandescent bulbs anywhere any more)
- Prop governor adjustment, clean up anything on the engine after test runs, correct any probe issues, etc
- Interior install
- Put some more air in the tires
- Paperwork. The mountain of this we are about to generate is going to be epic.
- Sign off the annual we very nearly completed a little over a year ago
- MAY install a Surefly ignition before first flight, STC is extremely close and I confirmed it will work with my airframe/engine combo. Timing will depend on where I fall on the list of interested parties, but I would really like to get this in. The other work may take long enough to push me into their delivery schedule nicely.
Sair is finishing my panel design as we speak here too. I expect to have the final CAD within a couple days, and a plastic template for test-fit shortly thereafter. Assuming it all fits or just requires minor edits, we should be proceeding with the metal panel cutting pretty soon.
I have a couple intake parts for the new balance tube on the way that I missed previously, but all in all the firewall-forward work is rapidly coming to a close. I think we'll hear that big Continental make some noise in the next couple weeks if all goes well!
Fri Oct 19, 2018 6:54 pm
Re: Let the games begin! Modernizing an old 182.
Lots more good stuff in the past little bit here. The engine is all buttoned up and basically ready for magnetos and fuel. The fuel system itself is not quite yet, but close.
Today marked a big milestone though: The shiny new MT prop I bought months ago is finally on the airplane! It looks every bit as good as I'd hoped, and I cannot wait to see it move some air.
I was also able to get the EI interface boxes mounted to my equipment panel and wired up, so this should just need to get bolted to the firewall and wiring run out to the engine. I am on the final push for this part of it. Once I have a way to watch the engine's numbers we should be able to start it up, even though the rest of the panel is still pending. It just runs a single data line over to the displays, so I can easily test those out with the original panel overlay and just move them to the new one as it becomes ready.
Fri Oct 19, 2018 7:06 pm
Re: Modernizing an old 182: MT prop is on!
Which EI unit did you end up going with?
Fri Oct 19, 2018 7:59 pm
Re: Modernizing an old 182: MT prop is on!
Very exciting, Ralph!
- Zzz offline


- Posts: 2855
- Joined: Fri Oct 08, 2004 11:09 pm
- Location: northern
- Aircraft: Swiveling desk chair
Half a century spent proving “it is better to be thought a fool than to open your mouth and remove all doubt.”
Sat Oct 20, 2018 5:29 pm
Re: Modernizing an old 182: MT prop is on!
Please throw some photos up when you have your equipment panel installed in the airplane. I'm running out of space on-top of my glovebox and I need some new ideas!
FYI: That prop is beautiful!
FYI: That prop is beautiful!

Sun Oct 21, 2018 4:18 pm
Re: Modernizing an old 182: MT prop is on!
A1Skinner wrote:Which EI unit did you end up going with?
CGR-30 combo; essentially both 30P and 30C displays tied together through the electronics interfaces.
pilotryan wrote:Please throw some photos up when you have your equipment panel installed in the airplane. I'm running out of space on-top of my glovebox and I need some new ideas!
While I can't share a final panel design yet, we are close. Here's a teaser shot of the main overlay CAD. Center stacked radios and audio panel (I hope, fitment is very tight with the T column) and other bits. Not shown: Breakers and switches will move to the two left cutouts on the bottom section, transponder in the 2nd from right, and glove box to the right cutout. I'm thinking I will use the current glovebox location for an equipment bay to hold the CO detector, Garmin AP interface, and a couple other bits behind a screw-on panel. The iPad will have a RAM ball mount on the panel above the current glove box location about where the suction gauge is now.

Sun Oct 21, 2018 8:49 pm
Re: Modernizing an old 182: MT prop is on!
Looks great Ralph. Can I ask why you went with the CGR-30P combo instead of the MVP50? I'm just trying to figure out which way to go with my 206, so asking the guys who have done it already...
Mon Oct 22, 2018 7:01 am
Re: Modernizing an old 182: MT prop is on!
A1Skinner wrote:Looks great Ralph. Can I ask why you went with the CGR-30P combo instead of the MVP50? I'm just trying to figure out which way to go with my 206, so asking the guys who have done it already...
Good question. I went back and forth on that decision, and this is a response from EI with a quick comparison:
"The MVP-50P offers far more display space and functions that can display on the main screen, and additionally has the system screen that can allow for more annunciators. As you mentioned, the weight/balance and gear indication screens are exclusive to the MVP-50P, but you can in fact get checklists on the 30C instrument of the combo as well."
Basically it came down to panel space; in my old 182 I don't have a lot of it, and it was far easier to align two 3-1/8" screens than a big square box. I didn't need anything about gear indication and I have checklists elsewhere in the cockpit. Also the annunciators are basic in this plane. I seem to recall the 30P-combo was lower cost as well, but not by a lot. Electronically they work the same with a single data line going to the display(s), and everything else in to the modules I pictured above.
If you are cutting an entirely new panel and have the room (as a 206 will), you might consider the MVP if the few additional features make sense. The 30's will otherwise work in your existing panel by just replacing existing 3-1/8" engine gauges, and since they are primary indicators, can replace any/all of them.
With a single 30P you can only display so much stuff on the main primary screen, and will have to relegate other functions to secondary screens. The combo gave me the ability to put every system as primary on a main display, with a lot of other useful things on the secondary pages. EI works with you to customize the layout to your tastes as well, so I have the indicators split between the displays (within their capabilities) based on how I wanted to see it.
I think you'd be happy either way. I'll do a full PIREP once I get them running, but EI is fantastic to work with. The lead time can be a little long (about a month) since every kit is custom to your specs; they configure displays, test, and pre-wire the main harnesses for you as part of that. You have to pin the extra modules and run the included wires out to the engine, but what you get is a completely labeled, fairly idiot proof kit bespoke to your aircraft and preferences.
DISPLAY OPTIONS
Who is online
Users browsing this forum: No registered users and 0 guests
Latest Features
-
Live to Tell
A Minnesota pilot is surprised to learn that the sudden asymmetric drag of an out-of-rig ski can…Read More -
Creators
Working in some of the Yukon's most beautiful and remote environments, photographer Simon Blakesley captures aircraft in…Read More -
Aircraft Ownership and Maintenance
Upgrading to big tires can make a huge difference in backcountry performance, but with those gains come…Read More -
Tales from Yesteryear
In this tale from bush flying yesteryear, Don Cogger signs up to help Atlee Dodge Jr recovery…Read More


Latest Knowledge Base
-
Destinations
A regional guide with ideas for winter camping destinations in California, Nevada, New Mexico, and Arizona.Read More -
Aircraft
Finding an affordable aircraft that can handle the backcountry for $80K or less? A challenge for sure, but with the…Read More -
Aircraft
01.29.2018 - Zane - Updated tire diameter graphic to add 8.50x10 Guide to tires for use in the backcountry and off-airport landing…Read More -
Pilots
12.22.2013 - Initial article format Operating aircraft on skis and negotiating a snow-covered landscape is an entirely unique skillset and environment.…Read More


